Topflite Giant P-47 Club
 02-17-2018, 05:30 AM
#1026

Join Date: May 2005
Location: , GERMANY
Posts: 48
Likes: 0
Received 0 Likes
on
0 Posts
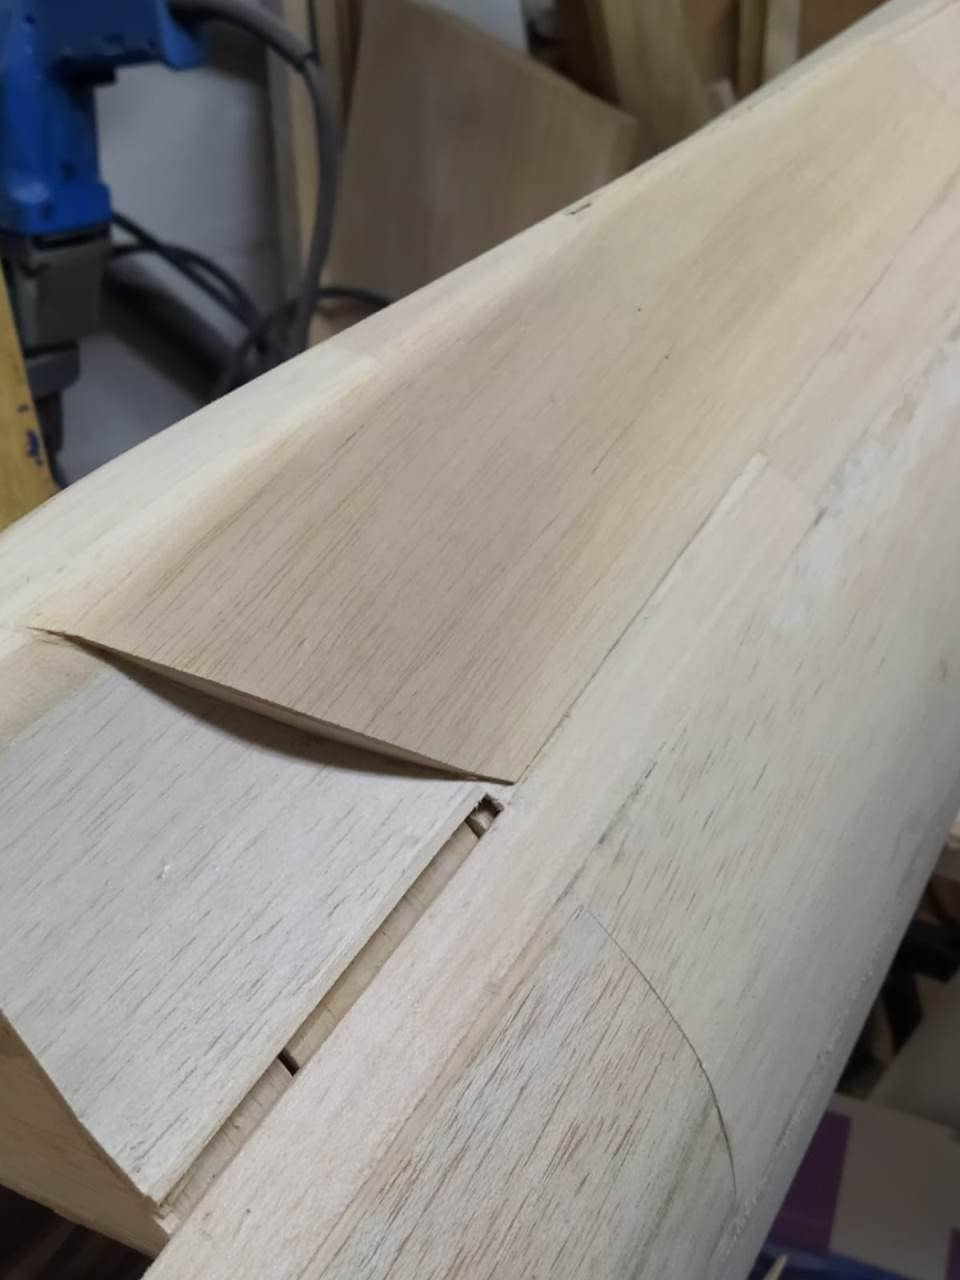
... Proceding at a very leisurely pace, I mostly only get to put in a few hours on the weekends. Also, I have a talent to get hung up on details. So my somewhat scale-ish hinge line modification probably became a little more complicated than it strictly needed to be.

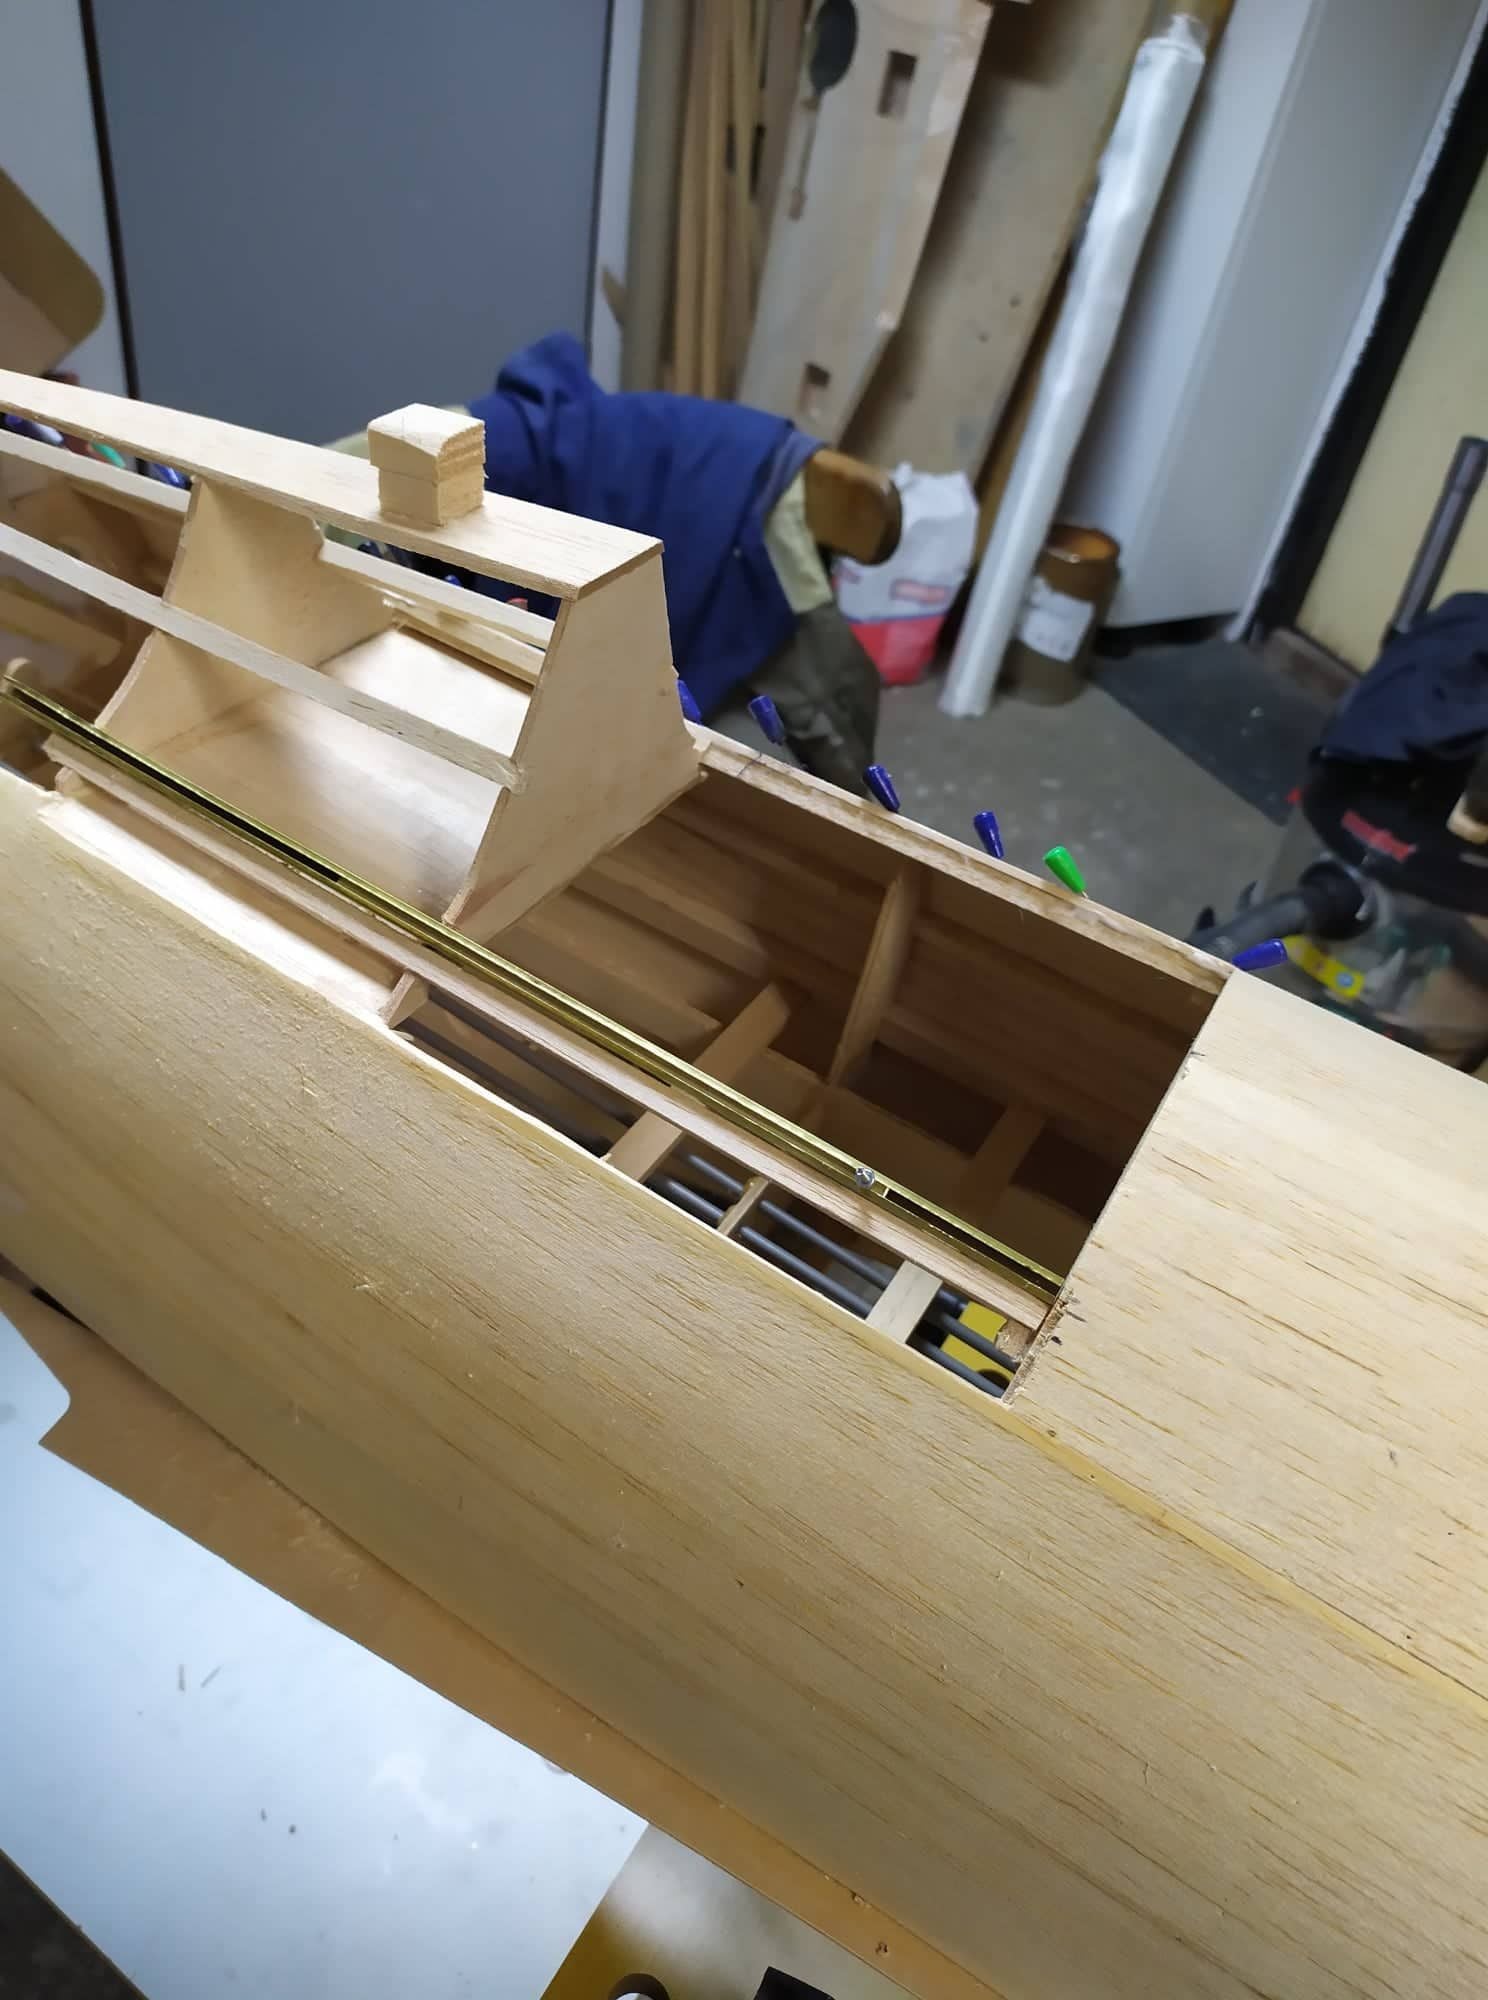
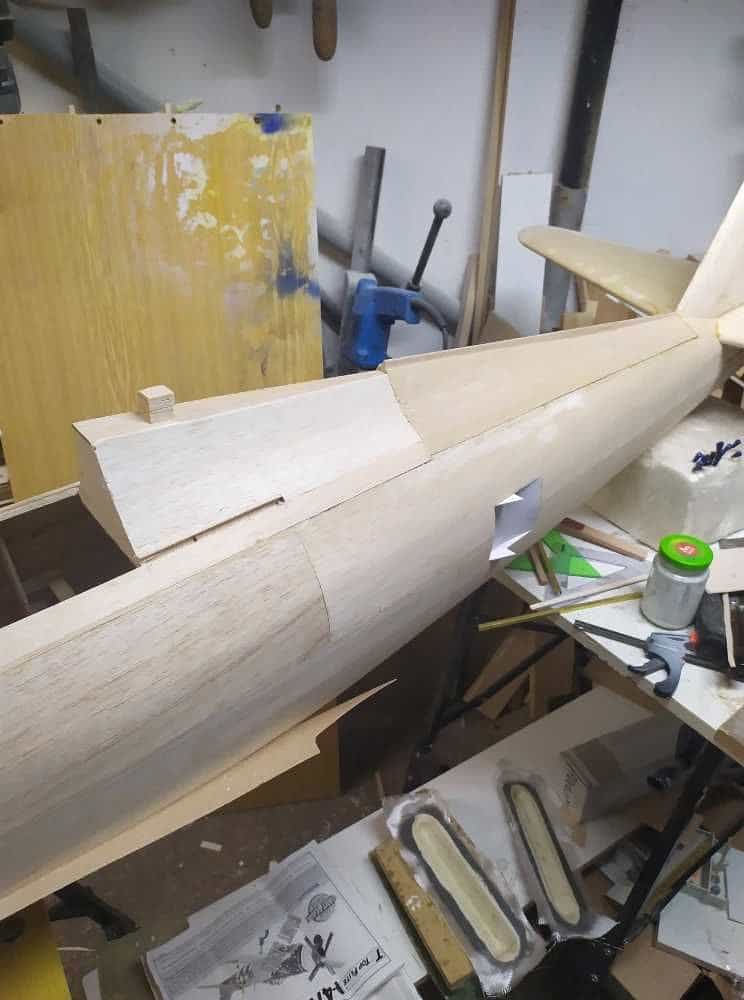
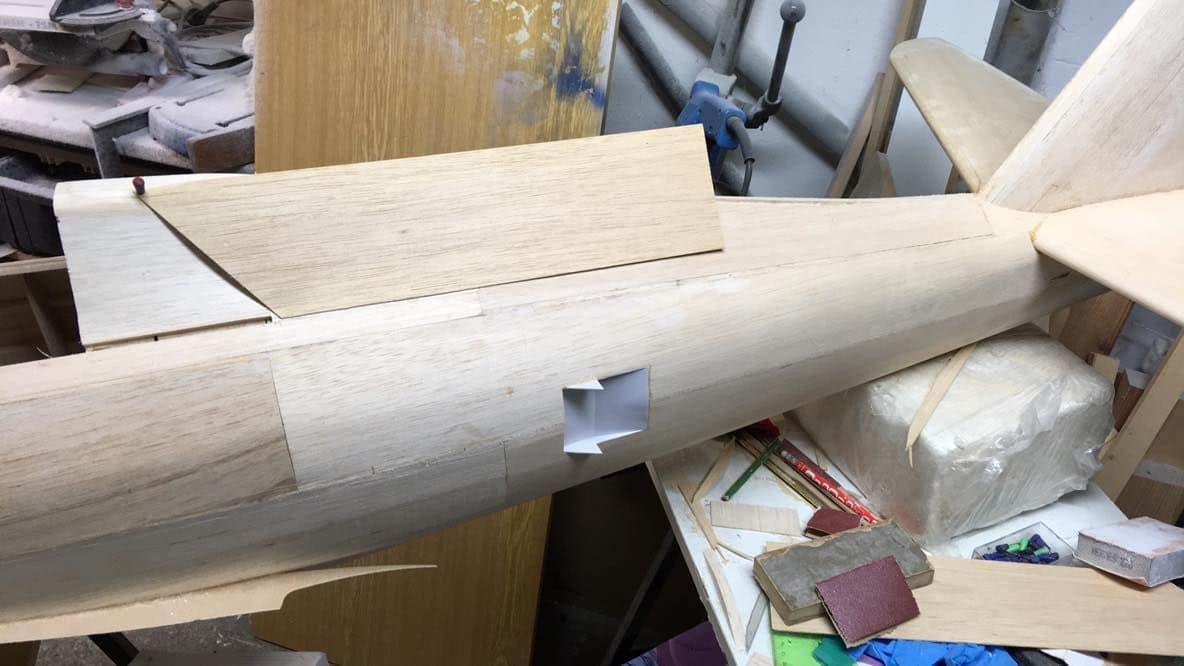
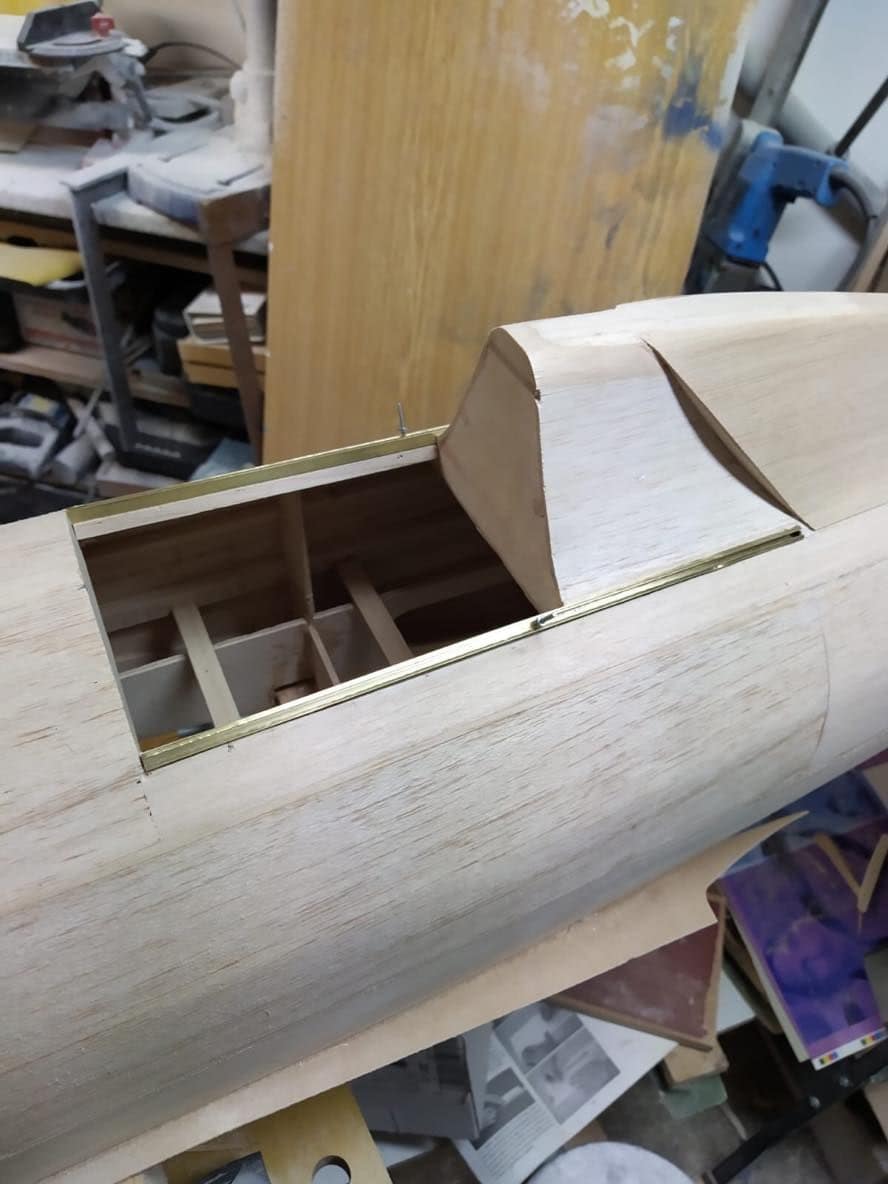
In another little modification I added some half spars behind F3 and connected them to build up a door structure. Also already added a hinge axis. So after sheeting, sanding and maybe even only after glassing, I should be able to cut this out and hopefully end up with a perfectly aligned and shape fitting access hatch for switches, valves and the like. Made it a little bigger as I have not yet decided on all the equipment that's going to go into the plane.
I was toying with the idea of doing a build thread, as a motivational thing, or maybe just a few posts here, mainly focusing on modifications and deviations from the instructions. For the benefit of future builders. Are people still building the kit version?
Greetings,
Hardy
 02-17-2018, 06:47 AM
#1027

My Feedback: (5)
Join Date: Feb 2013
Location: Mechanicsville,
VA
Posts: 77
Likes: 0
Received 0 Likes
on
0 Posts
I will be. Not necessarily soon, but building is at least half the fun for me. So, while it won't benefit me right away, I will be at least one person that will appreciate any build info you post when I finally get to building my jug.
Thanks,
Mike
Thanks,
Mike
02-17-2018, 11:40 AM
#1028
Join Date: Oct 2009
Location: Novi, Michigan
Posts: 64
Likes: 0
Received 0 Likes
on
0 Posts
I am just beginning to build the Top Flite Giant Scale P47 ARF razorback version with a DA60 and Jtec Pitts style wrap around muffler. I plan on using a xoar 22x12 two bladed prop. I am looking for max speed. Is this the best prop for speed?
02-17-2018, 04:14 PM
#1030
Thread Starter

Join Date: Oct 2011
Location: Kelowna BC Canada
Posts: 188
Likes: 0
Received 0 Likes
on
0 Posts
02-17-2018, 04:52 PM
#1031
Guess I should sell all my electrics maybe all my planes. I have 2 TF GS P-47's TH and another what am I offered? the second one is between the White YAK 54 and the Tan Eindecker its the one with the star and candy striped tail.... OH there is a Blue Nose there too with a 20 CC gas motor. Those are just the tip of the Iceburg ... No Brag Just Fact... Theres about 15 0r more in the other part of that room then there's the other spare room.
p.s. The pic of TarHeel is its maiden when the right wheel fell off in flight and we landed it gear up. Not even a grass stain.
p.s. The pic of TarHeel is its maiden when the right wheel fell off in flight and we landed it gear up. Not even a grass stain.
02-17-2018, 05:51 PM
#1032
Thread Starter
Join Date: Oct 2011
Location: Kelowna BC Canada
Posts: 188
Likes: 0
Received 0 Likes
on
0 Posts
Guess I should sell all my electrics maybe all my planes. I have 2 TF GS P-47's TH and another what am I offered? the second one is between the White YAK 54 and the Tan Eindecker its the one with the star and candy striped tail.... OH there is a Blue Nose there too with a 20 CC gas motor. Those are just the tip of the Iceburg ... No Brag Just Fact... Theres about 15 0r more in the other part of that room then there's the other spare room.
p.s. The pic of TarHeel is its maiden when the right wheel fell off in flight and we landed it gear up. Not even a grass stain.
p.s. The pic of TarHeel is its maiden when the right wheel fell off in flight and we landed it gear up. Not even a grass stain.
02-17-2018, 09:16 PM
#1034
Thread Starter
Join Date: Oct 2011
Location: Kelowna BC Canada
Posts: 188
Likes: 0
Received 0 Likes
on
0 Posts
Trev
03-04-2018, 01:52 PM
#1035
Join Date: May 2005
Location: , GERMANY
Posts: 48
Likes: 0
Received 0 Likes
on
0 Posts
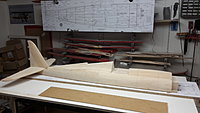
So the manual called for a suitable building stand. I don't have a Robart Super Stand II or any such thing, and looking at some pics, I have my doubts if these things are really suitable to build a plane on. Maybe for some maintenance and field work. Anyway, this wasn't much effort and probably works better as a building stand:
Using the spar patterns as a guidline I quickly cut the four carrier walls from hard foam board and glued them to a base. They don't need to be an exact fit, leave some air between the sheeting and the hard foam. Protect the fuselage with cellophane wrap (please do not forget this), apply some expanding polyurethane foam to the roughly cut edges, put the whole construction upside down onto the fuselage still on the building board, let it dry, et voil�, you have a precisely fitting building stand. I think this is going to work nicely. Though for now I'll let the fuse sit on the building board. Another plane needs some work done for the coming flying season, so the Razorback will have to wait for a while.
Greetings,
Hardy
10-13-2019, 01:02 AM
#1036

I took that kit from second hand. The guy before me prepare the wings and fuselage for some China retracts. I have the Robart for this kit, but it would be difficult to make new mounting and replaced them. I prefer the Razorback, would like to make the ridge, probably fibreglass. I�ve already designed some STL files for the P-47.


10-13-2019, 10:43 AM
#1037
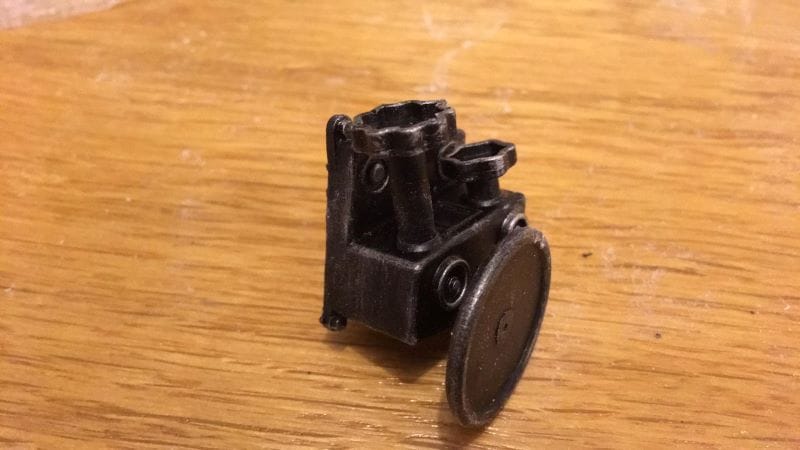
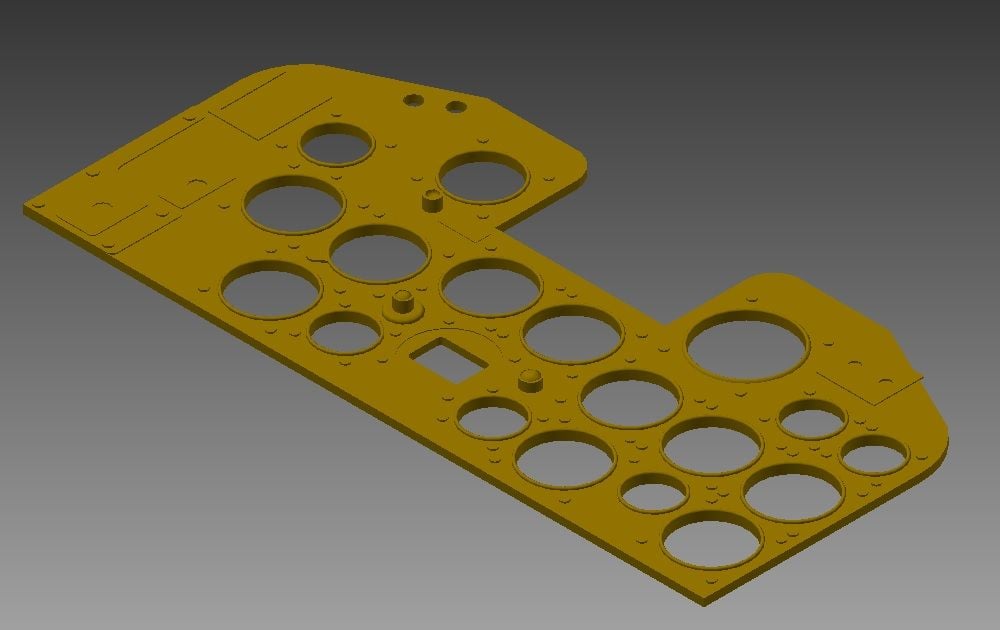
Some pictures of instrument panel I did 2 years ago. The white one is made from ABS and the grey one is printed in very poor quality. I will make another master and list the resin instrument panel.
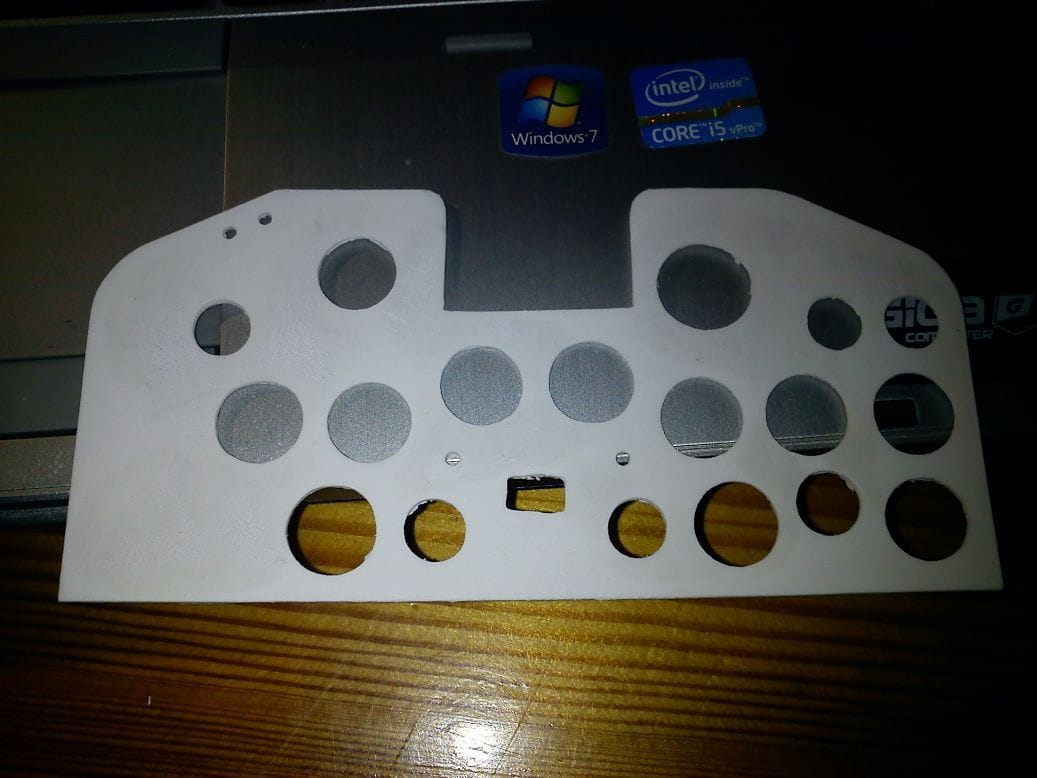
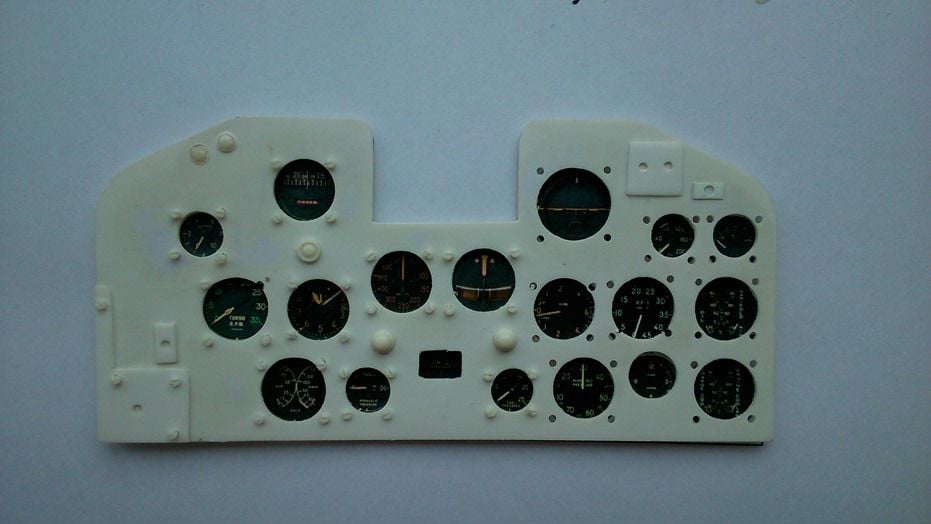
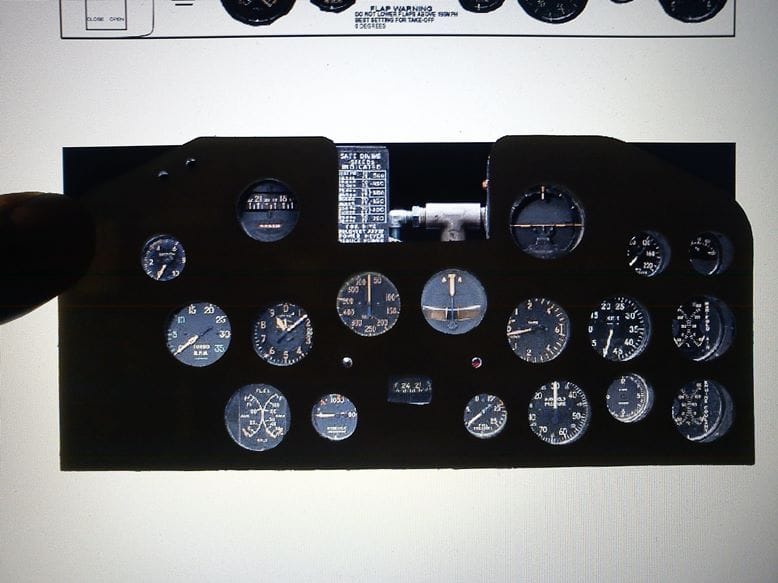

.
.
10-16-2019, 09:04 AM
#1038
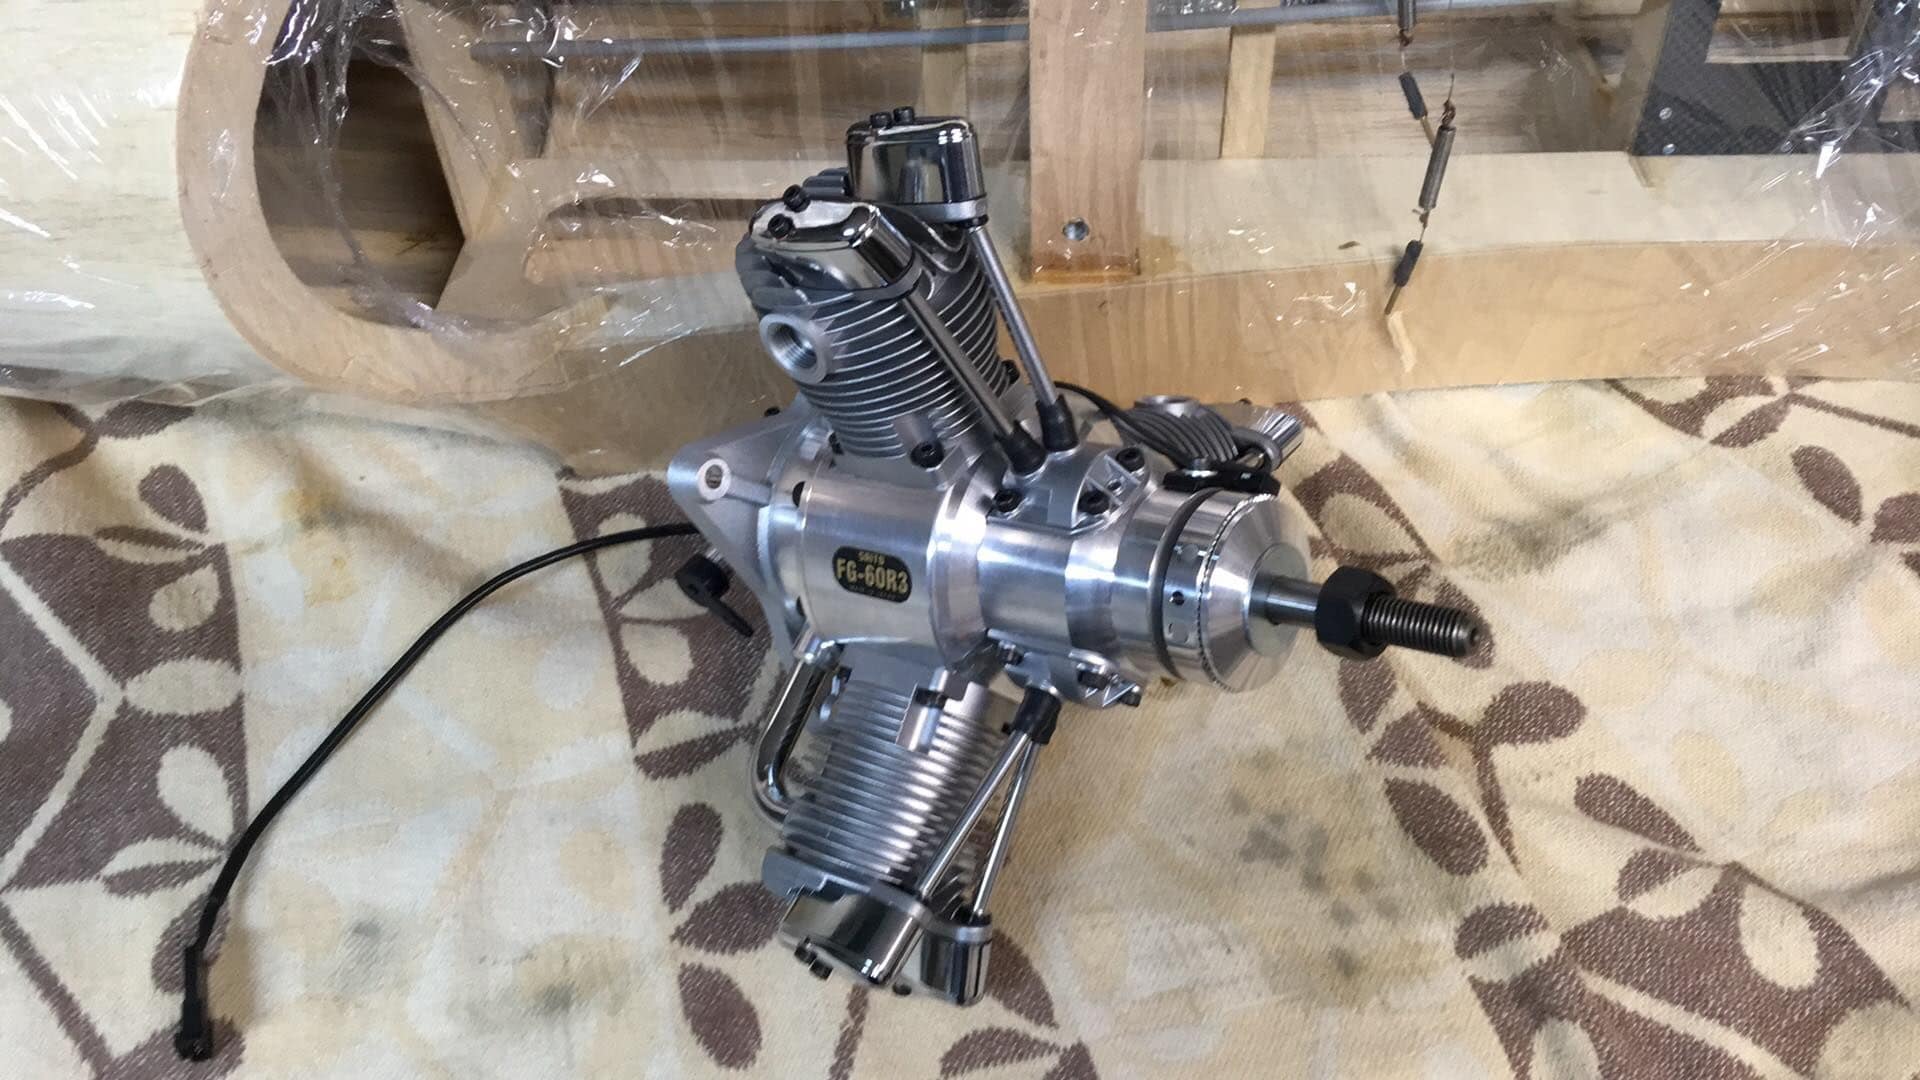
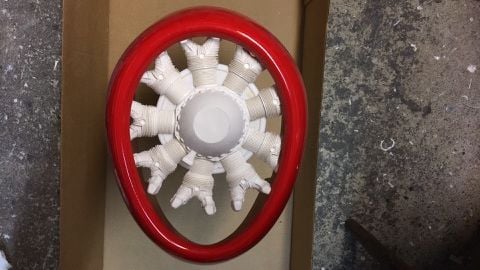
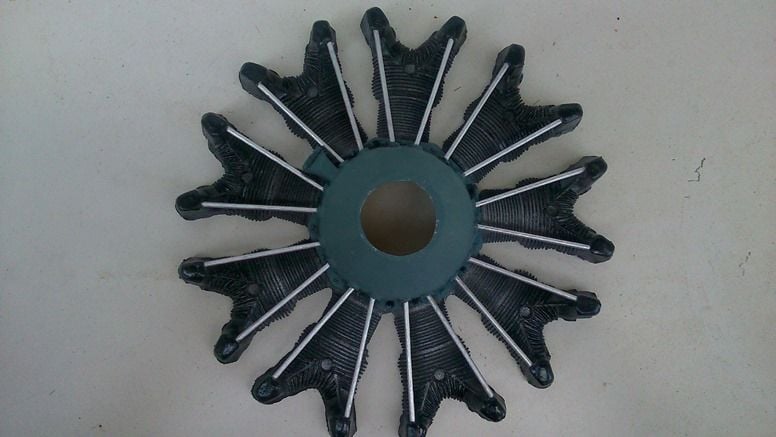
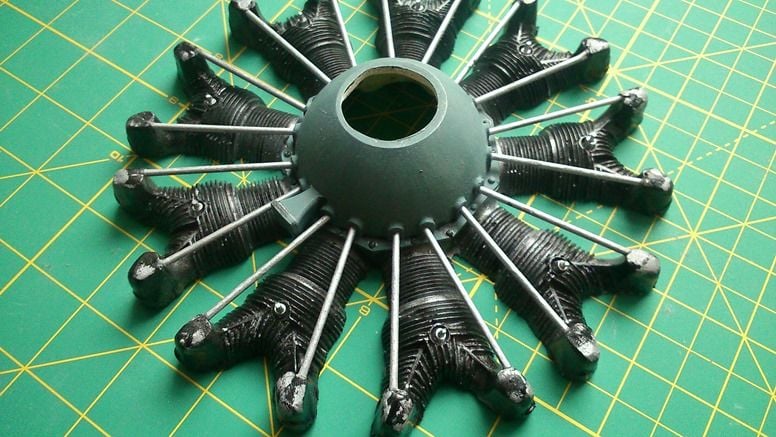
7.2in dummy radial engine from our production. Some pictures of ready made done dummy radials attached, The one for my Jug I would like to make more detailed and scale. Anybody here who owned or still the TF P-47 with Saito FG 60 and use dummy radial engine?


11-09-2019, 11:51 AM
#1039
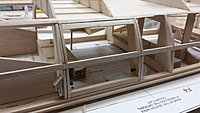
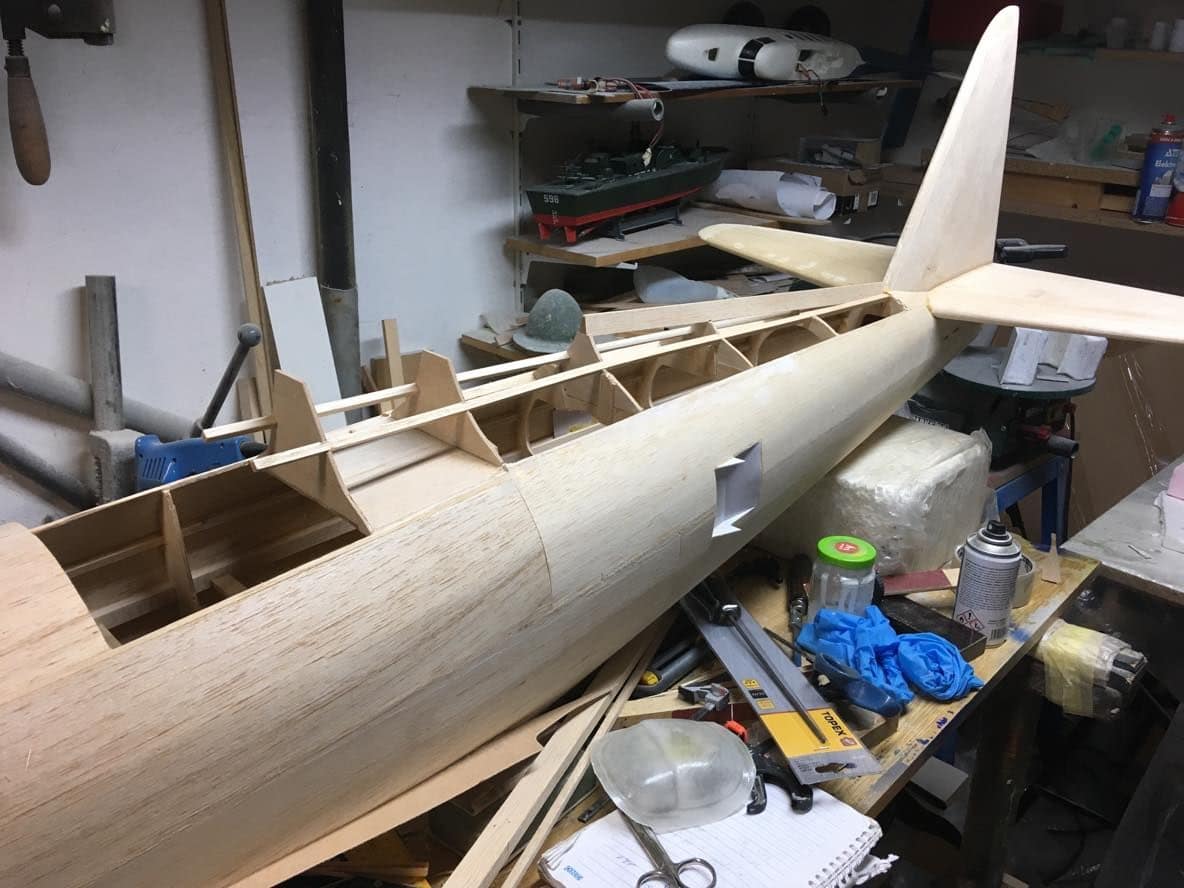
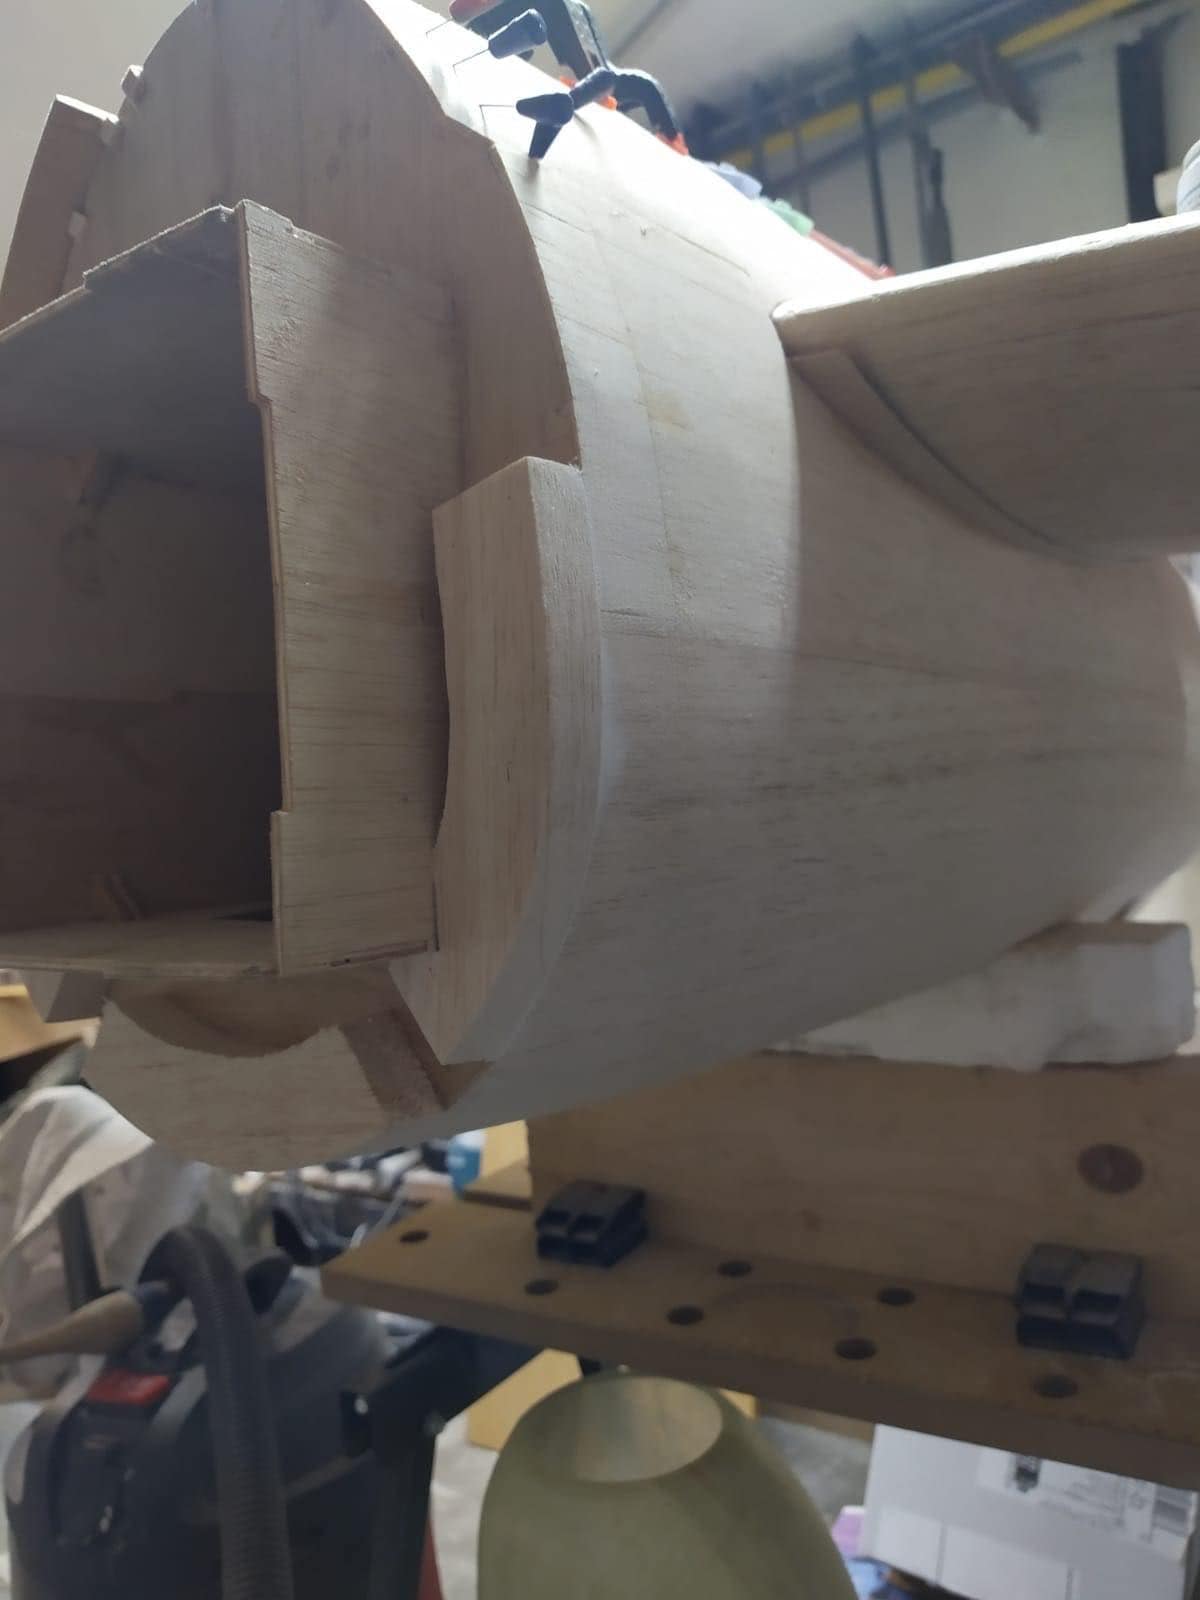
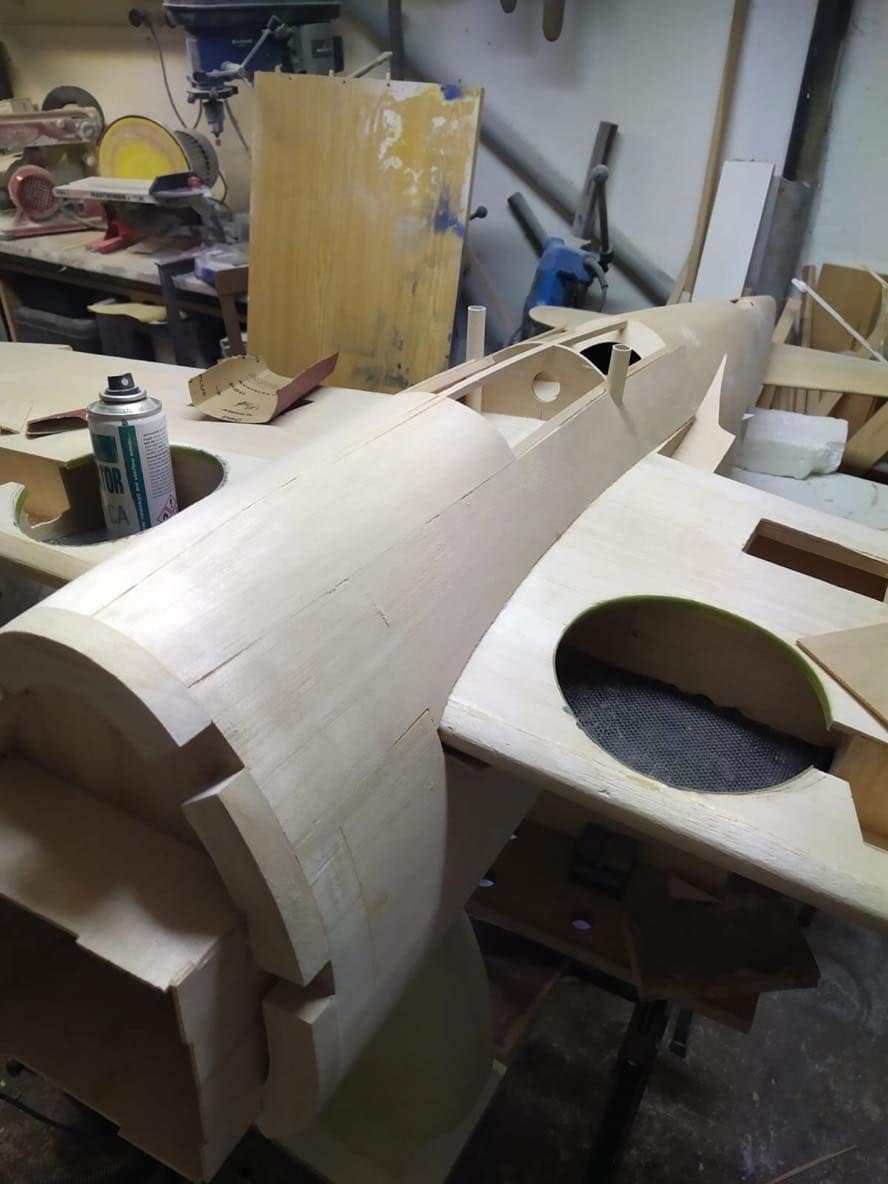
When I was thinking about TopFlite Giant P-47 I wanted the Razorback. That one I took was build as bubble top. A while I was thinking and tried search some bubble top paint scheme I like. But I decided to convert the jug to Razorback. The formers were still in box, well I removed the sheeting and attached the back formers.

 11-28-2019, 10:45 AM
#1042
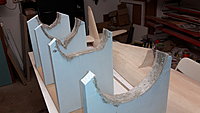
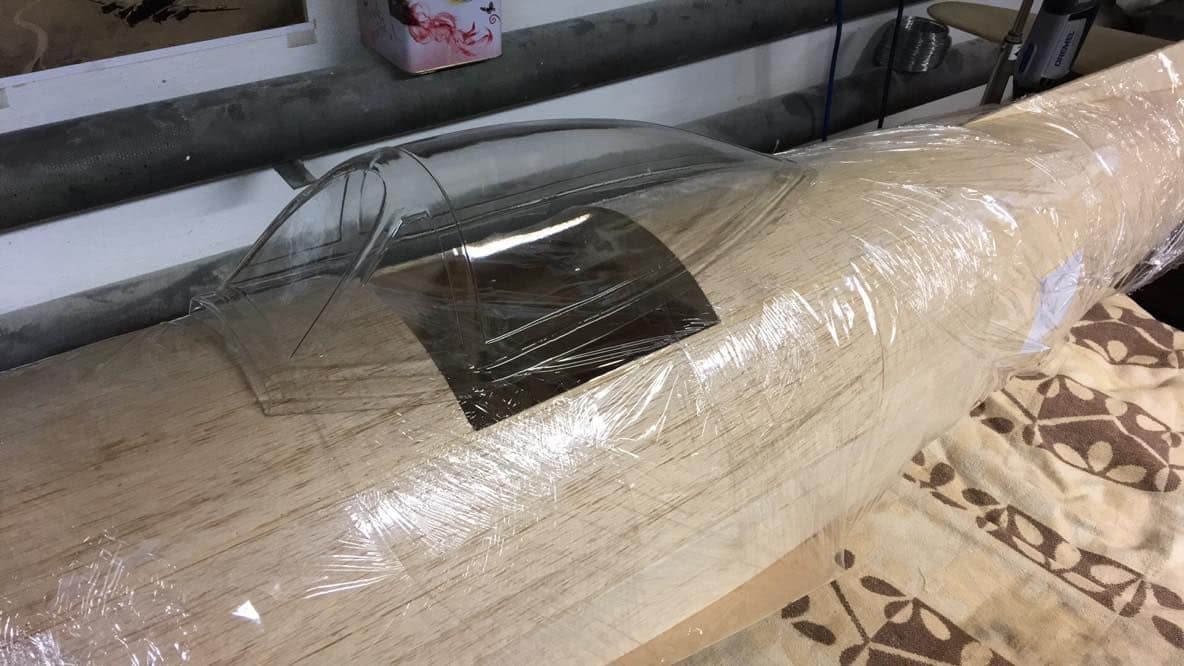
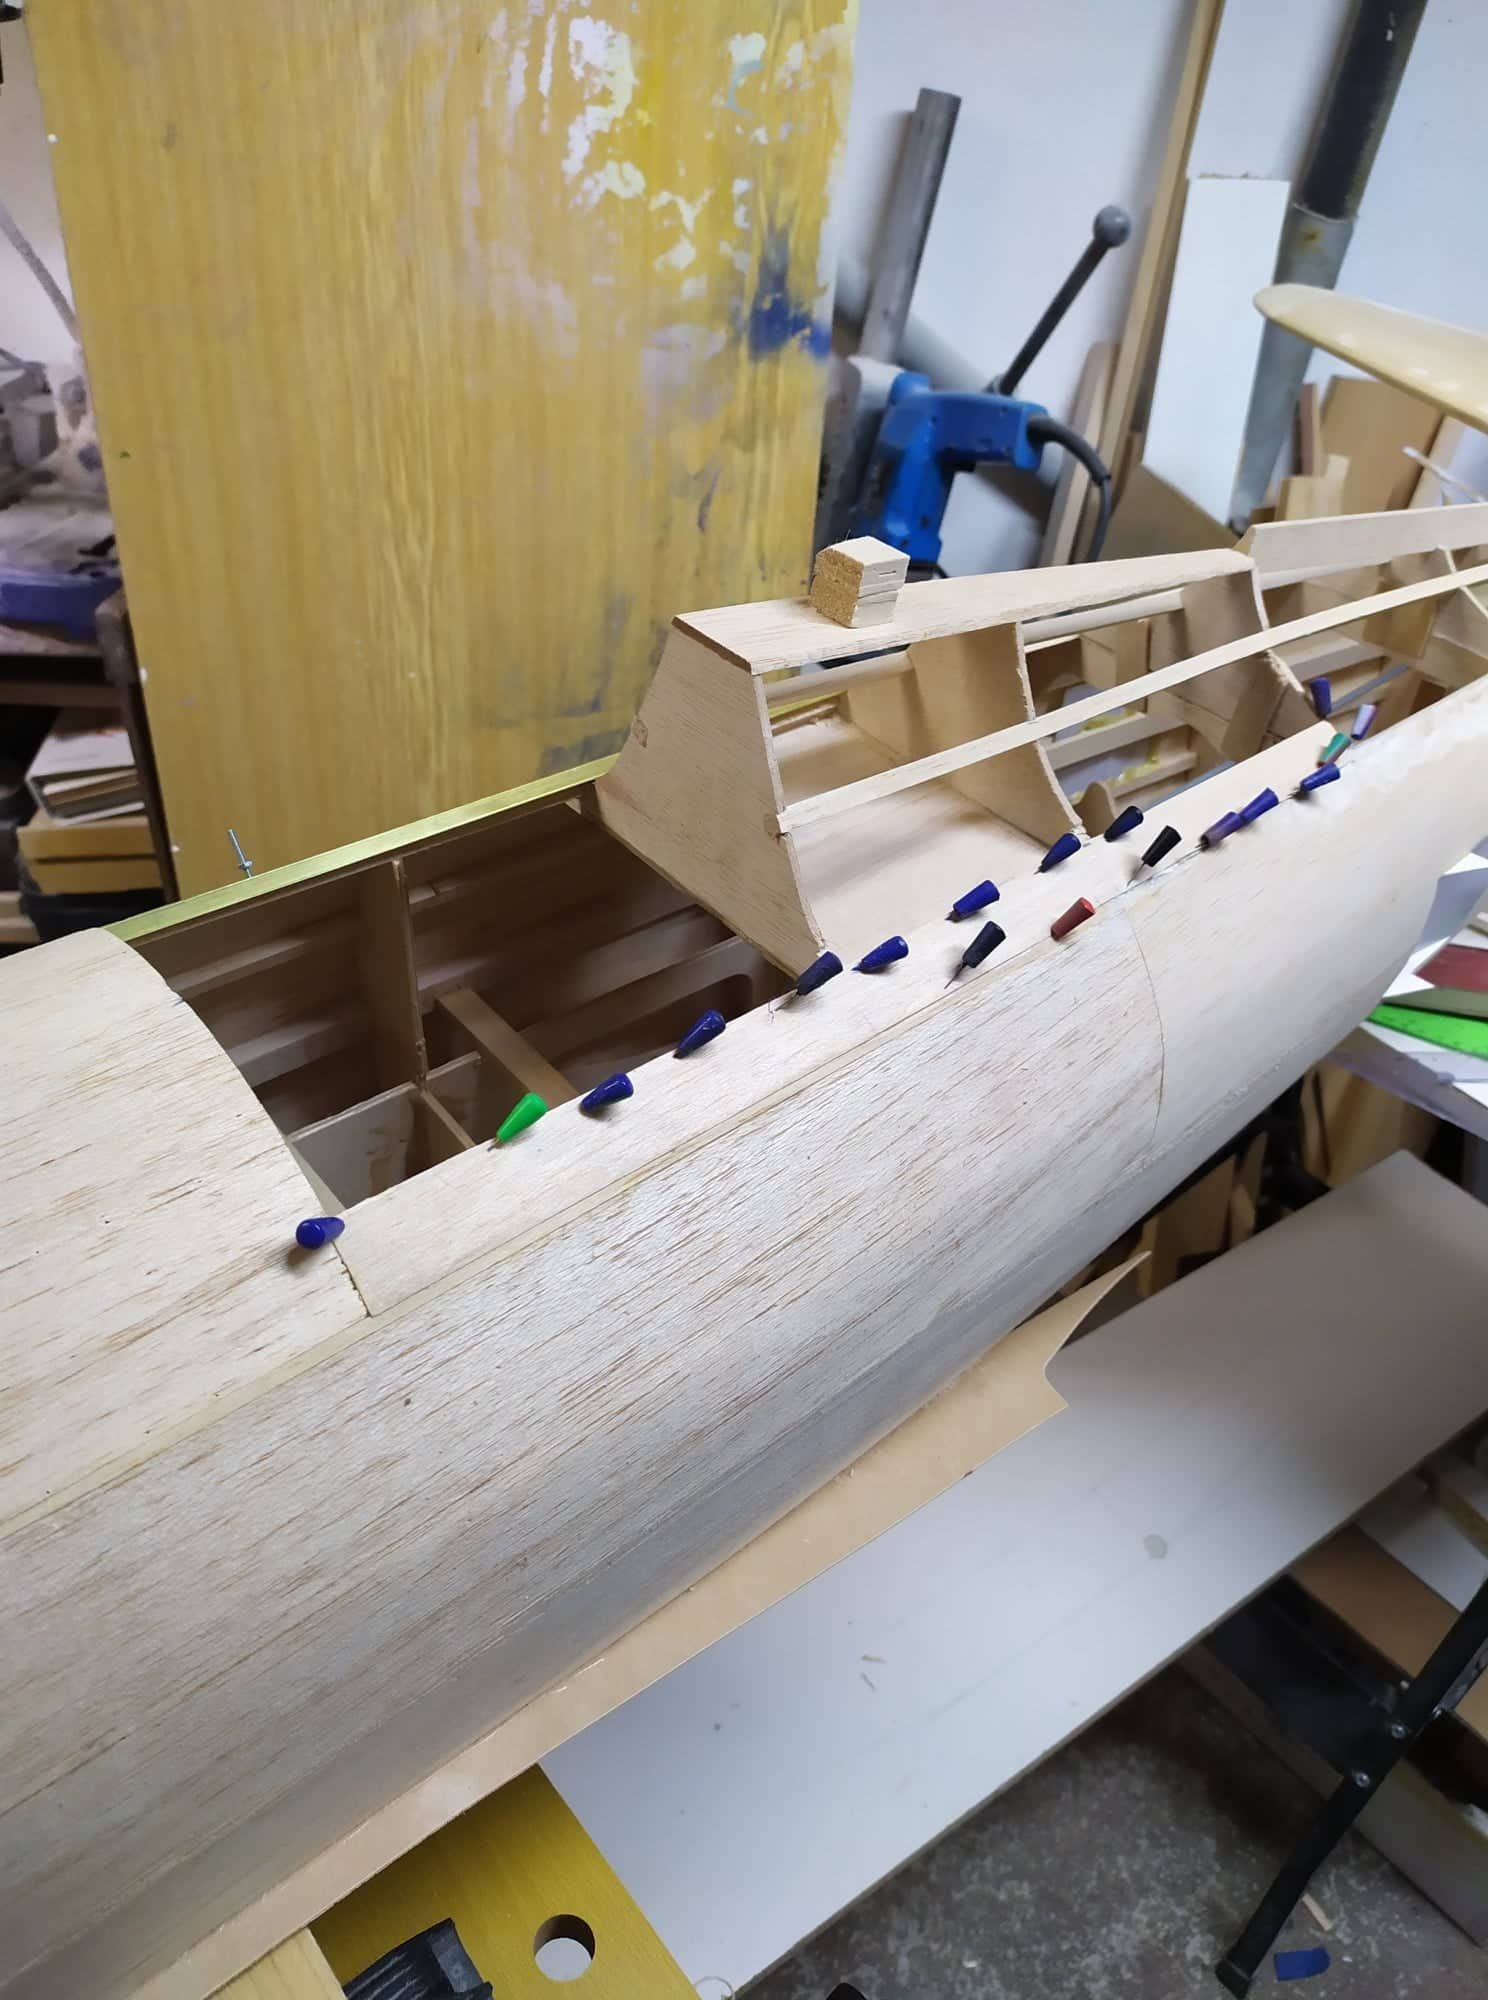
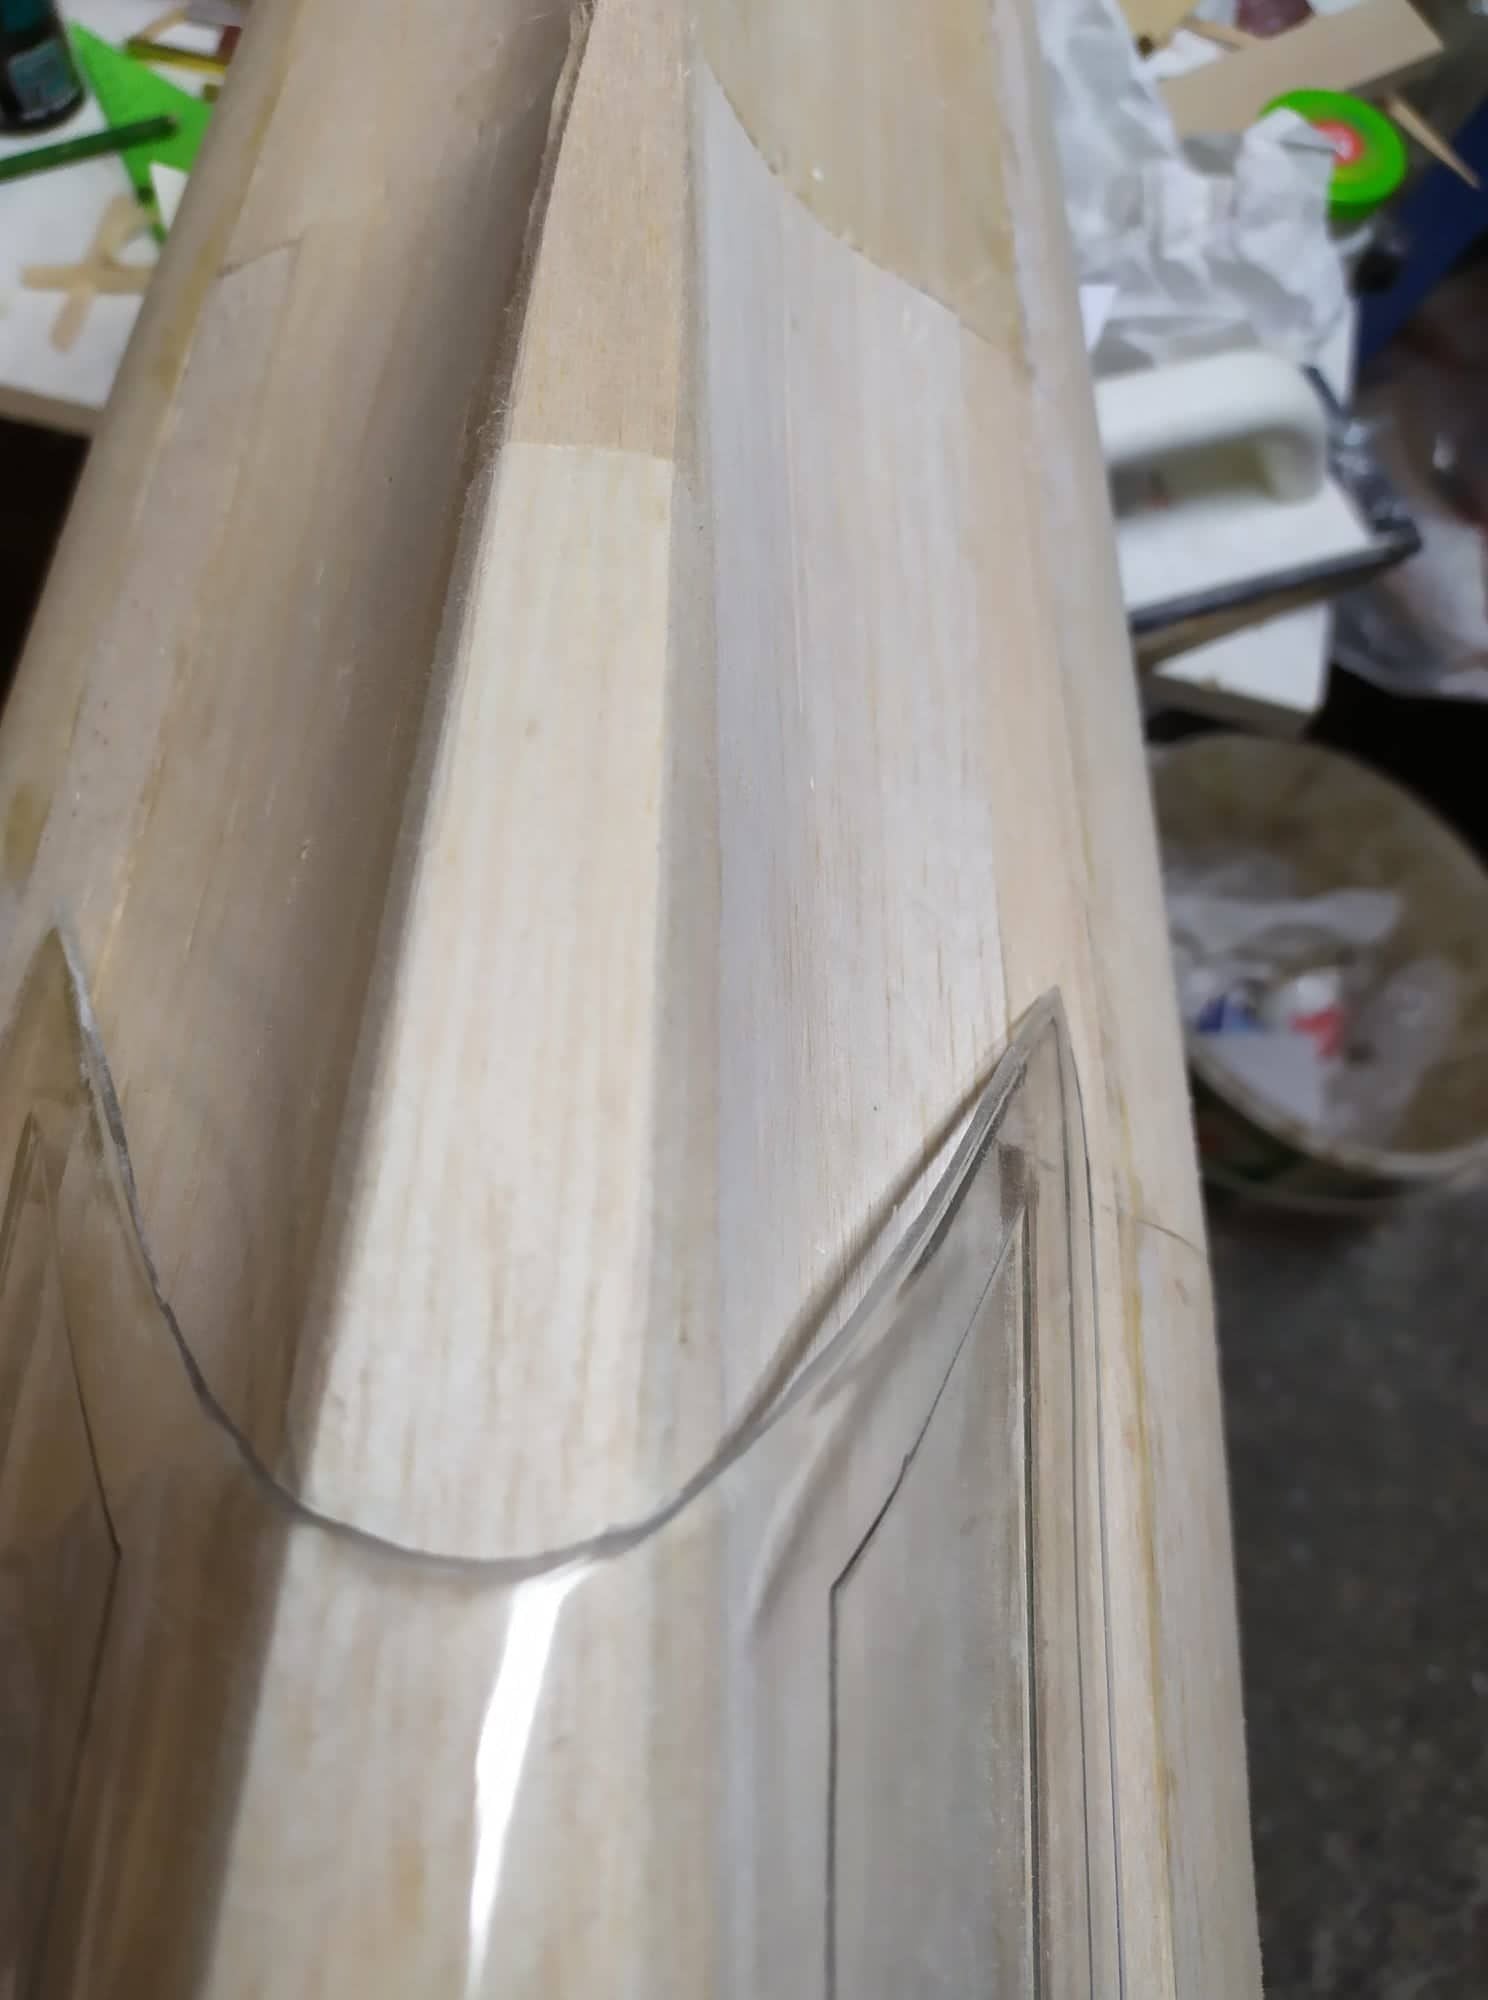
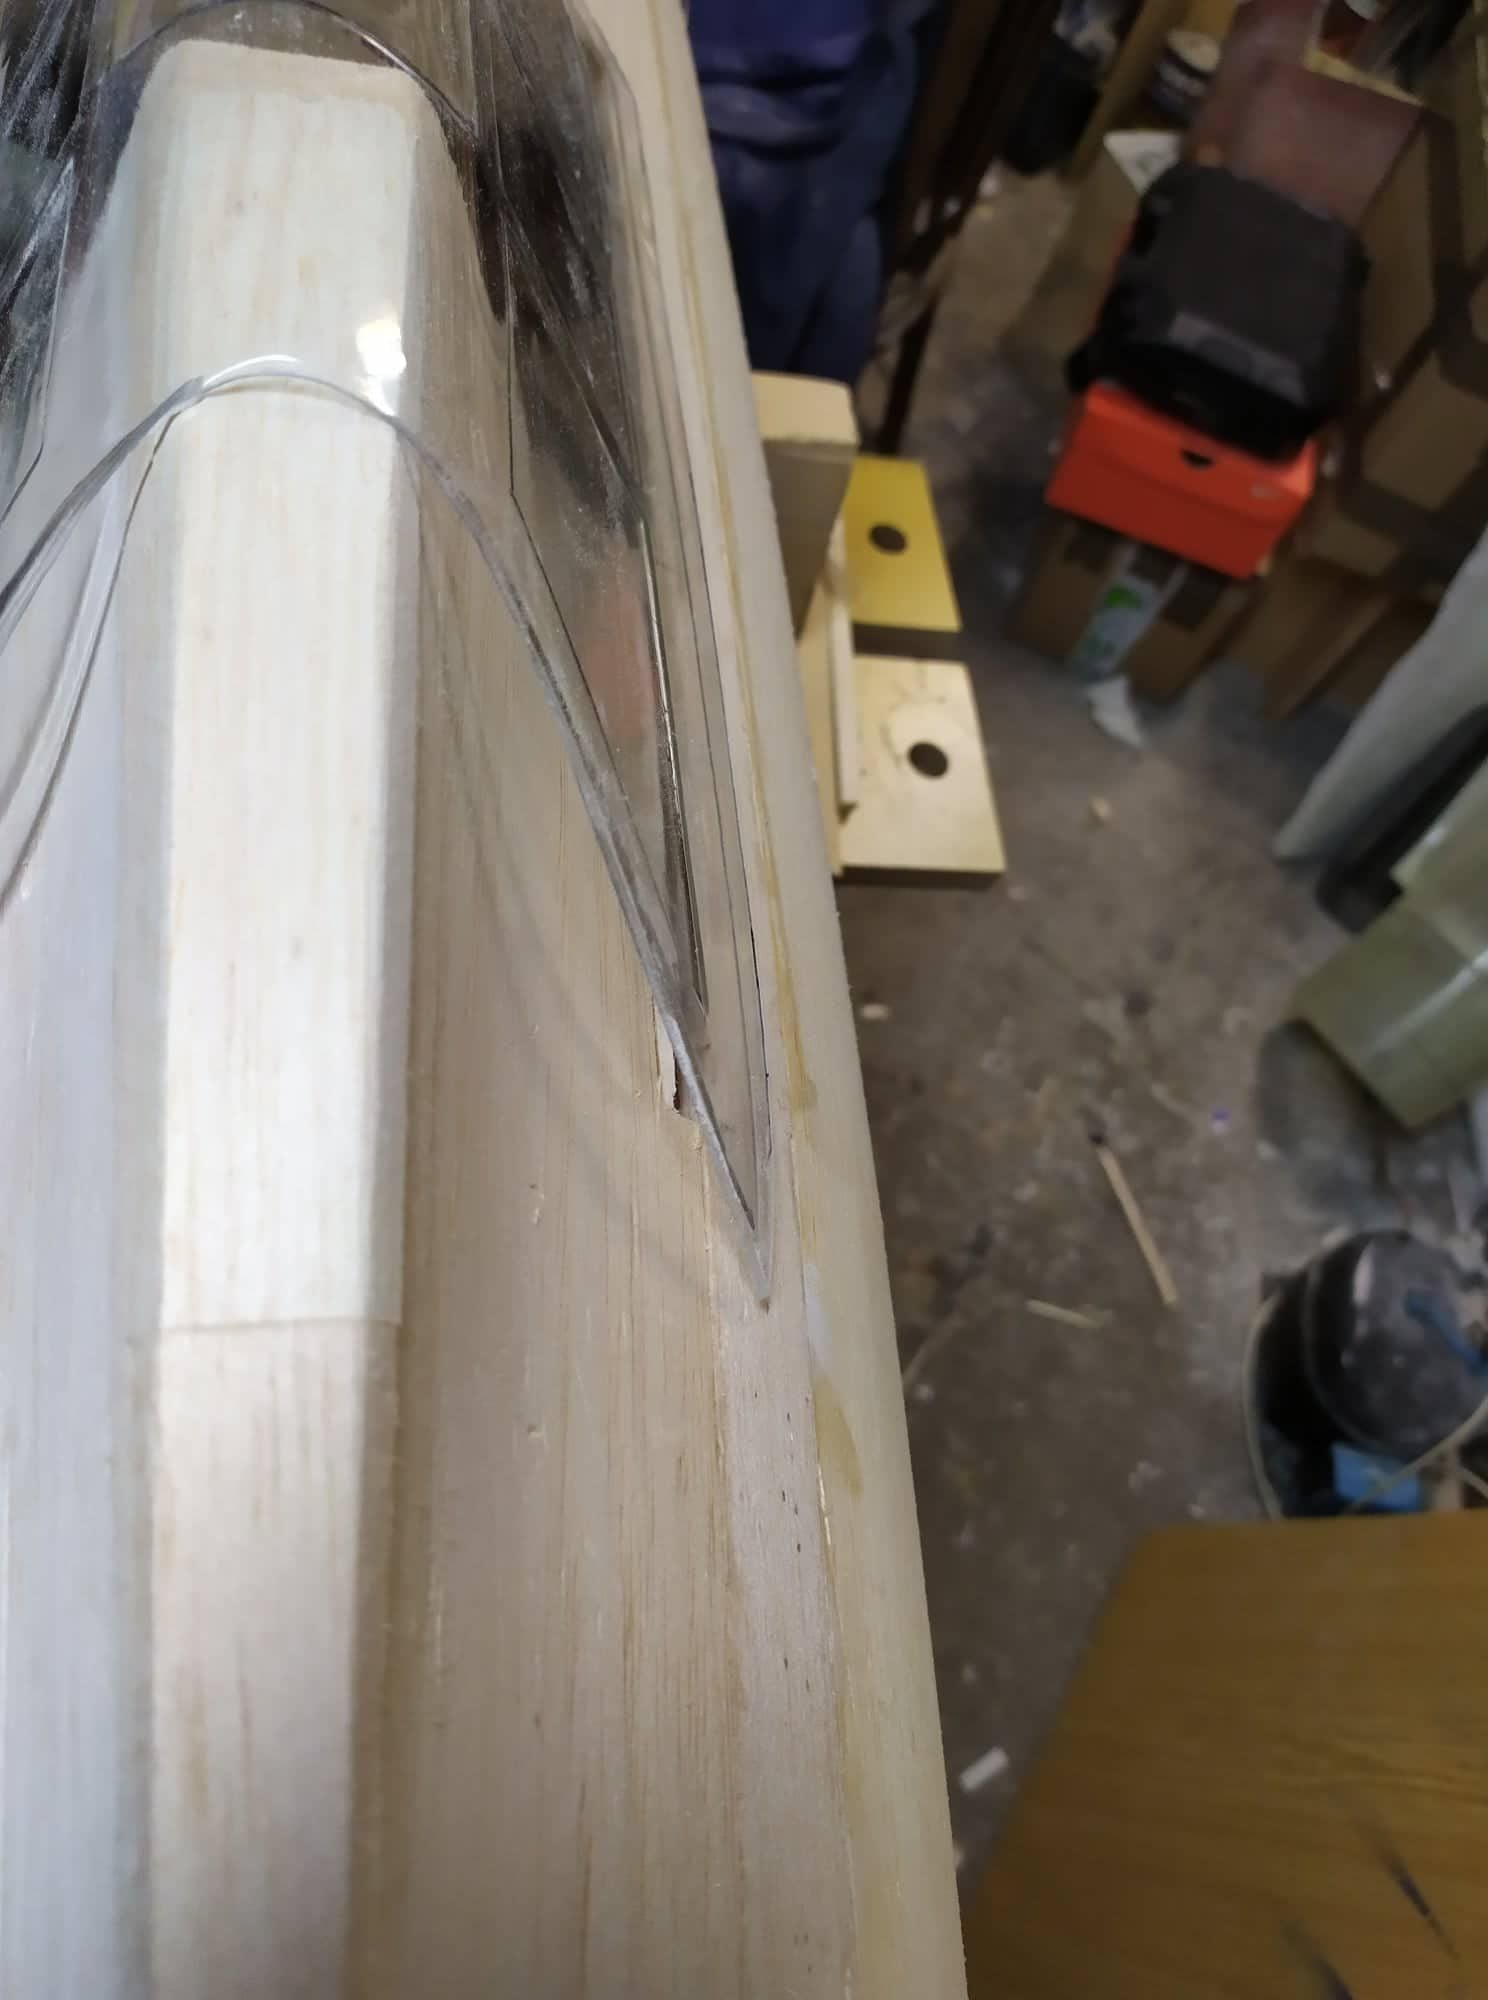
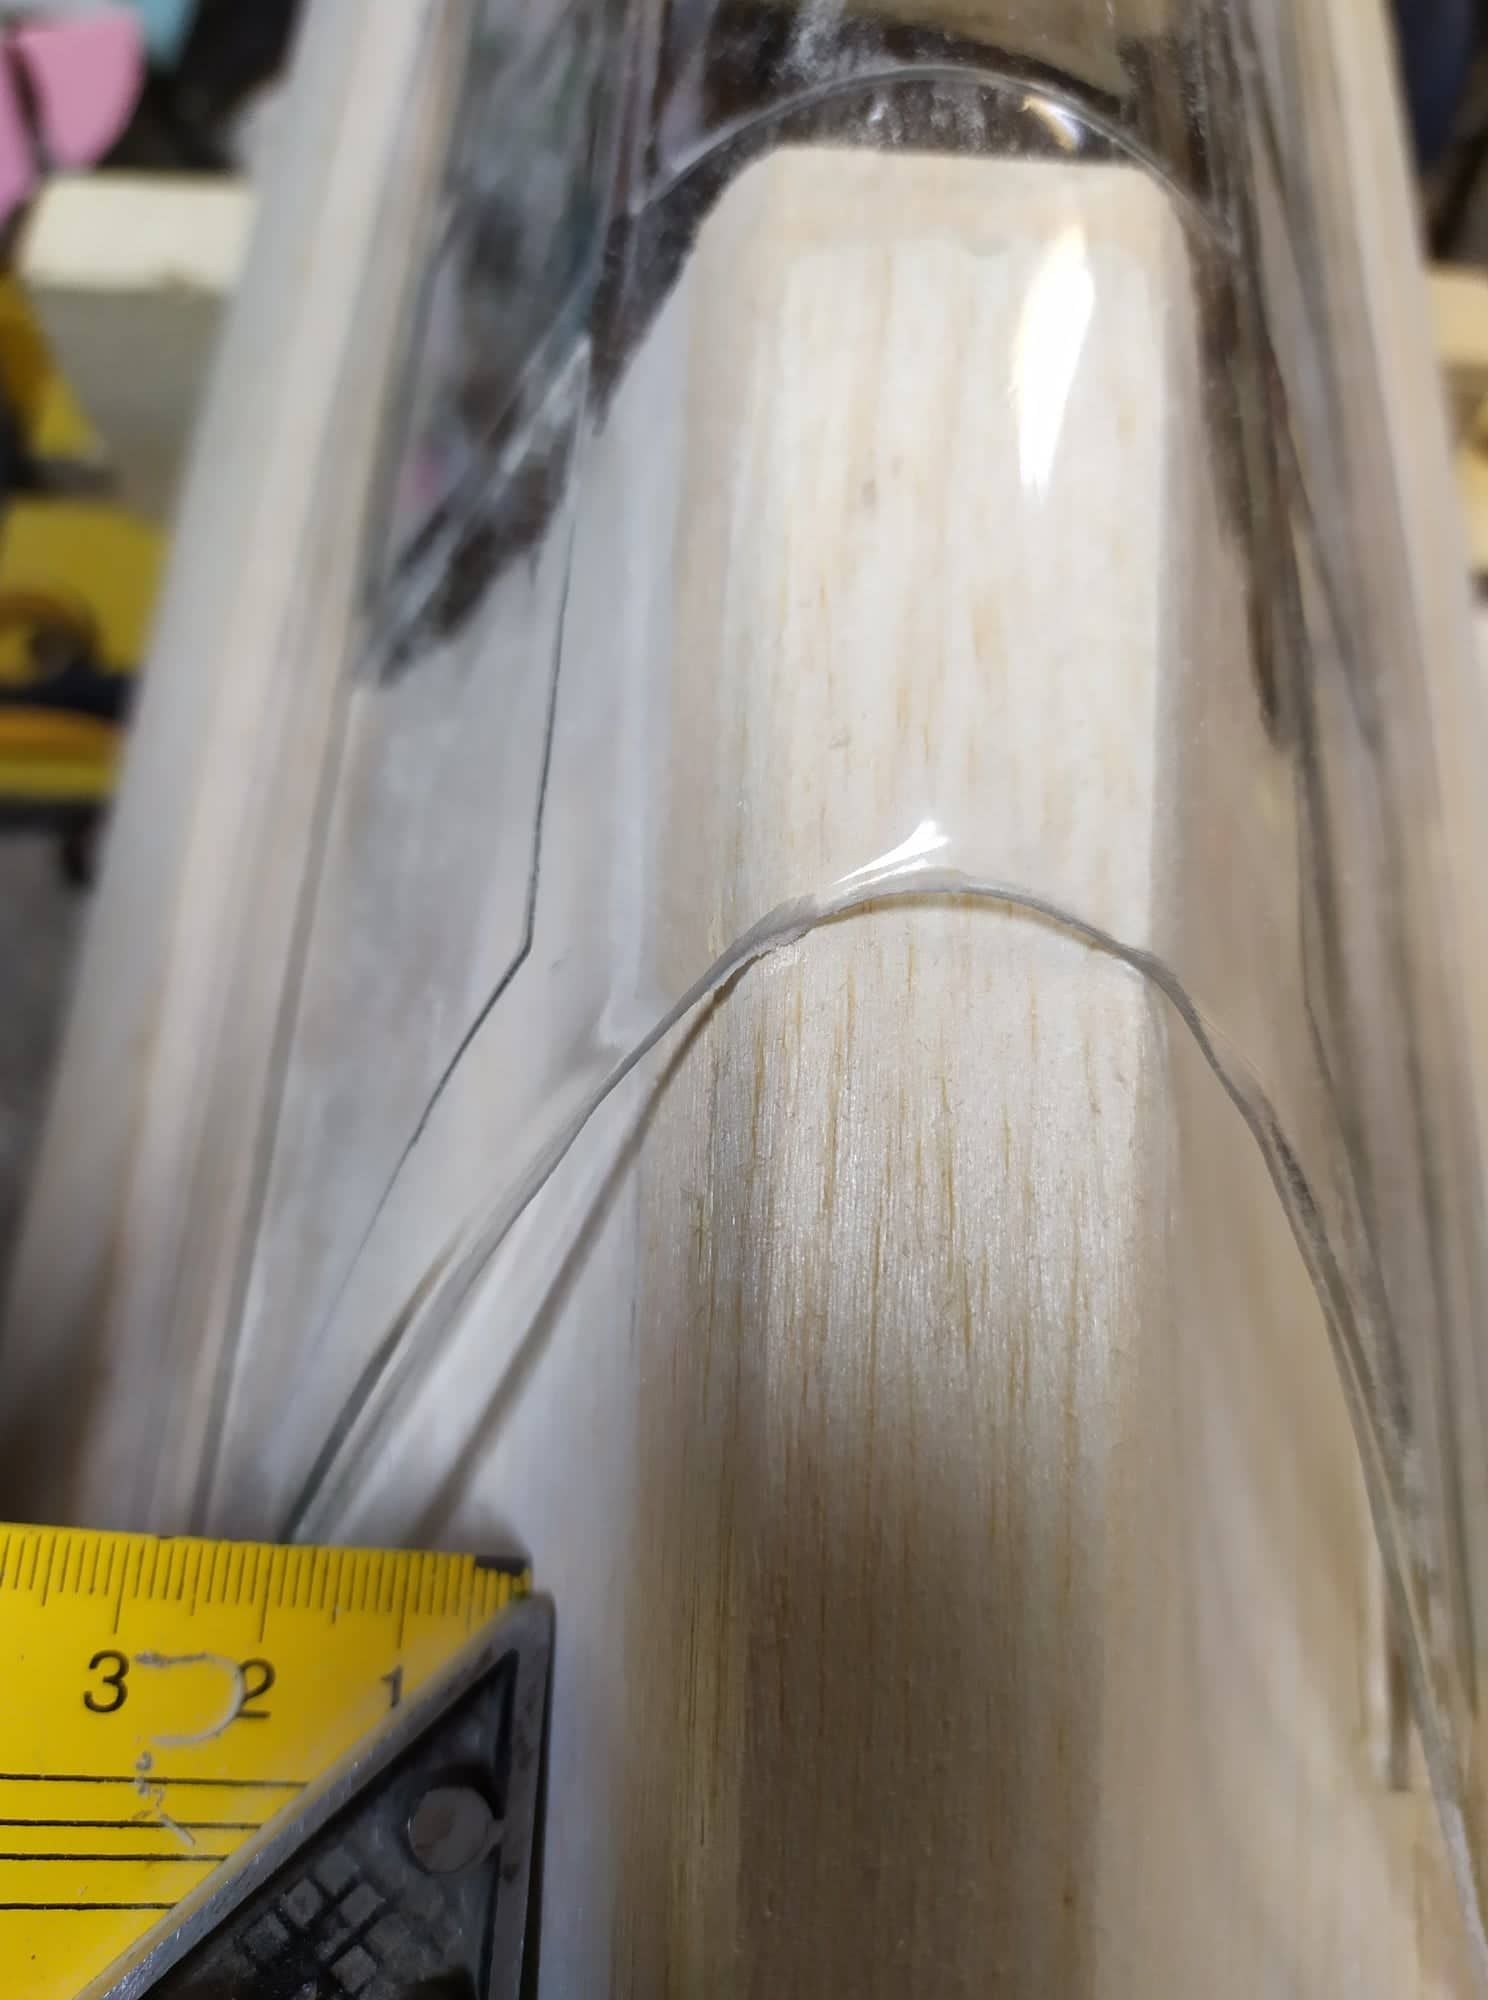
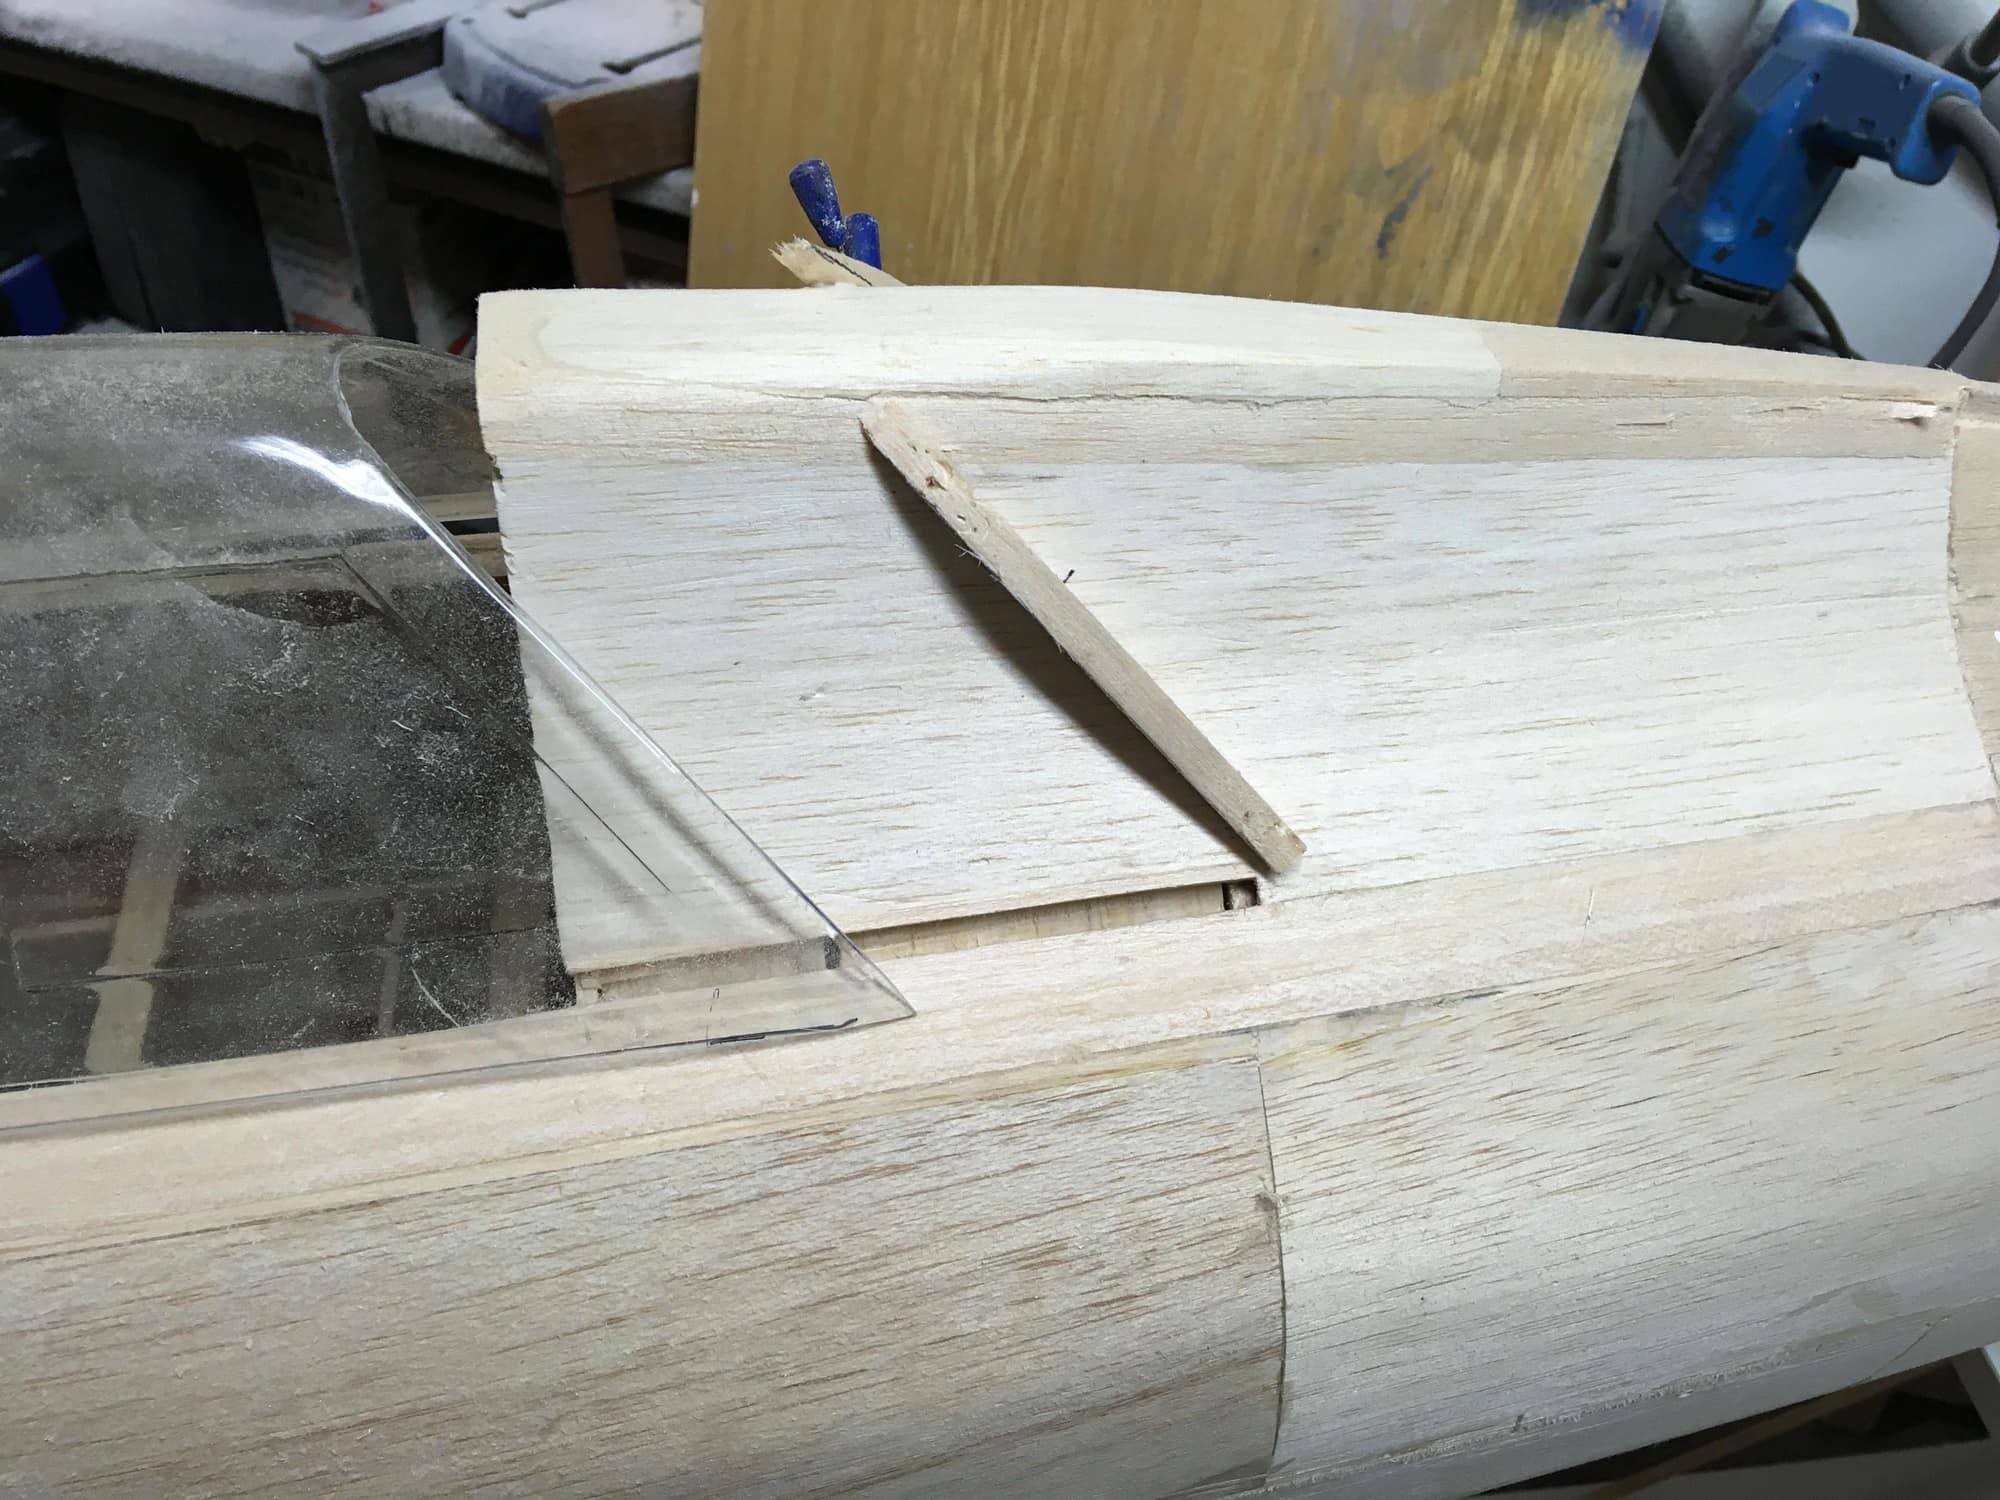
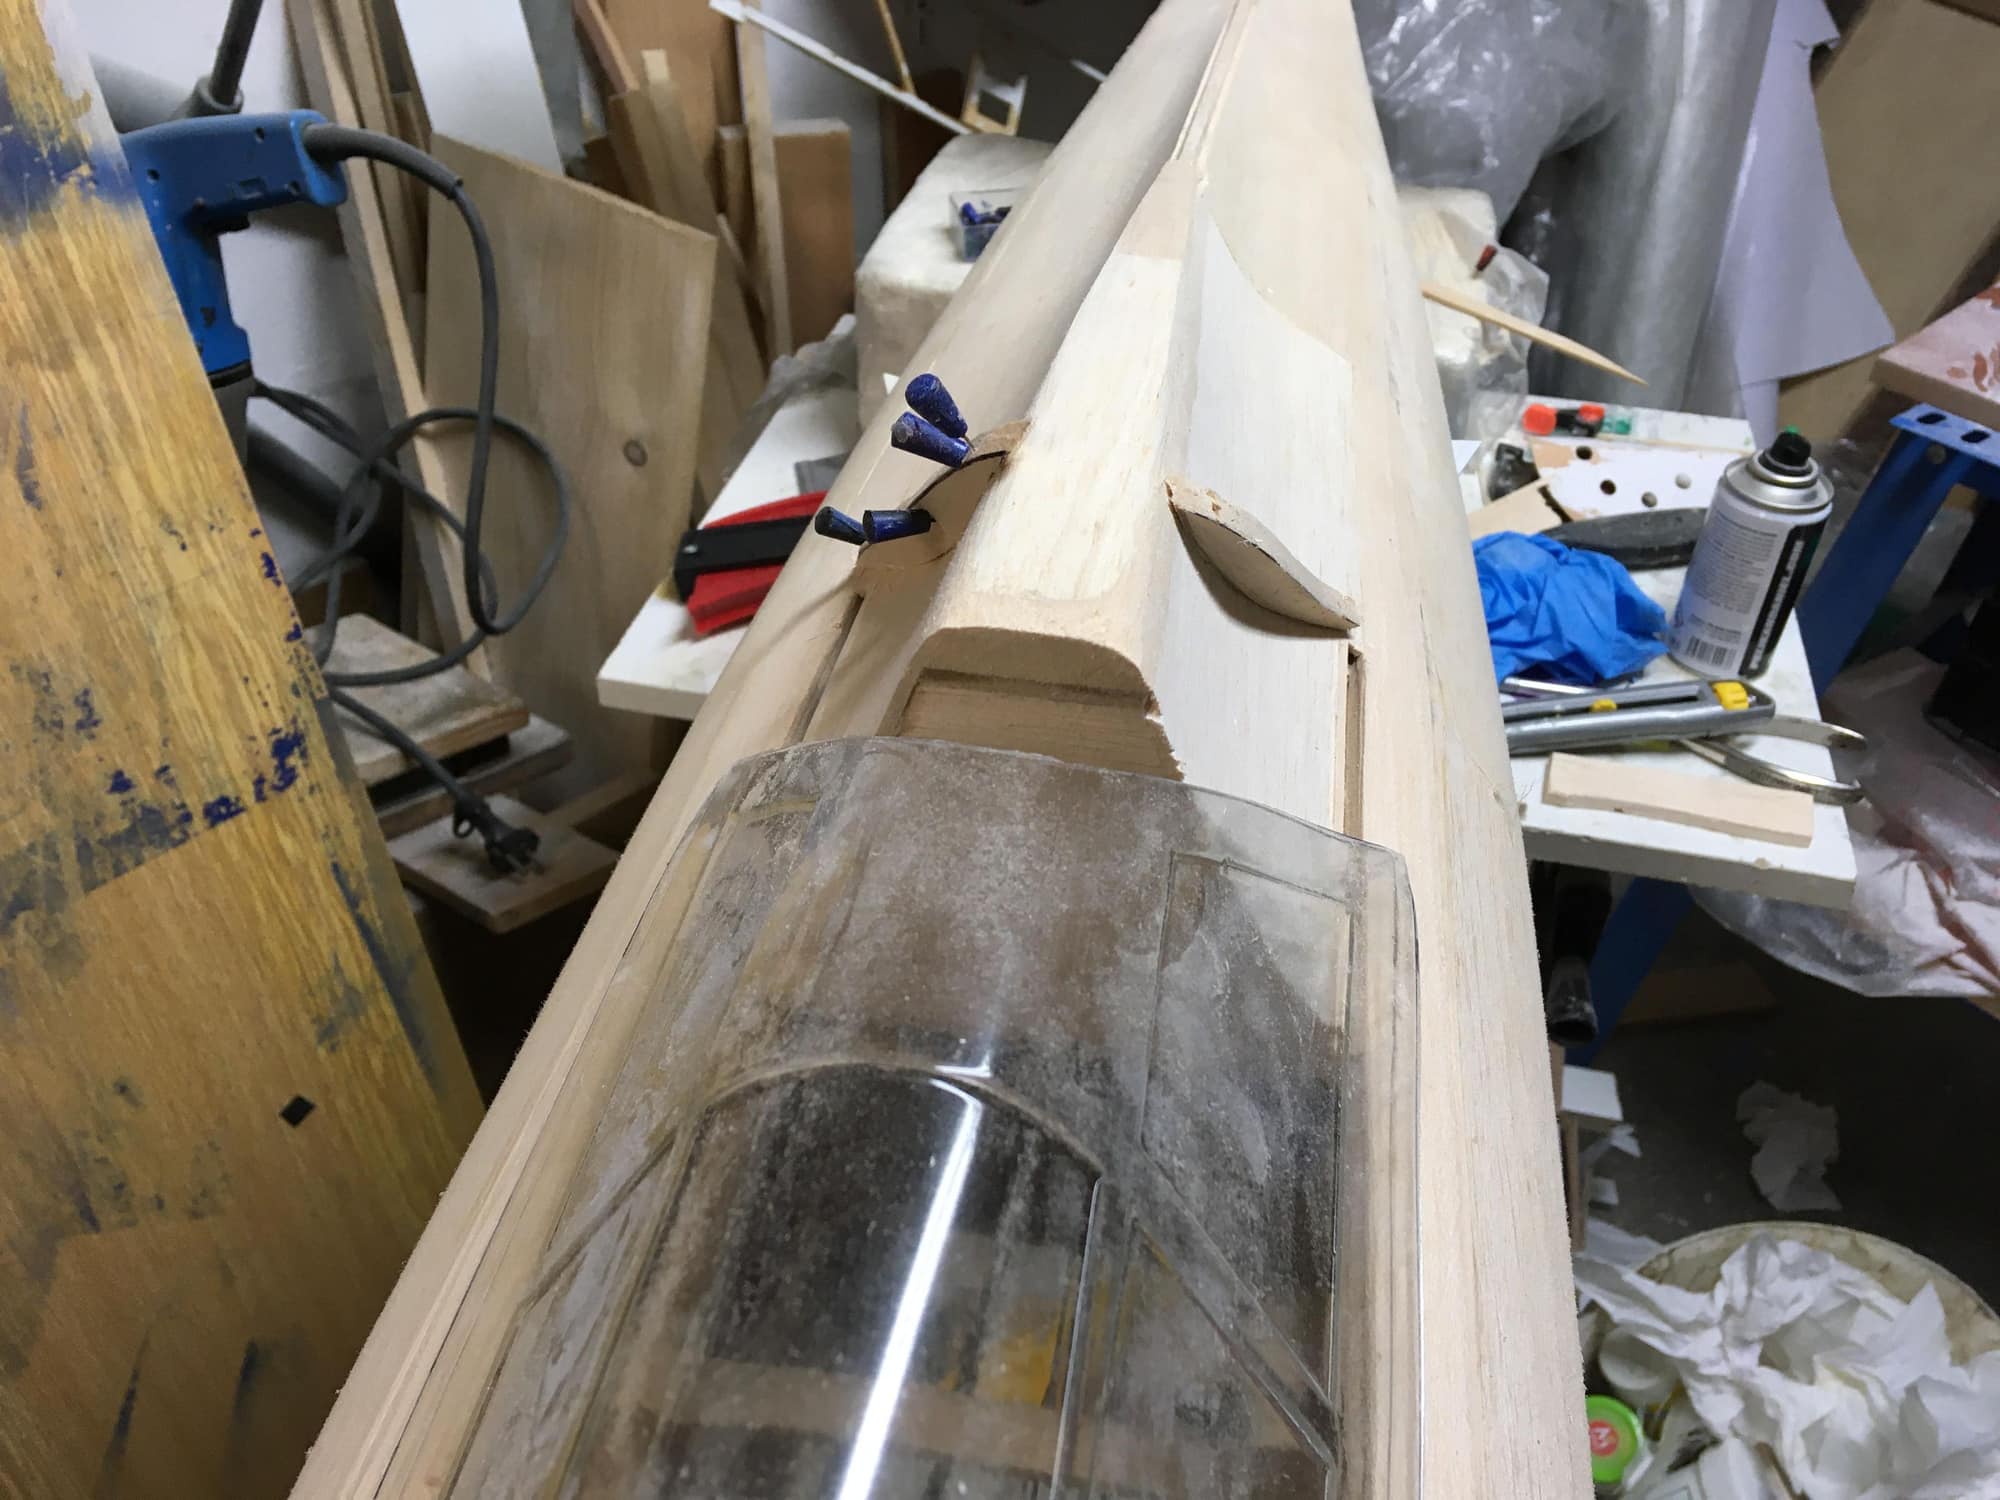
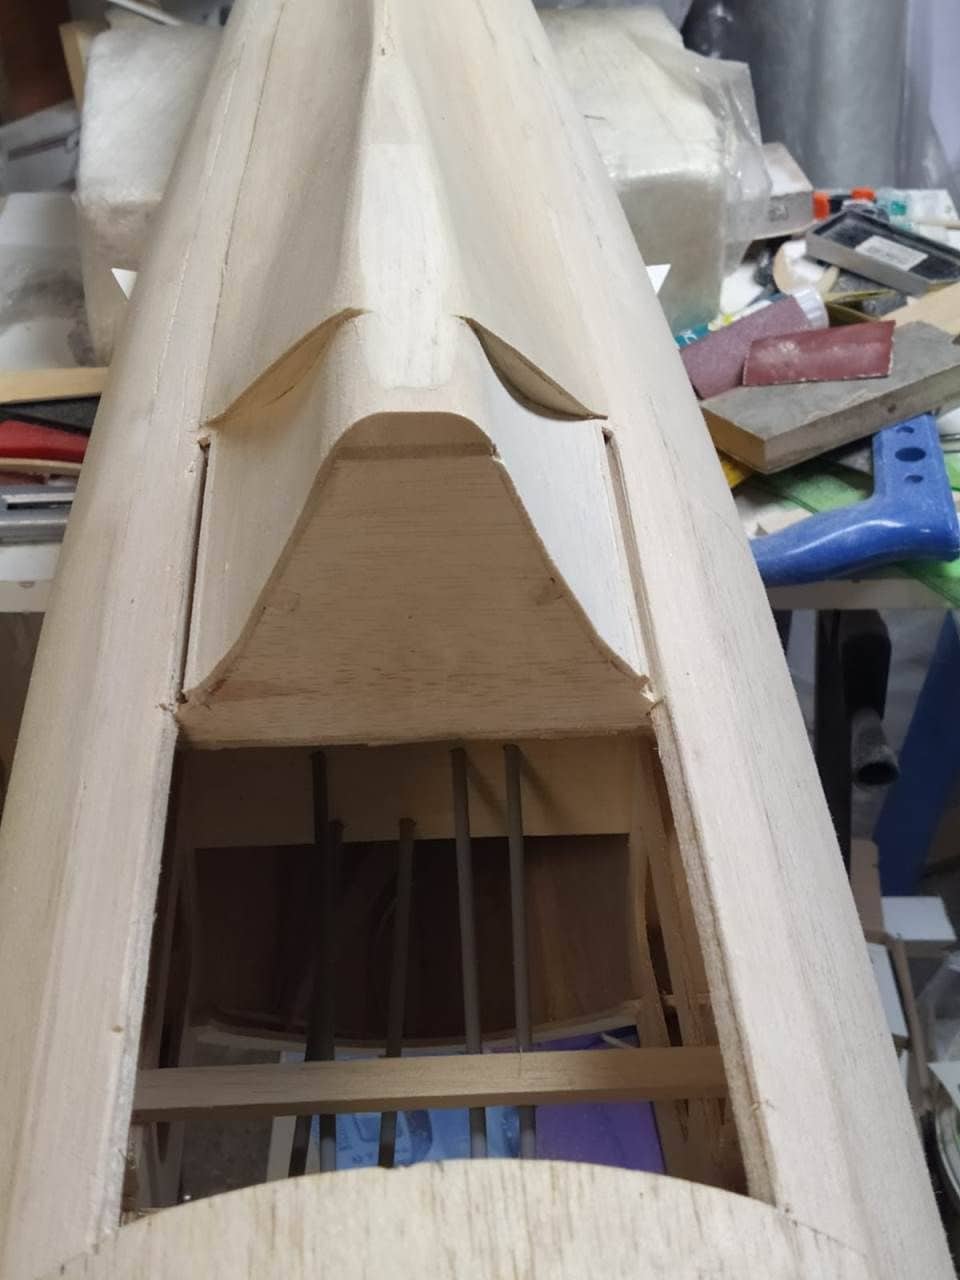
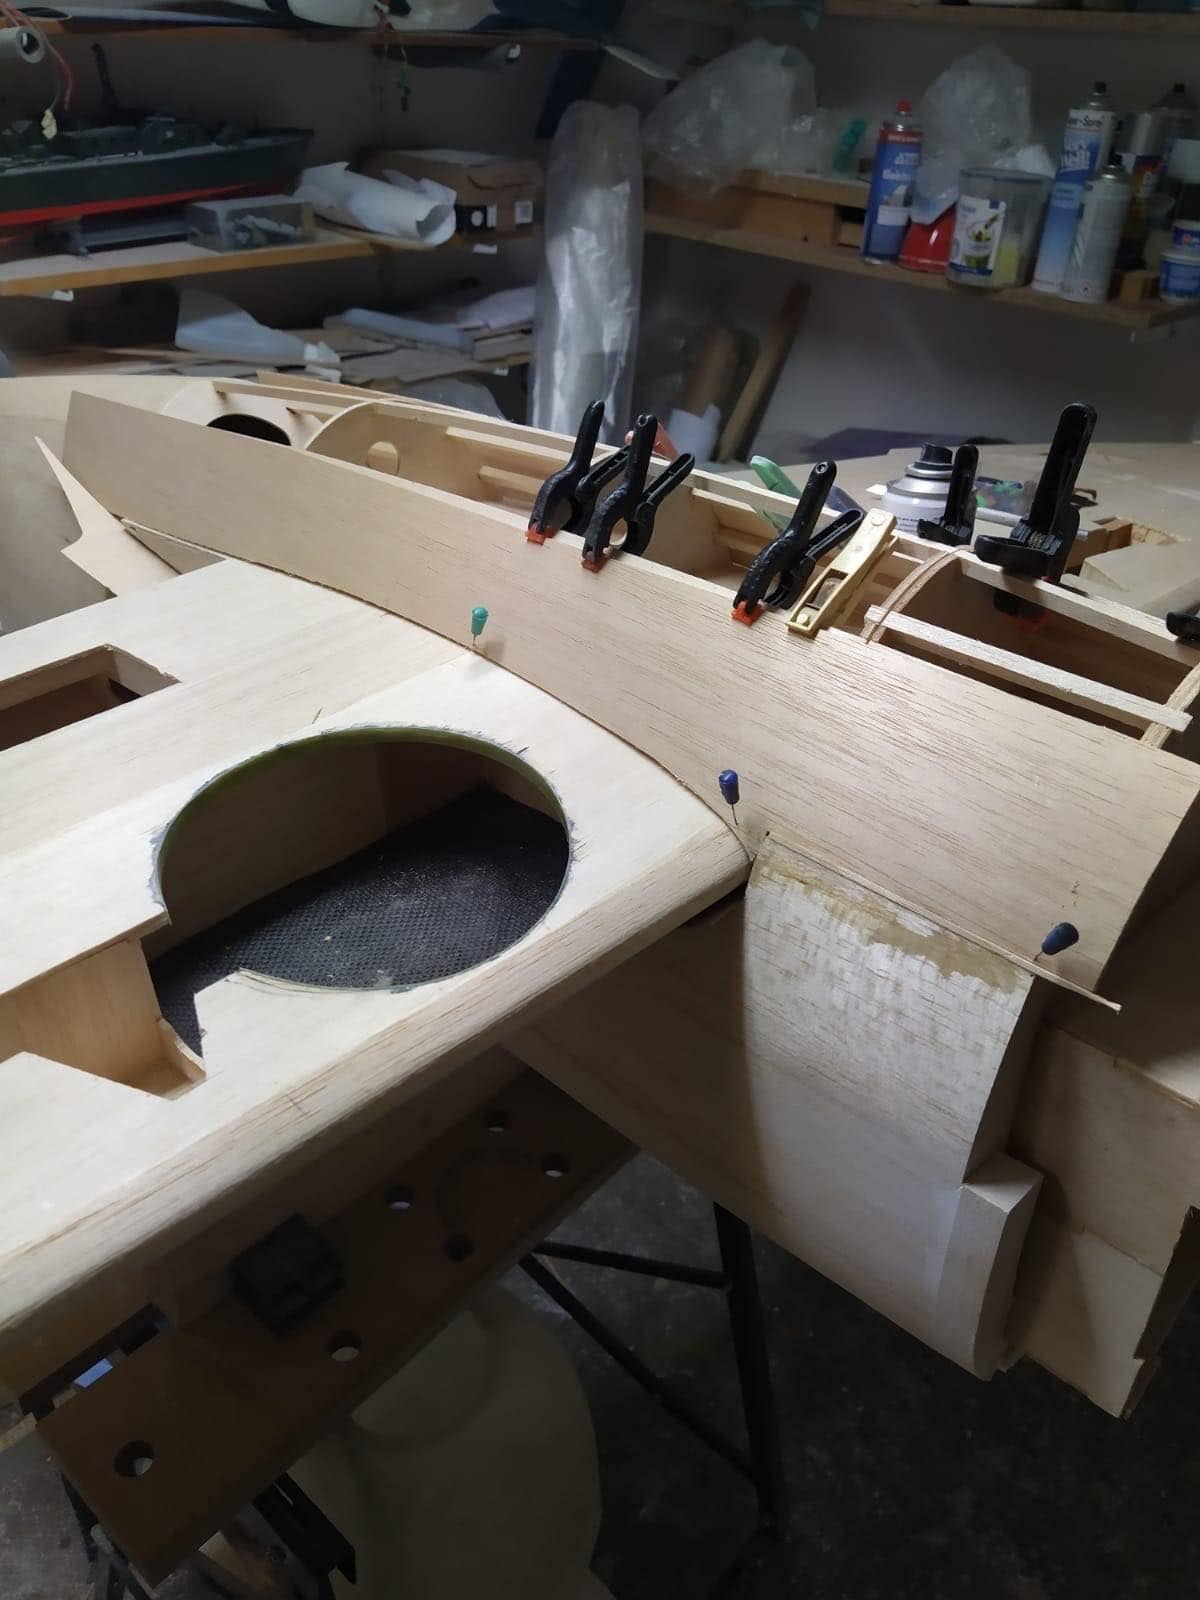
Here are some actuall shots. I�m still working on the back. Now I�m not sure how to fill in the gap between the canopy and balsa sheeting. I found the two strips of the balsa, but it would be necessary to add another sheeting. Anybody can advice or post some pictures of the TF P-47 kit?

Last edited by Prekin; 11-28-2019 at 10:55 AM.
 12-09-2019, 01:07 PM
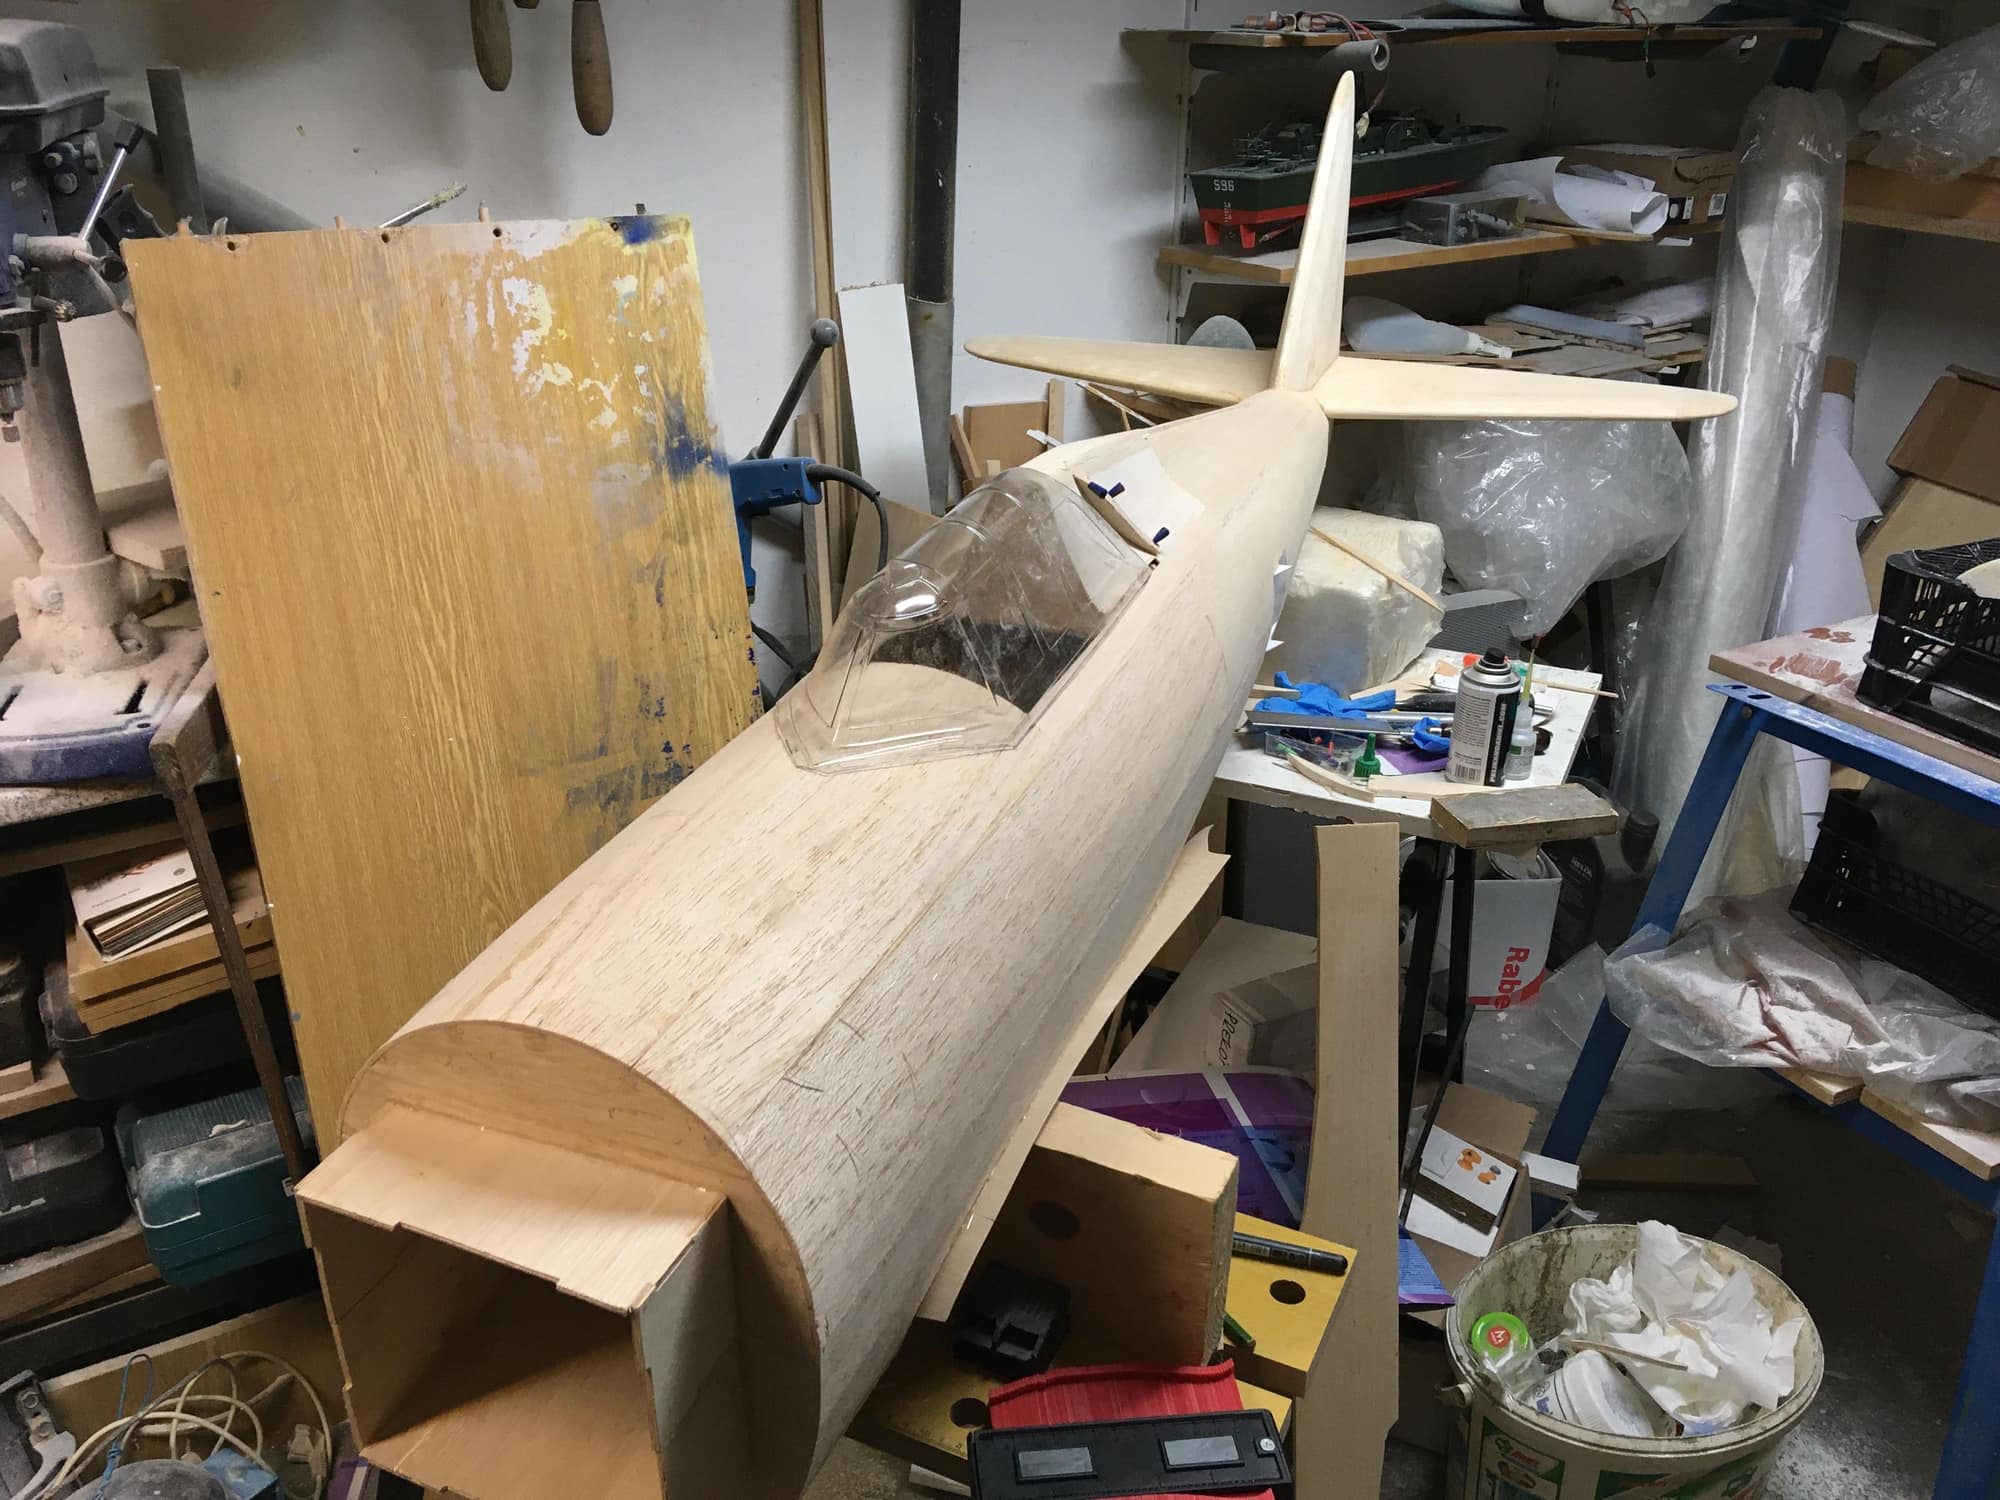
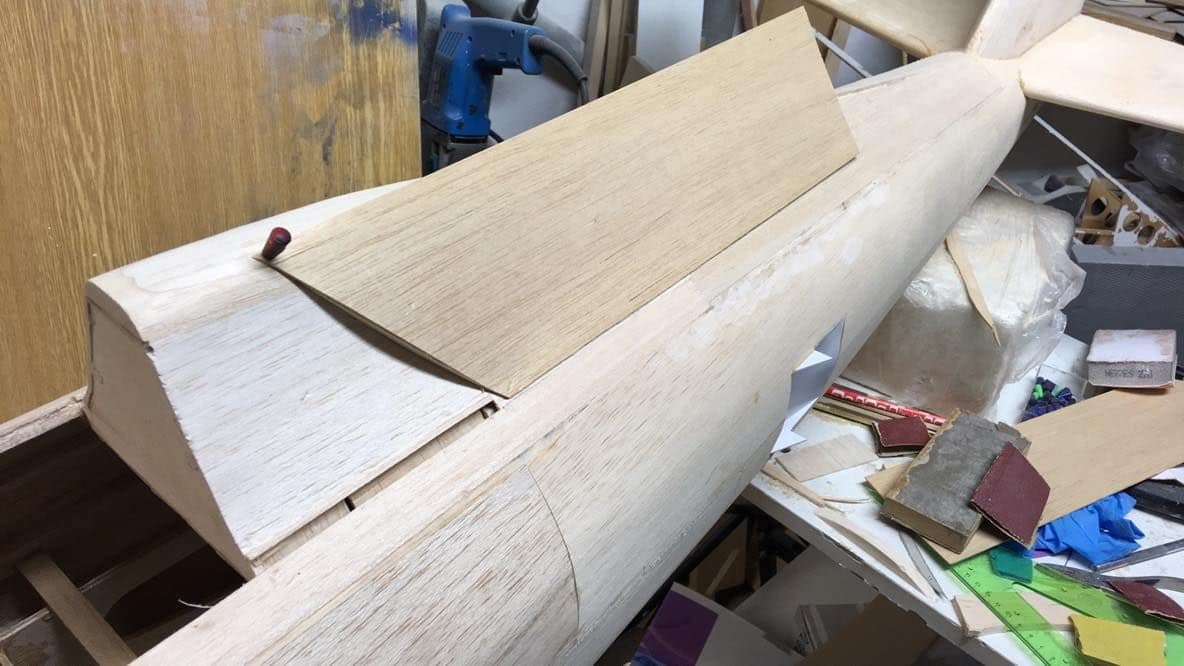
#1044
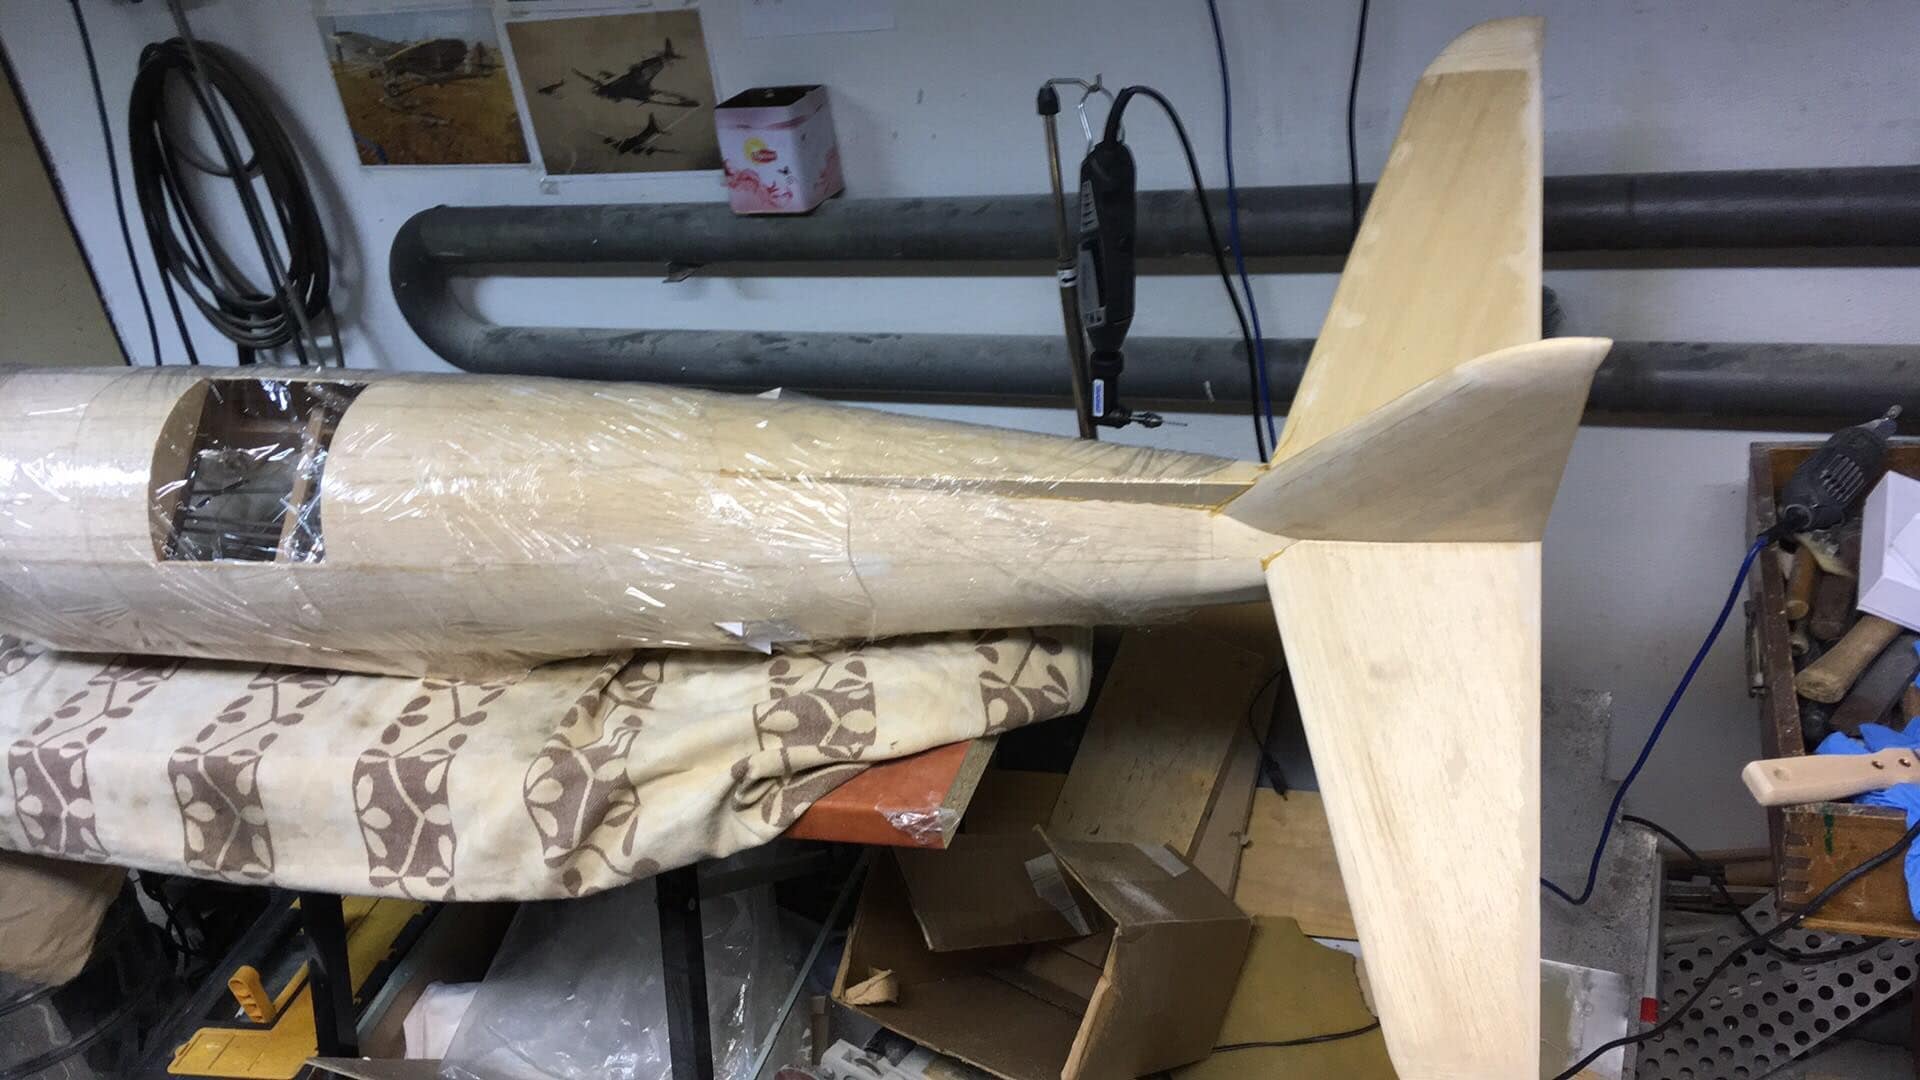
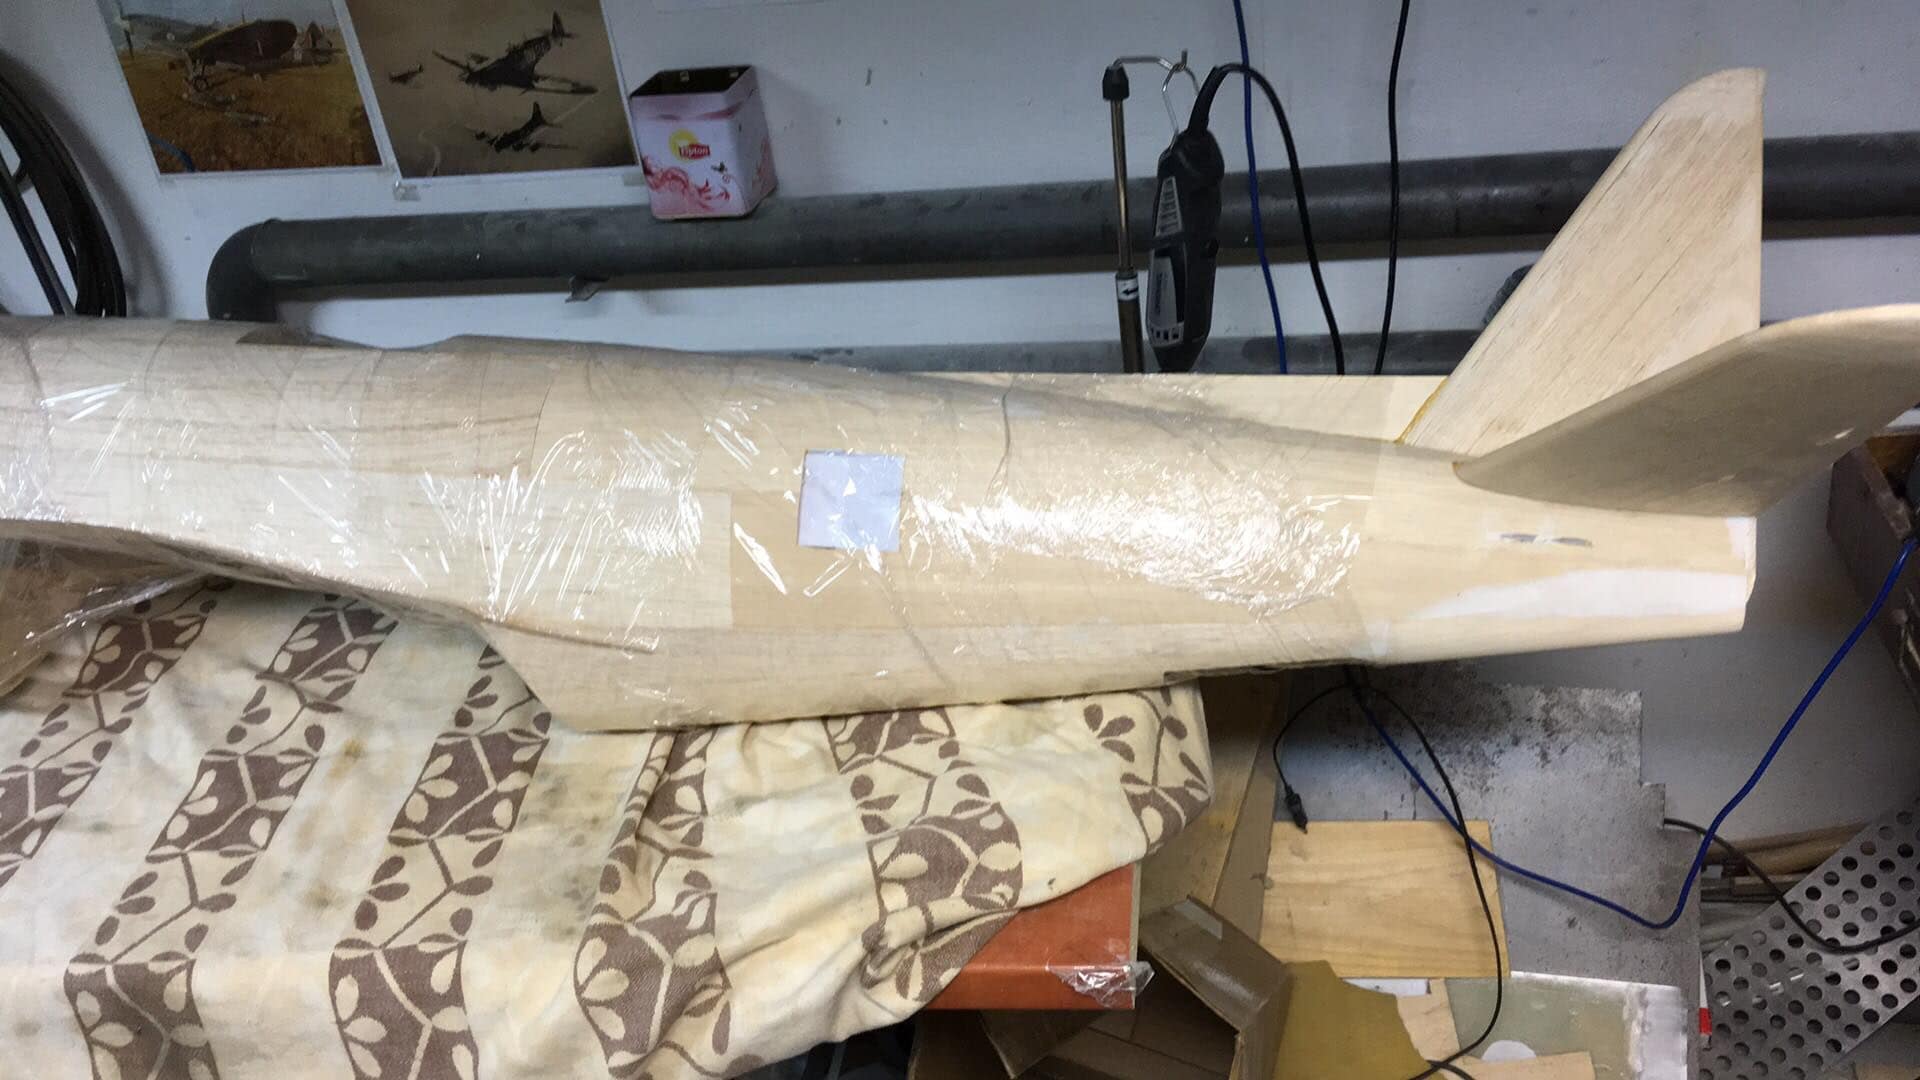
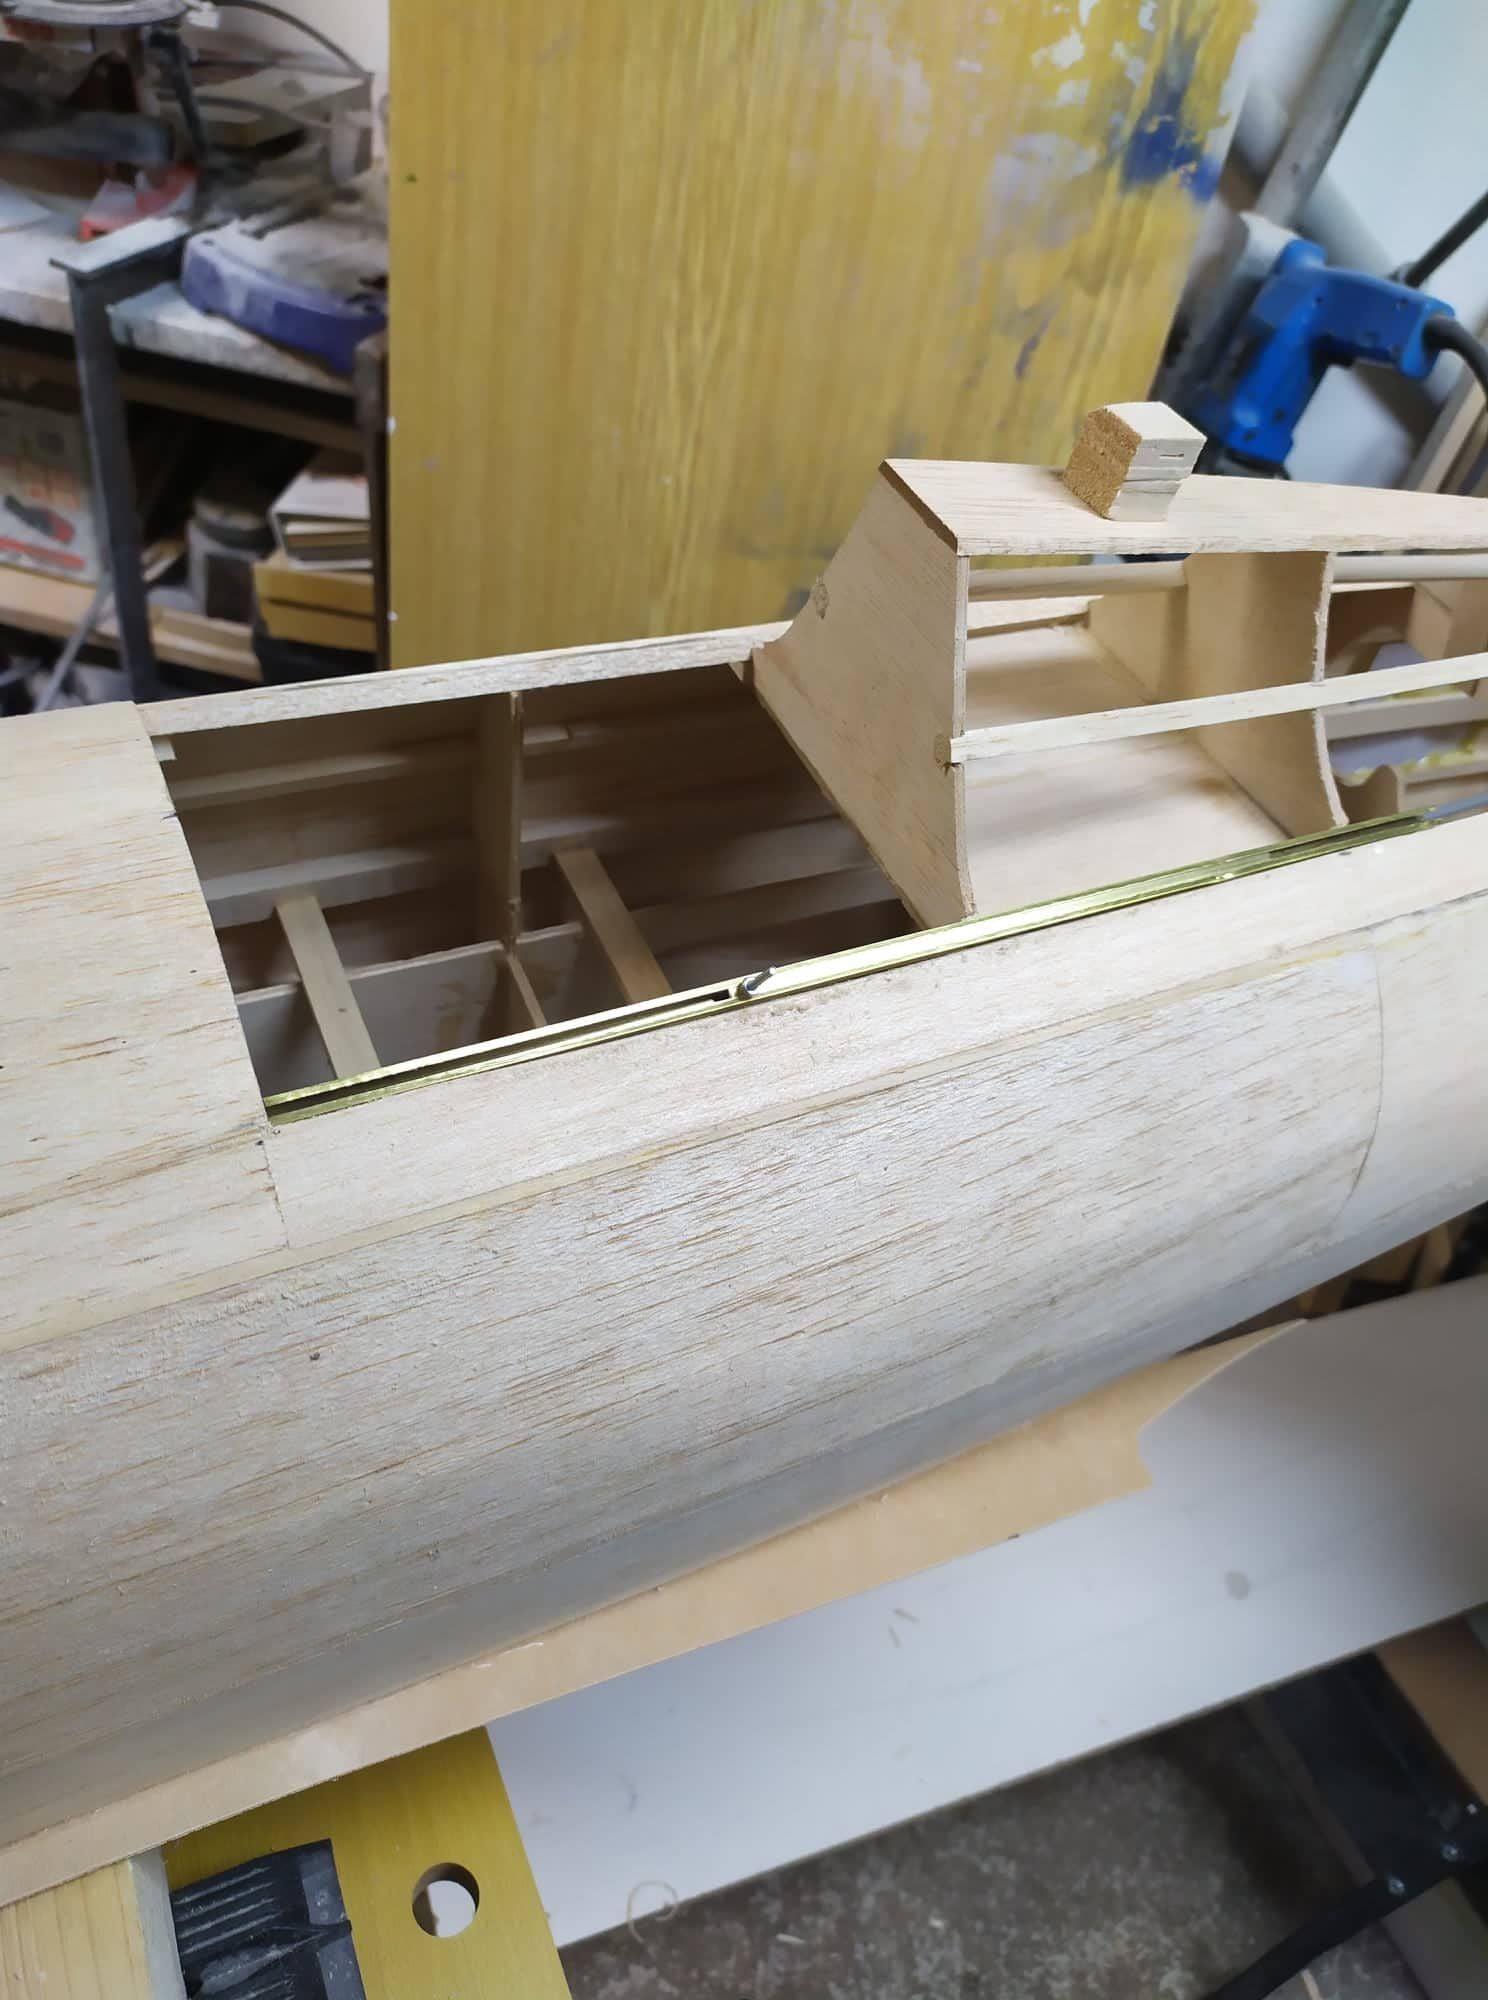
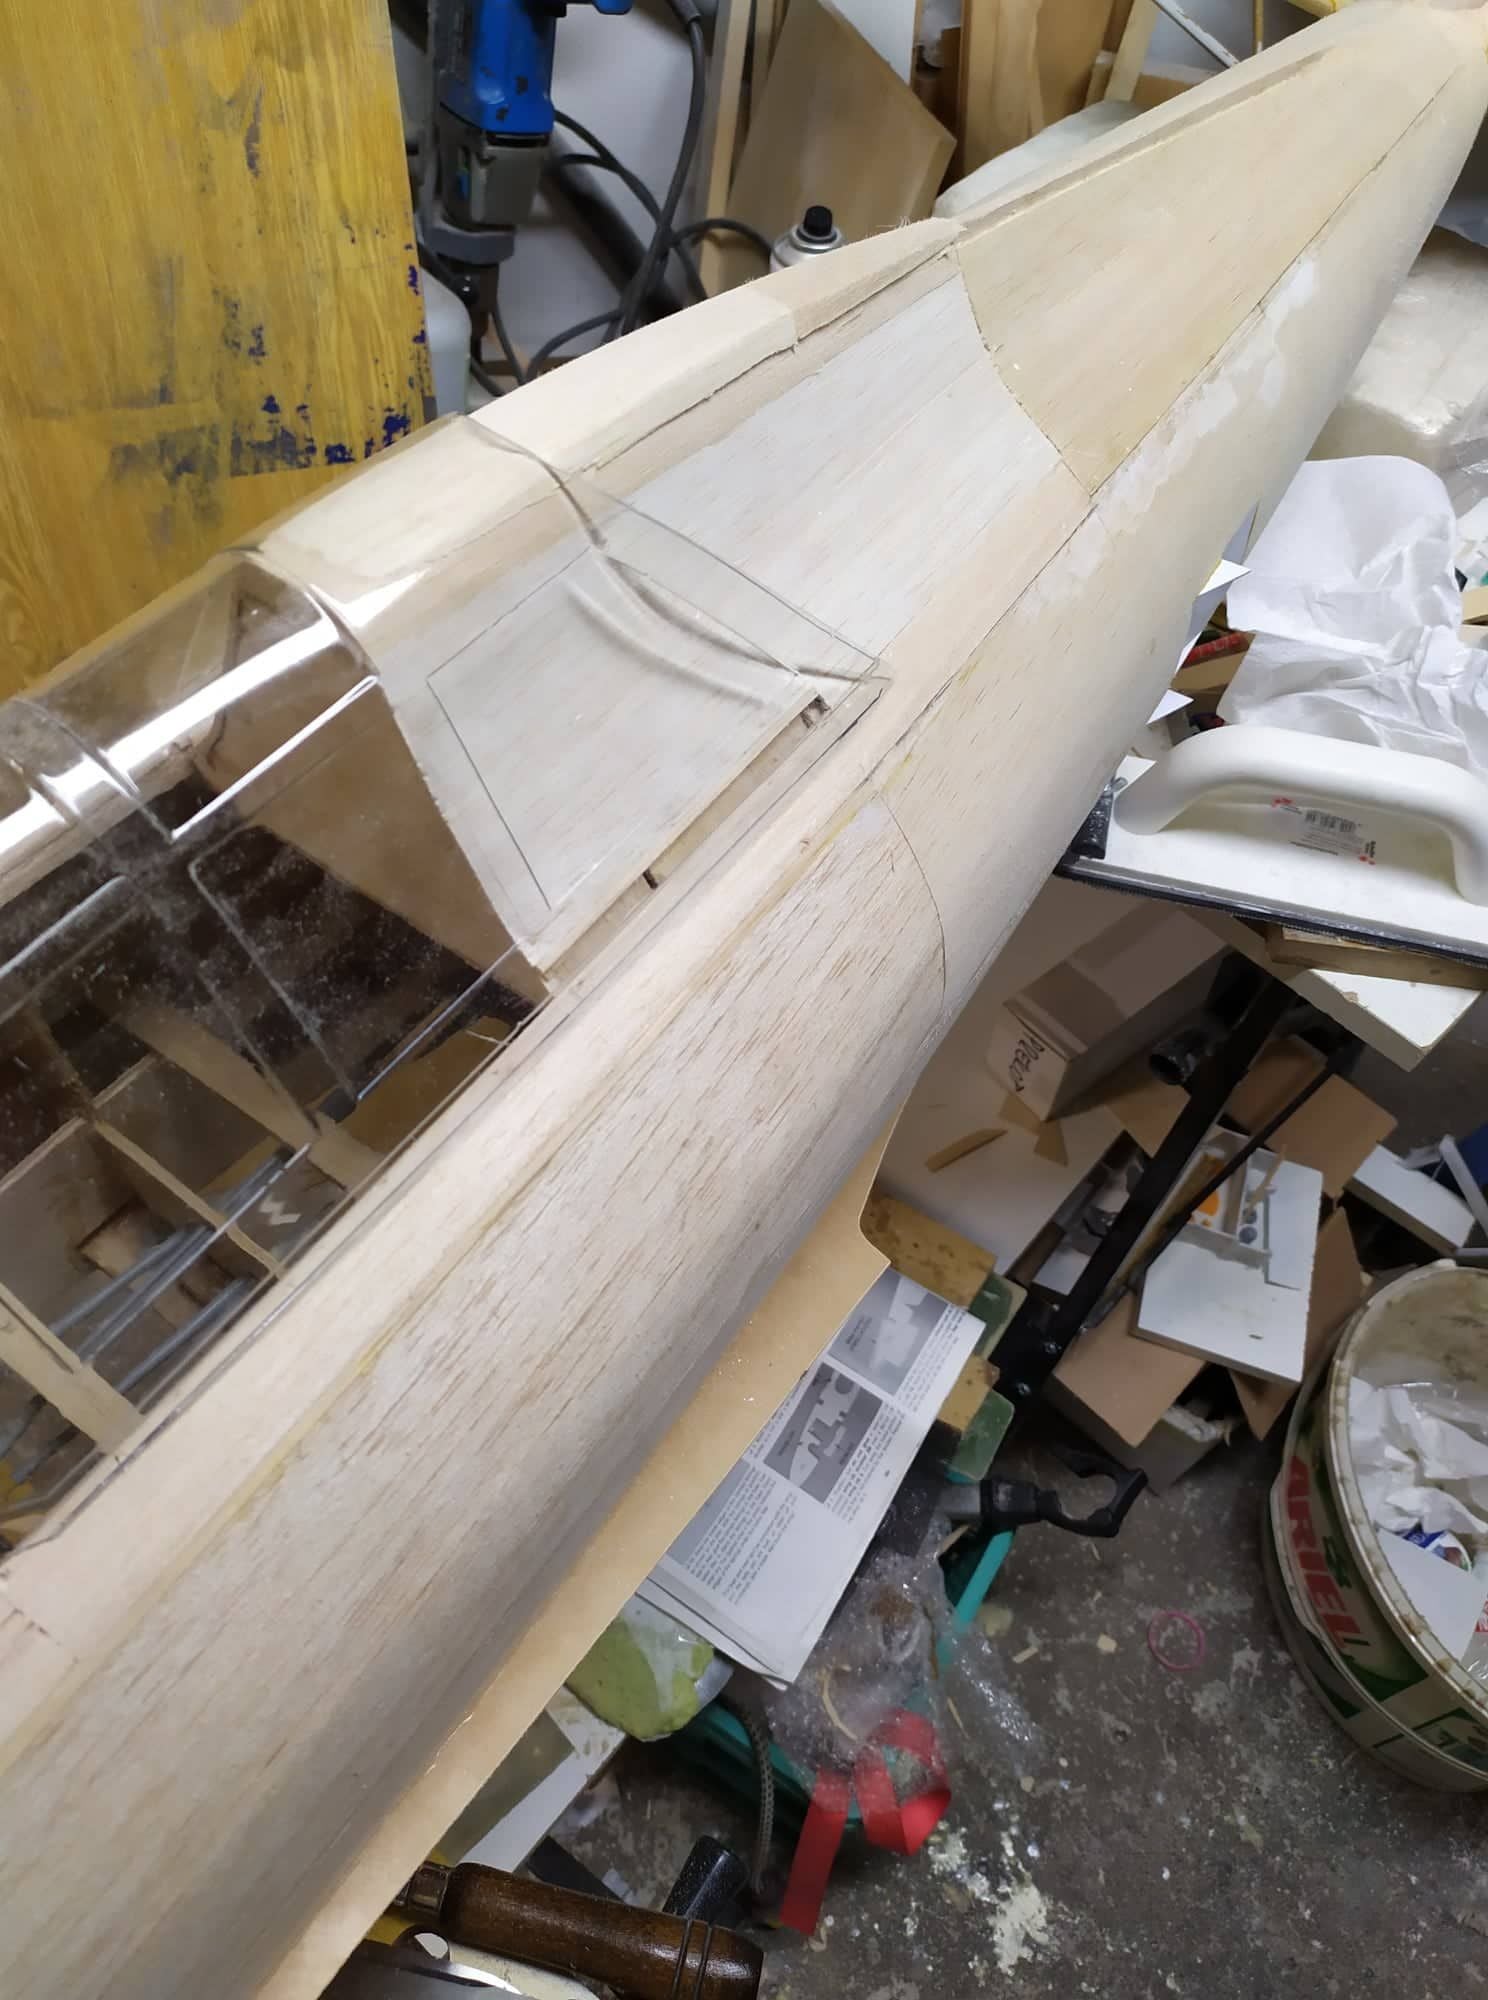
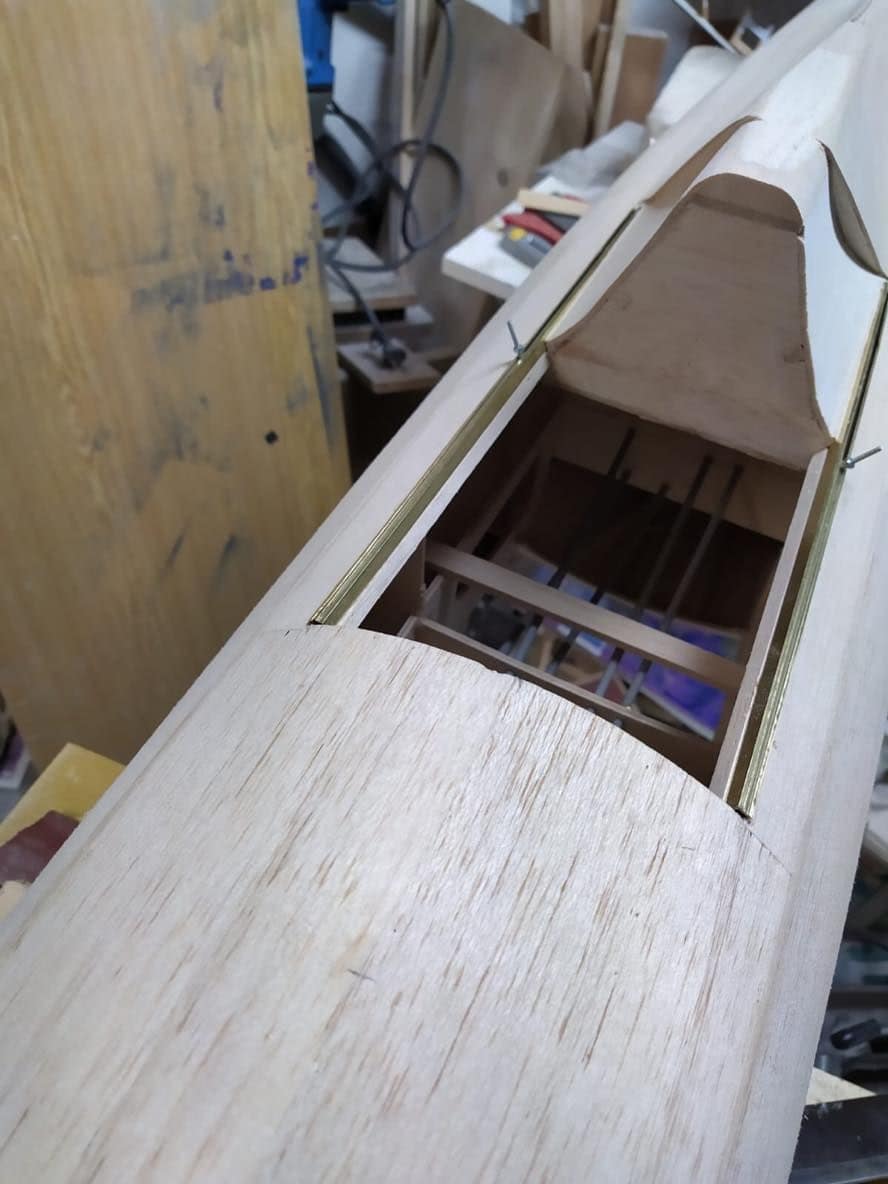
Some progress. The back is sanded. I suppose it would be better to make some update on that kit and design new ribs. The top of the back could be covered by 2mm balsa sheets.

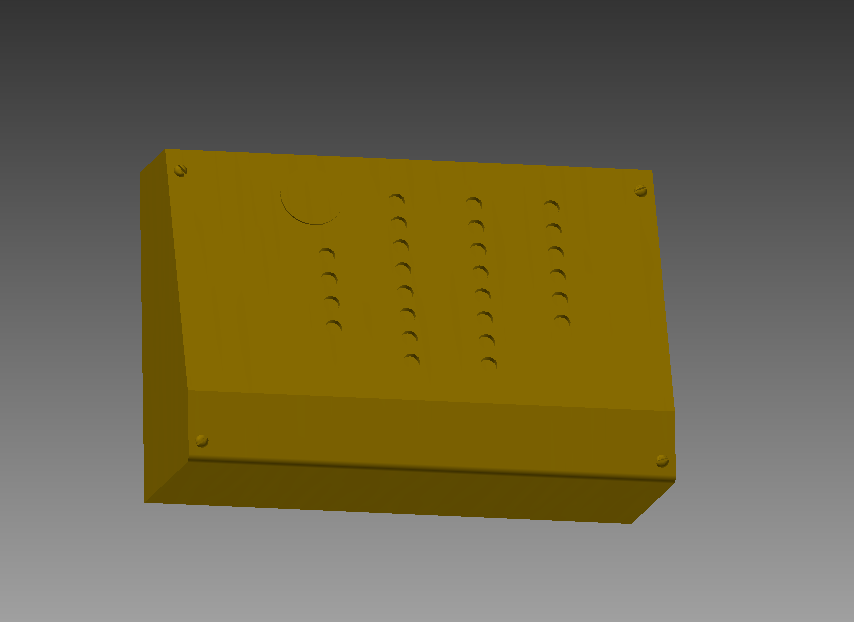
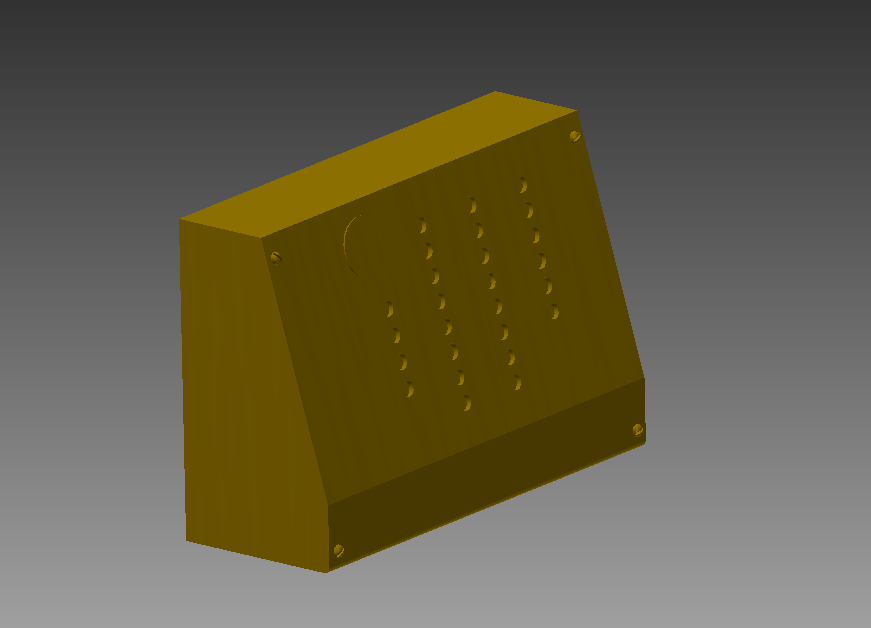
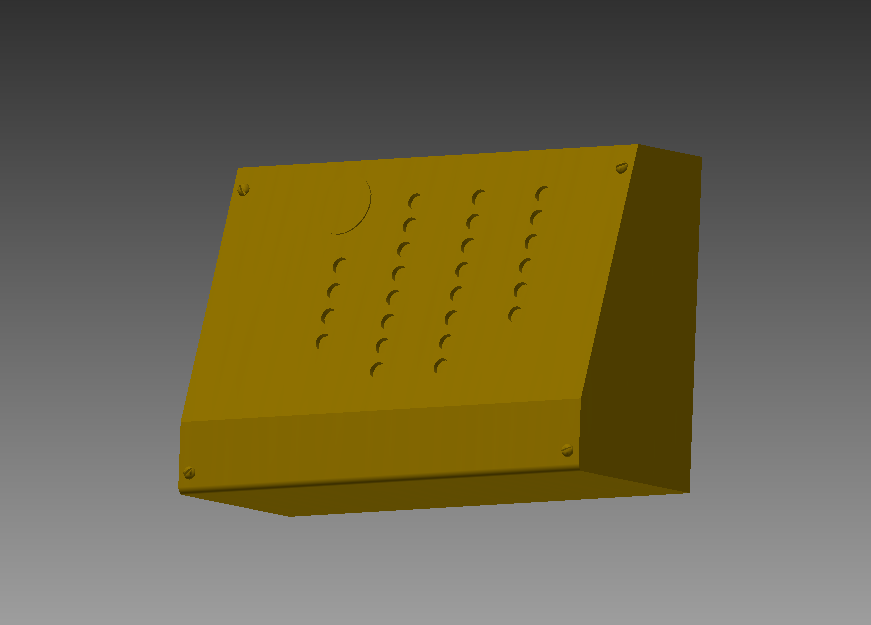
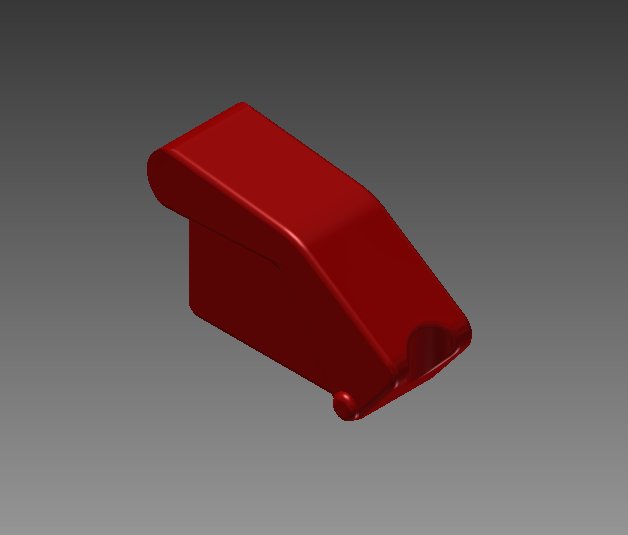
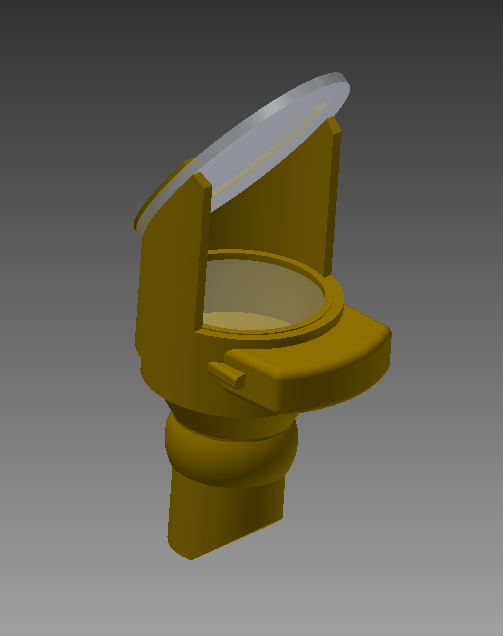
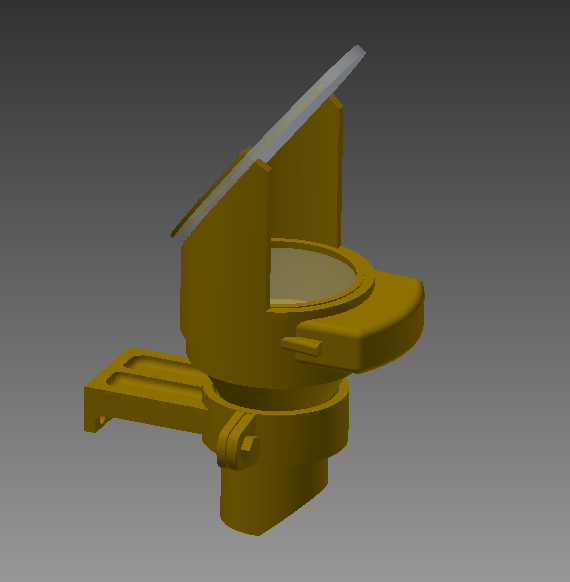
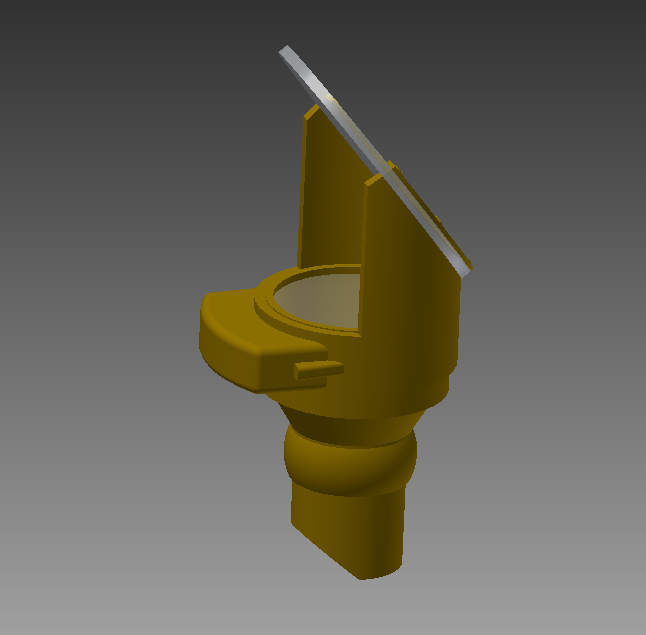
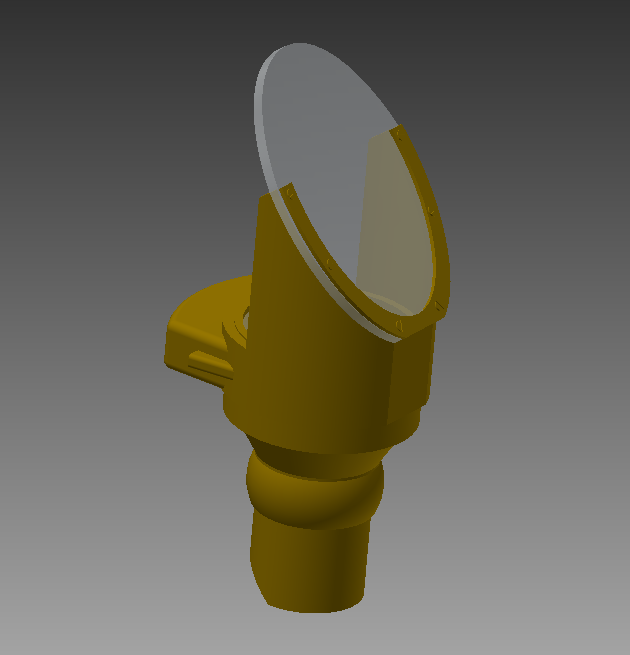
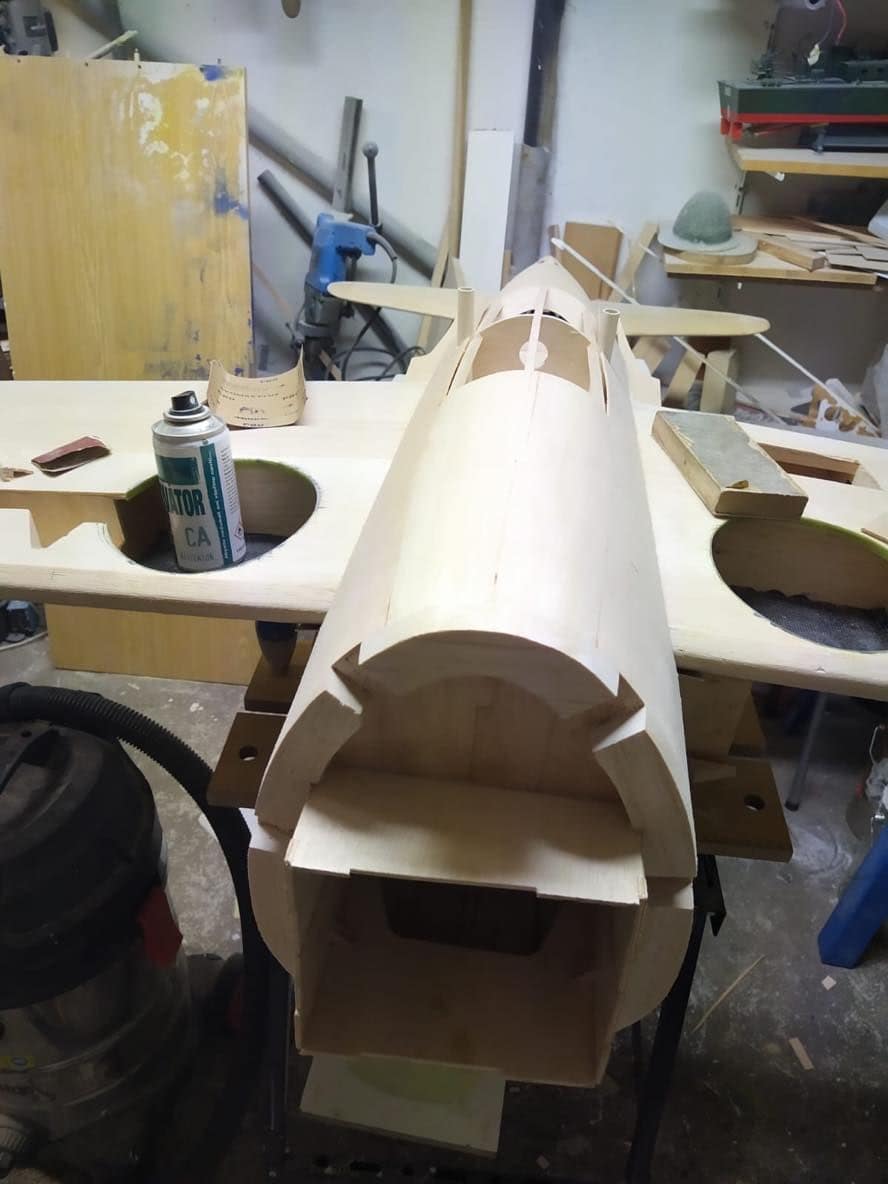 12-19-2019, 12:21 PM
#1047
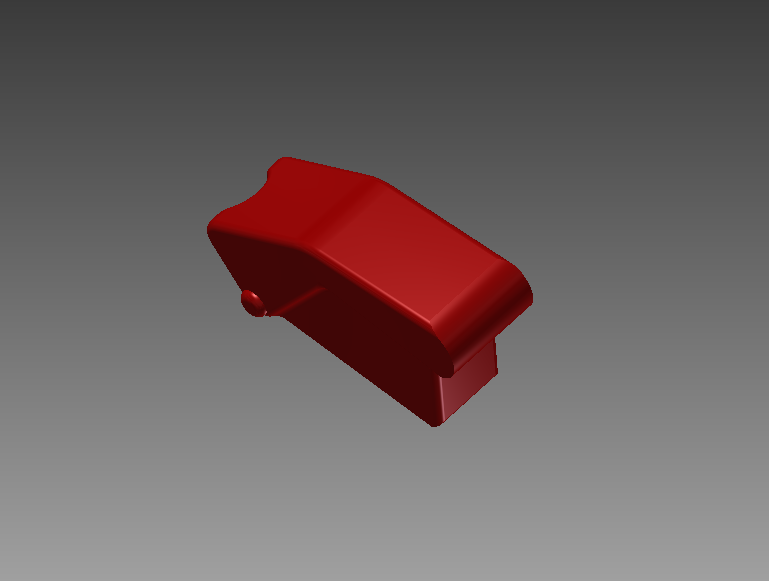
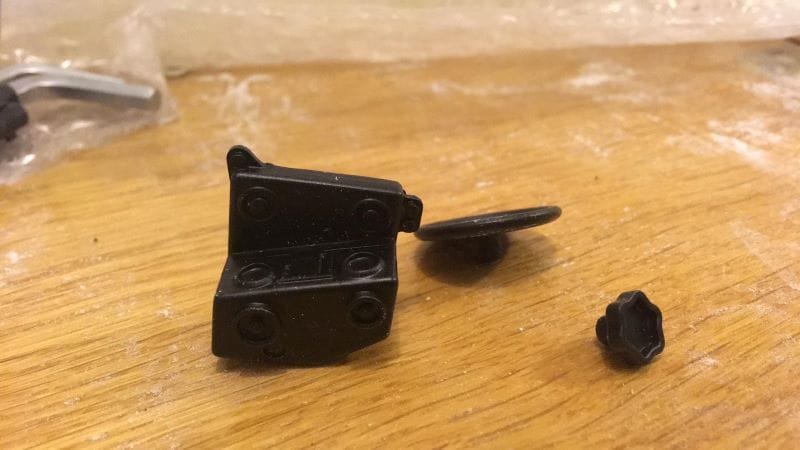
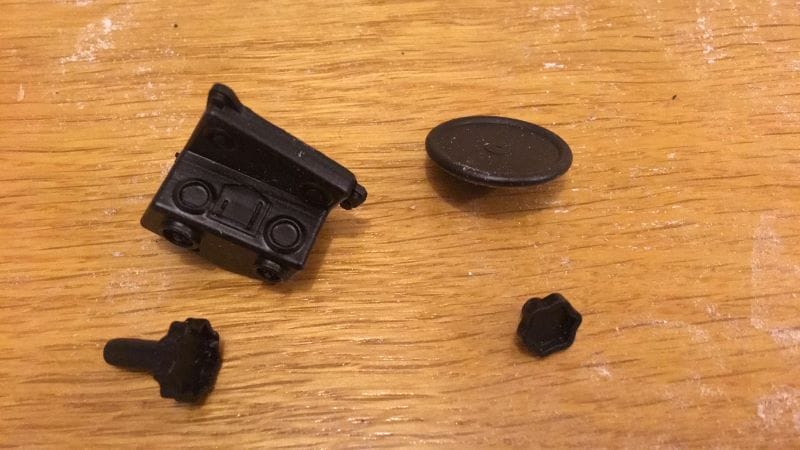
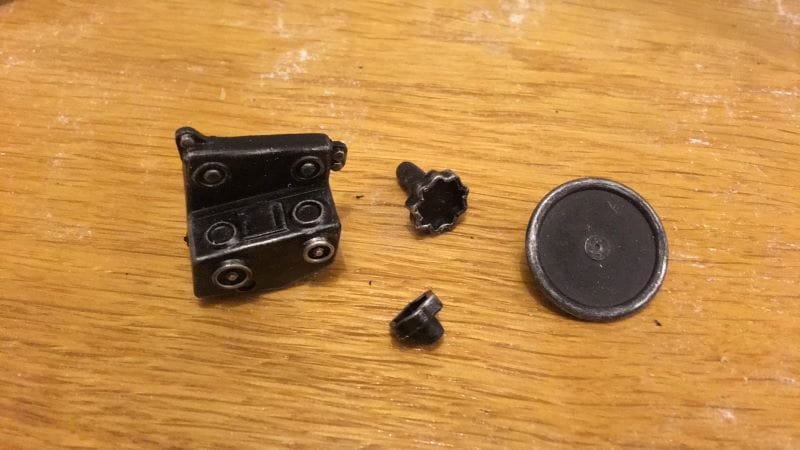
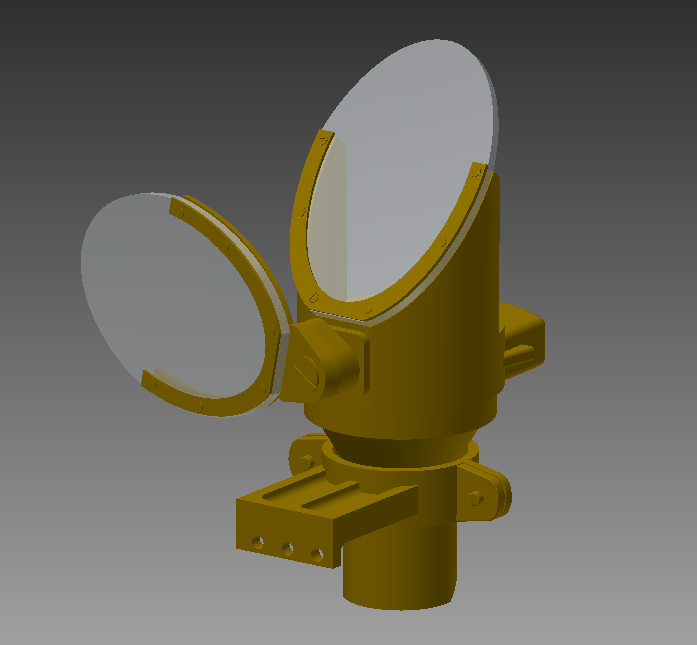
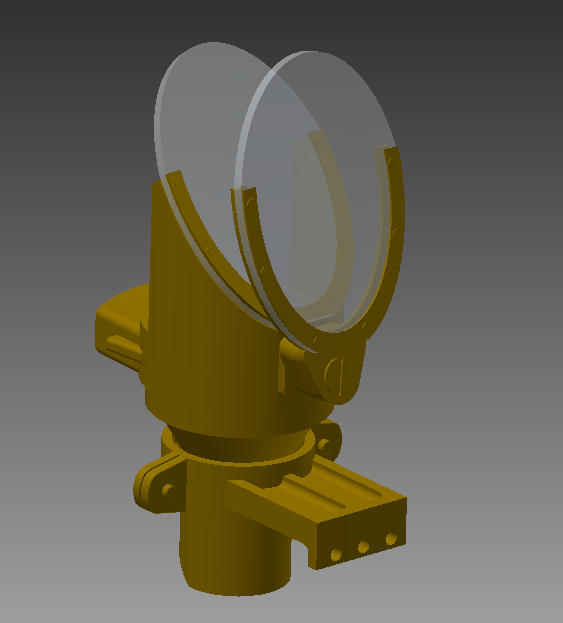
A little more CAD 3D designing. I have the TopFlite cockpit kit for my TF Razorback, but I�m not satisfied with the quality and ABS parts. I decided to make some parts for the cokpit. As you probably mentioned the gunsight is done. Last day I did the trim control unit.
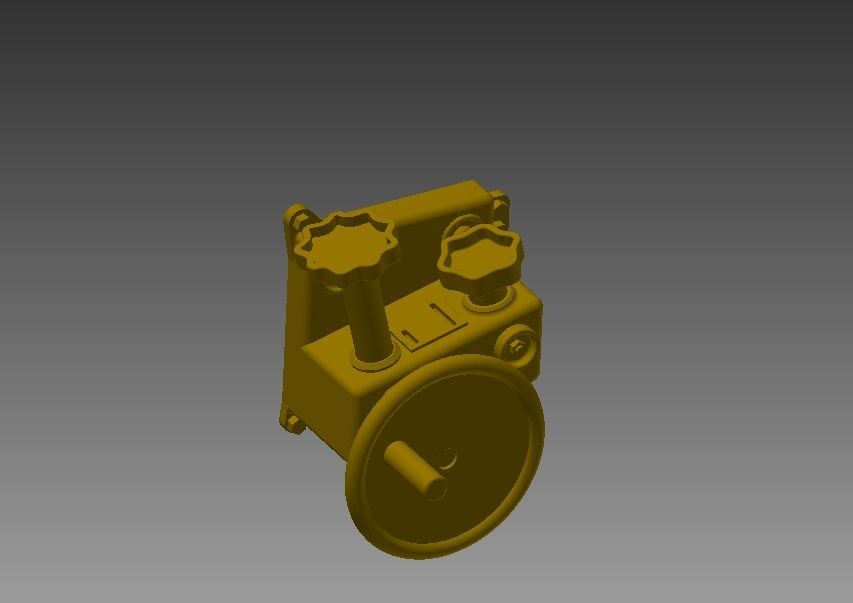
Trim control unit

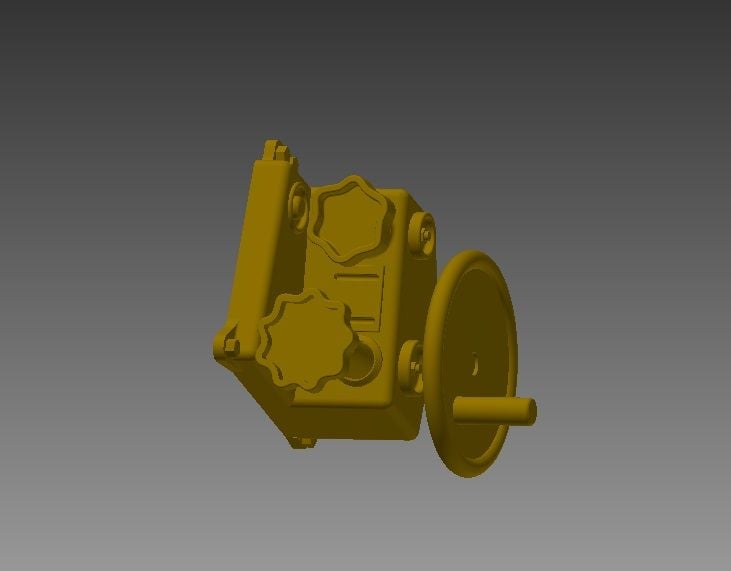
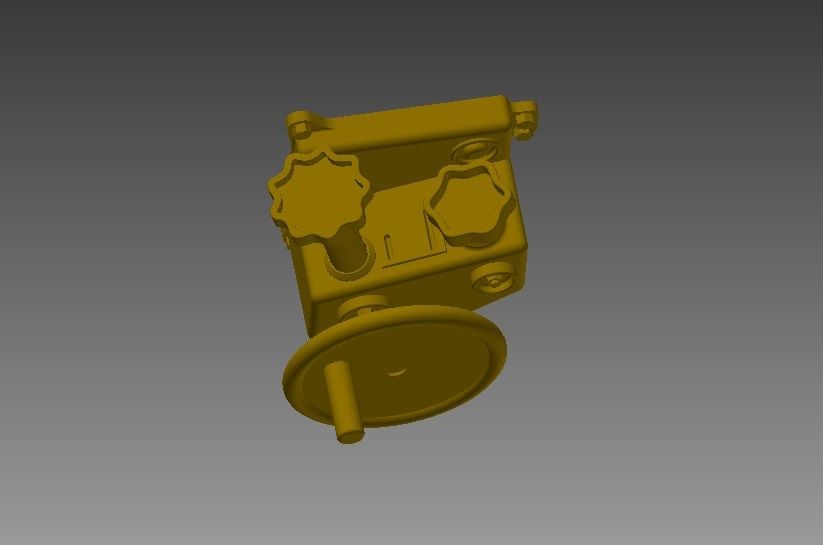
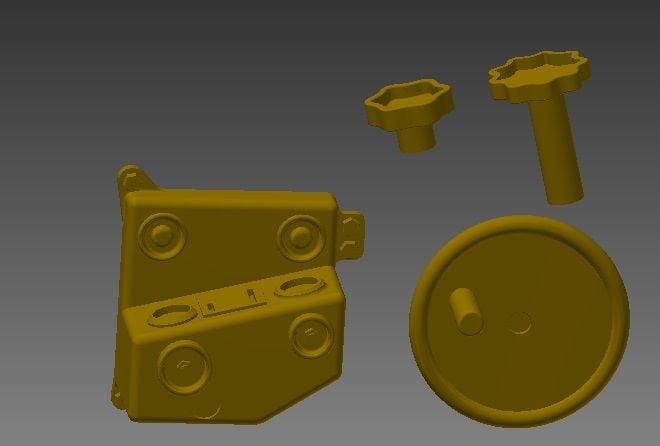
Trim control unit kit
Trim control unit
Trim control unit kit