Go Back  RCU Forums > RC Airplanes > RC Warbirds and Warplanes
FokkeRC 1/5 Spitfire MKIX build log >

FokkeRC 1/5 Spitfire MKIX build log

Community
Search
Notices
RC Warbirds and Warplanes Discuss rc warbirds and warplanes in this forum.

FokkeRC 1/5 Spitfire MKIX build log

Thread Tools
 
Search this Thread
 
Old 01-12-2021, 12:44 PM
  #76  
Thread Starter
 
Wyoturbine's Avatar
 
Join Date: May 2014
Location: Platte City, Mo
Posts: 241
Received 22 Likes on 18 Posts
Default

Beautiful work! I’ve followed your build closely on Rumen’s website. I love the metal work and scale detail you’ve added, it’s going to be an awesome spitfire! Thanks for sharing photos.
The following users liked this post:
benoit64 (01-12-2021)
Old 01-13-2021, 09:51 PM
  #77  
Thread Starter
 
Wyoturbine's Avatar
 
Join Date: May 2014
Location: Platte City, Mo
Posts: 241
Received 22 Likes on 18 Posts
Default

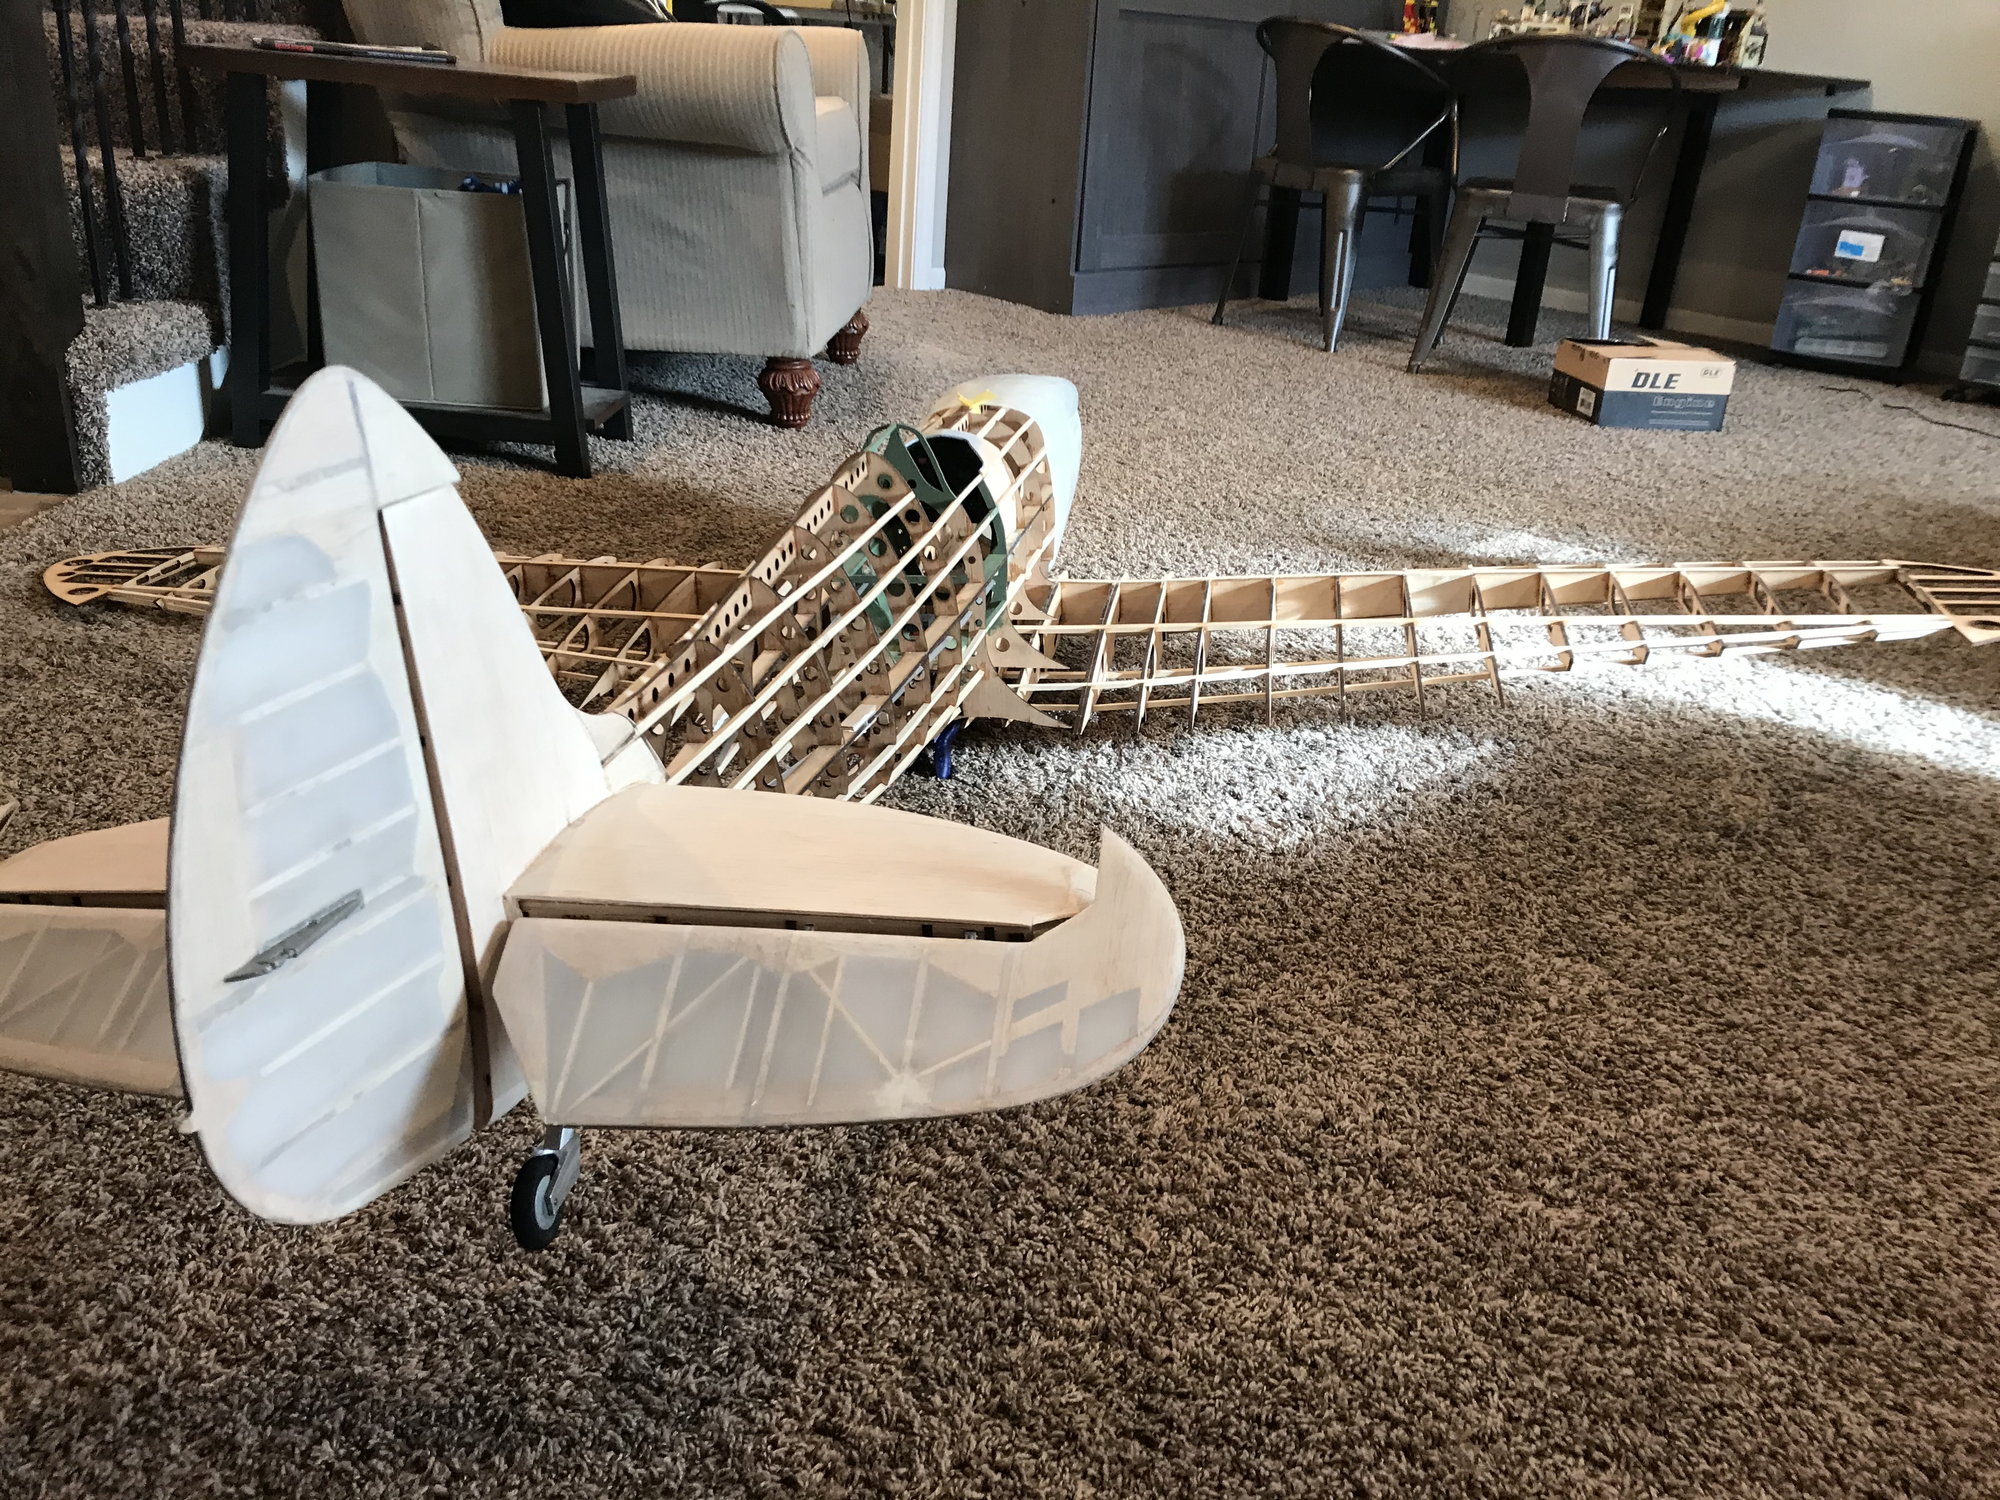
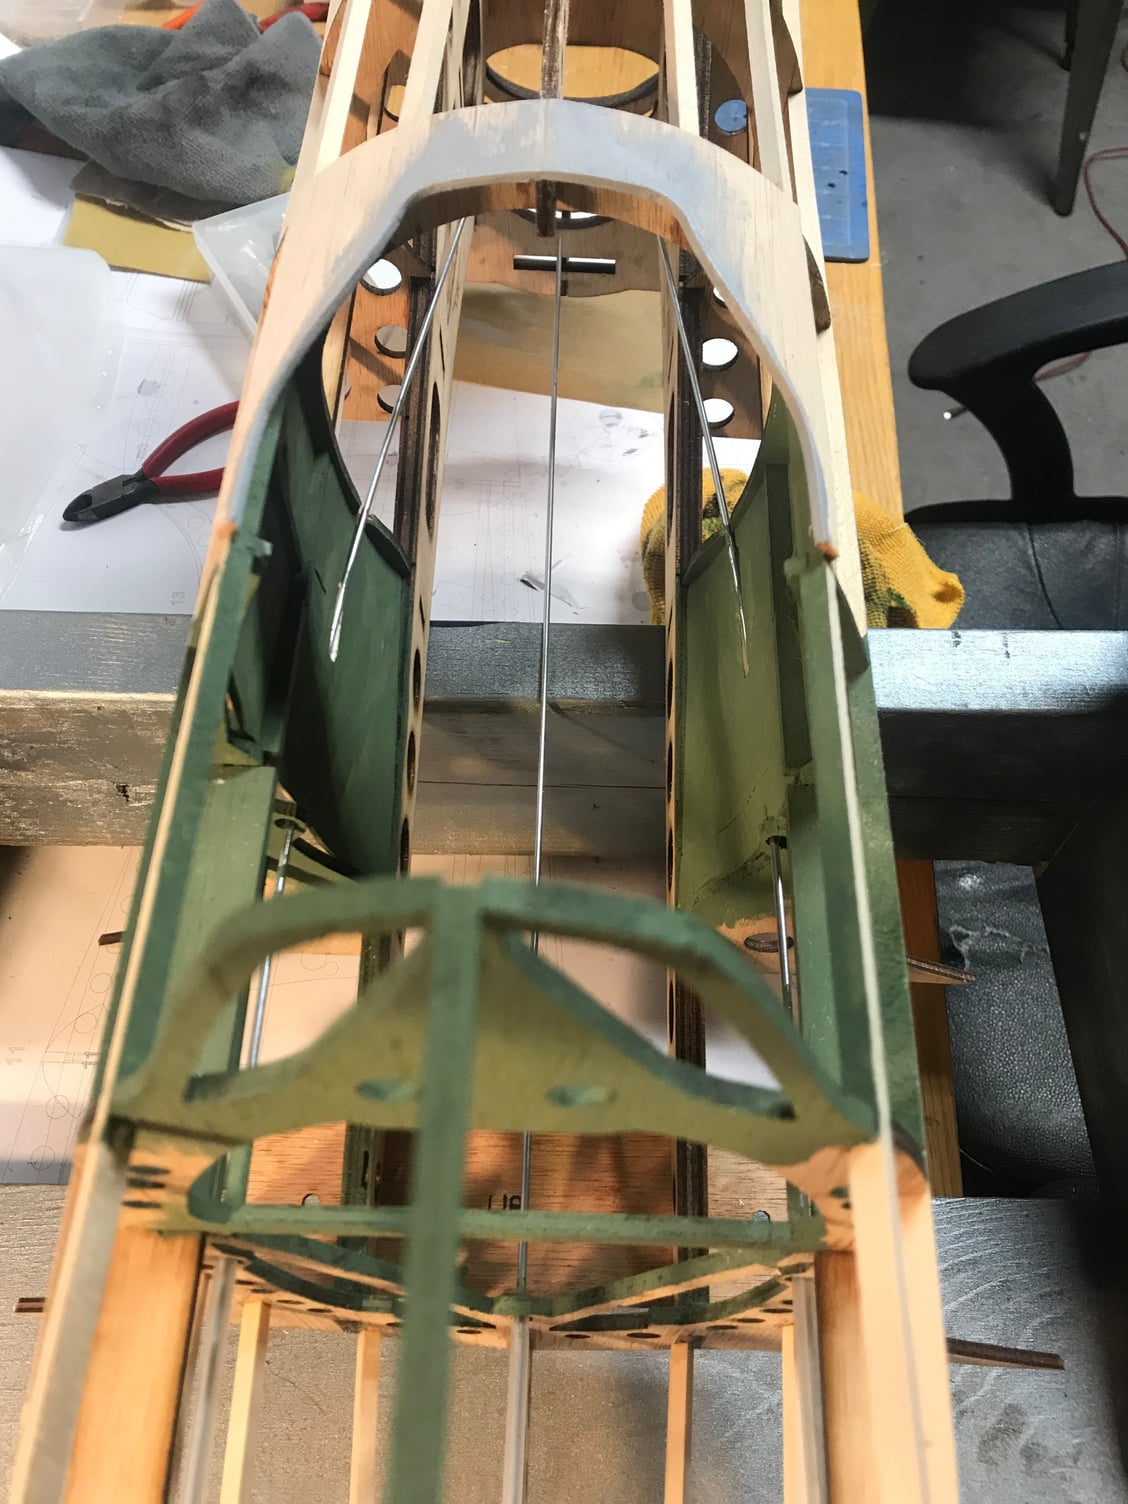
Before heading out to work this week I finished up a rough in of the rudder and elevators, I have some finish sanding to do next. Starting to map out guide-tubes for dual elevator, rudder and tail wheel servos. I’m going to box in the cockpit to make sure I save room for all this. I plan to make it as scale as possible so I think I need to map out the cockpit first I think


. Anyway here’s a few photos of the latest.
Old 01-16-2021, 11:25 AM
  #78  
My Feedback: (14)
 
radfordc's Avatar
 
Join Date: Apr 2005
Location: Lansing, KS
Posts: 1,598
Received 1 Like on 1 Post
Default

John, glad you found the correct spinner for your Spit. I am using a 3d printed spinner on my Zero. I printed it using ABS filament and so far it is holding up well on the DLE 55RA engine.
Old 01-16-2021, 11:33 AM
  #79  
Thread Starter
 
Wyoturbine's Avatar
 
Join Date: May 2014
Location: Platte City, Mo
Posts: 241
Received 22 Likes on 18 Posts
Default

Originally Posted by radfordc
John, glad you found the correct spinner for your Spit. I am using a 3d printed spinner on my Zero. I printed it using ABS filament and so far it is holding up well on the DLE 55RA engine.
Looks great Charlie! Lookin forward to getting up in formation with you this spring!
Old 01-16-2021, 11:43 AM
  #80  
My Feedback: (1)
 
Lifer's Avatar
 
Join Date: Aug 2008
Location: Kansas City, MO
Posts: 4,532
Likes: 0
Received 30 Likes on 29 Posts
Default

Radfordc,

What 3-blade prop are you using and what diameter and pitch?
Old 01-16-2021, 12:23 PM
  #81  
My Feedback: (14)
 
radfordc's Avatar
 
Join Date: Apr 2005
Location: Lansing, KS
Posts: 1,598
Received 1 Like on 1 Post
Default

It's a 20x10 wood but I can't remember for sure the brand....maybe Xoar?
Old 01-17-2021, 06:15 PM
  #82  
Thread Starter
 
Wyoturbine's Avatar
 
Join Date: May 2014
Location: Platte City, Mo
Posts: 241
Received 22 Likes on 18 Posts
Default

The spinner arrived today! Just what I was looking for.


Old 01-20-2021, 09:30 AM
  #83  
Thread Starter
 
Wyoturbine's Avatar
 
Join Date: May 2014
Location: Platte City, Mo
Posts: 241
Received 22 Likes on 18 Posts
Default

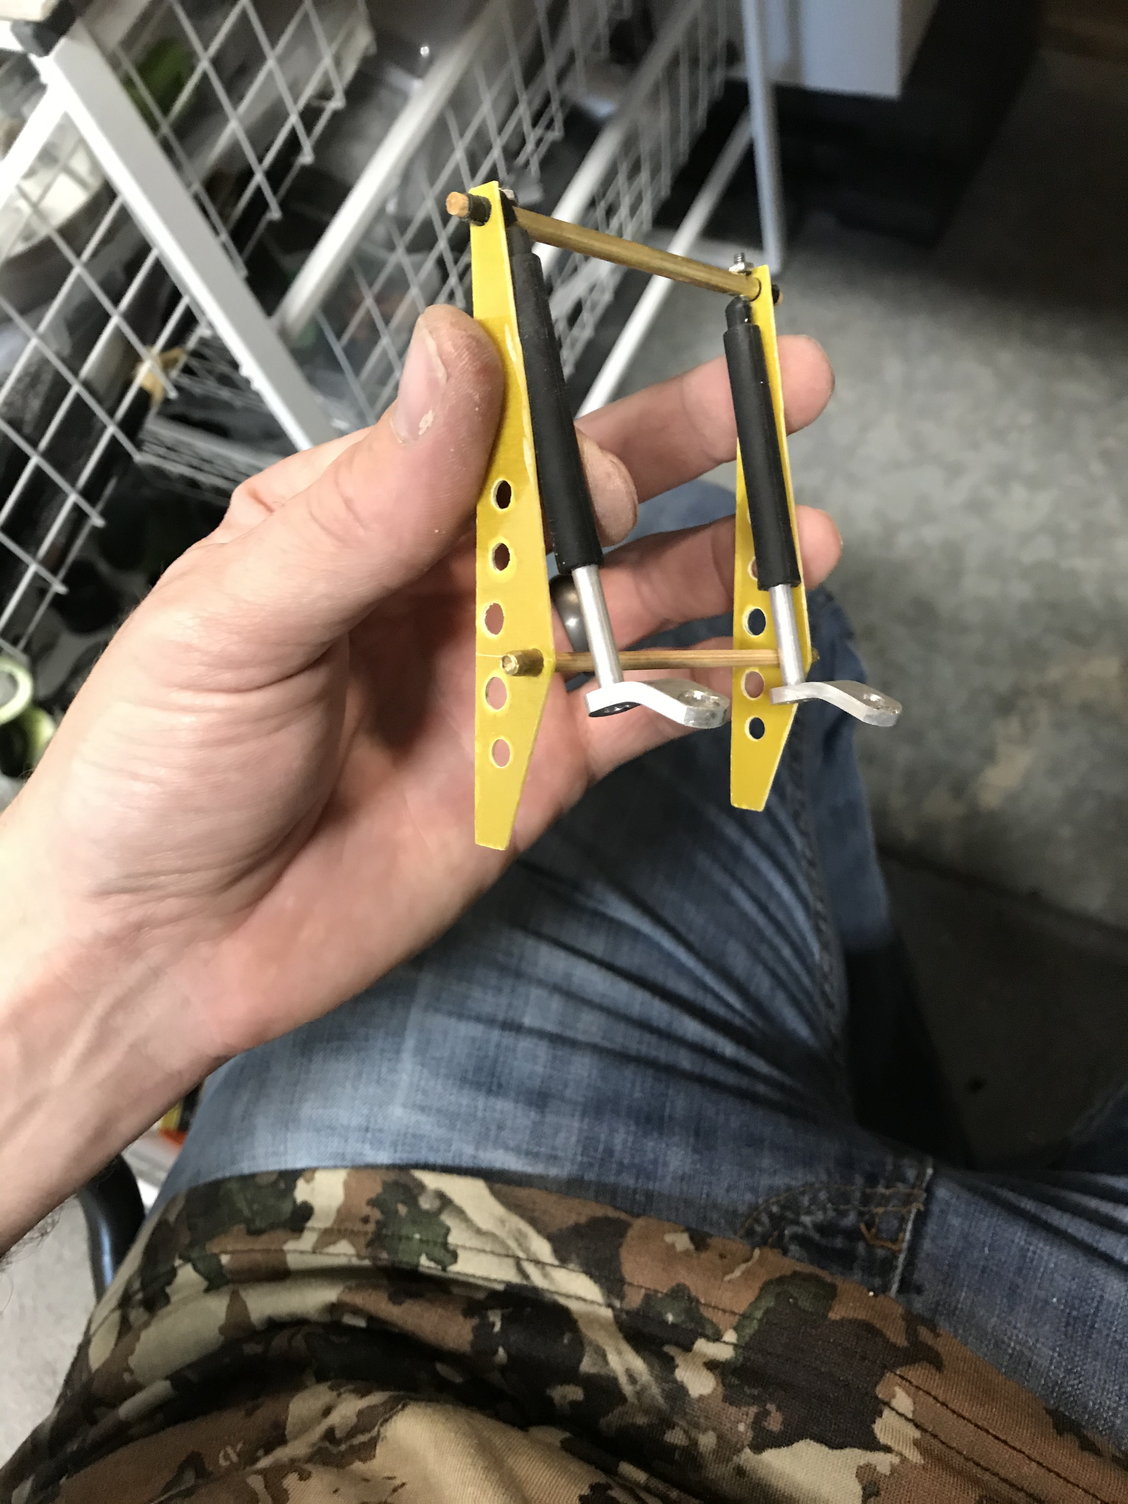
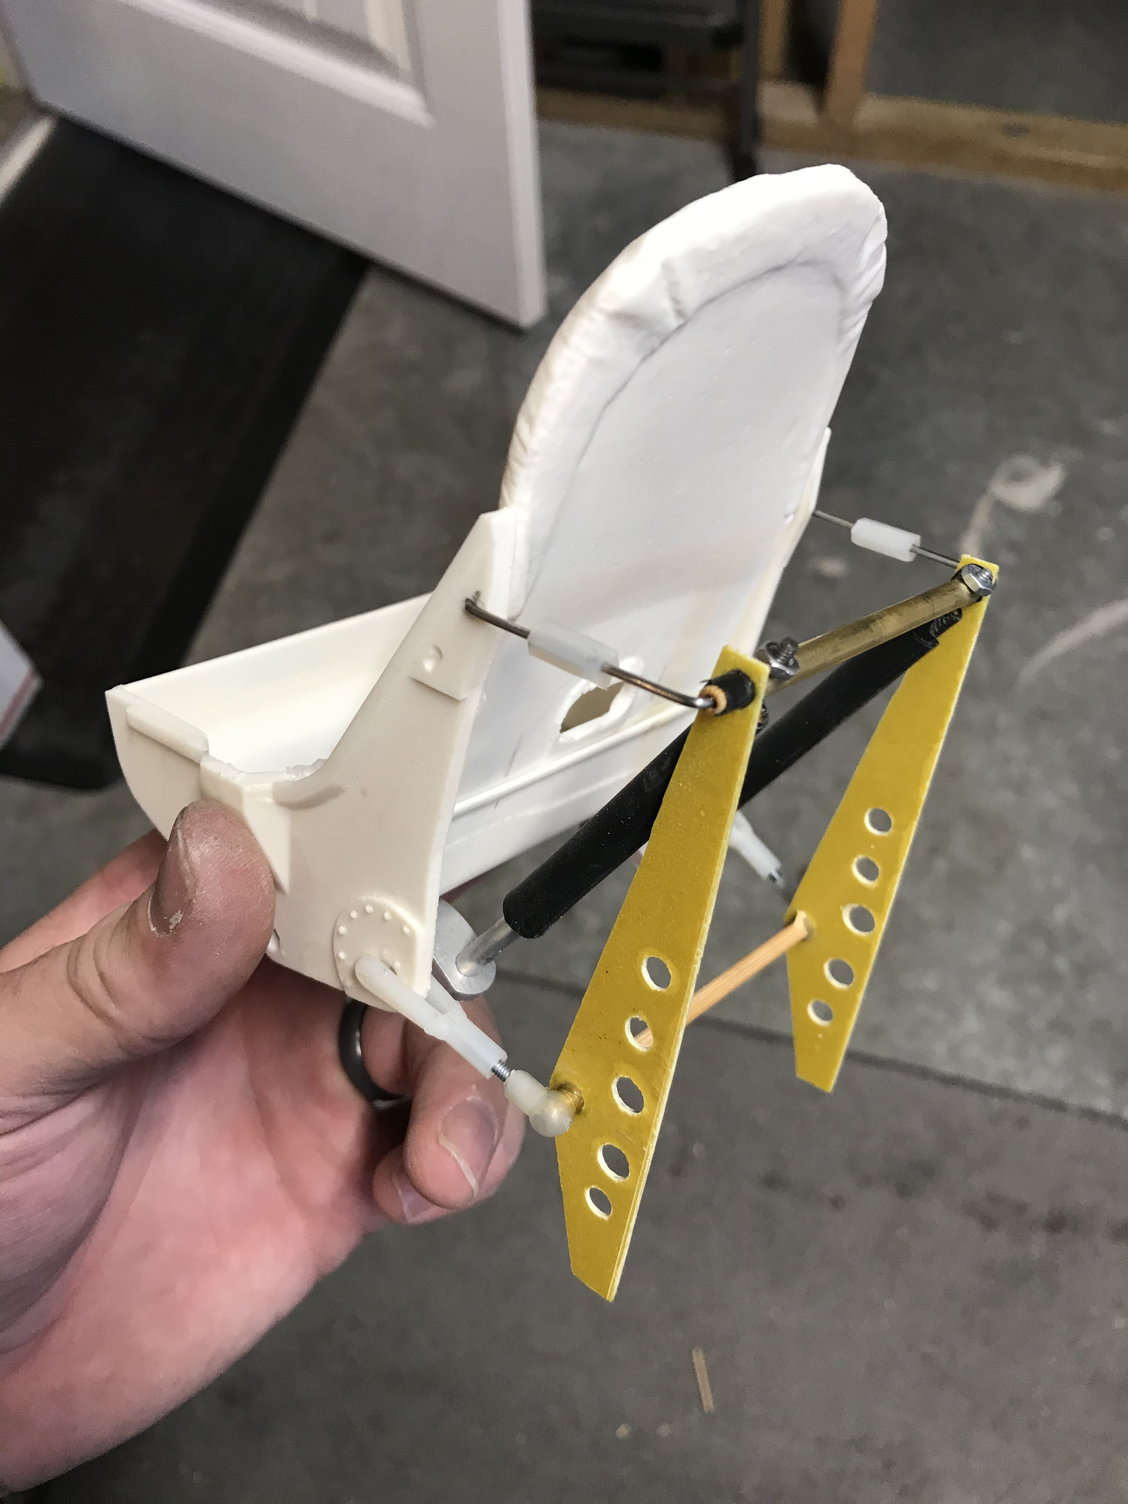
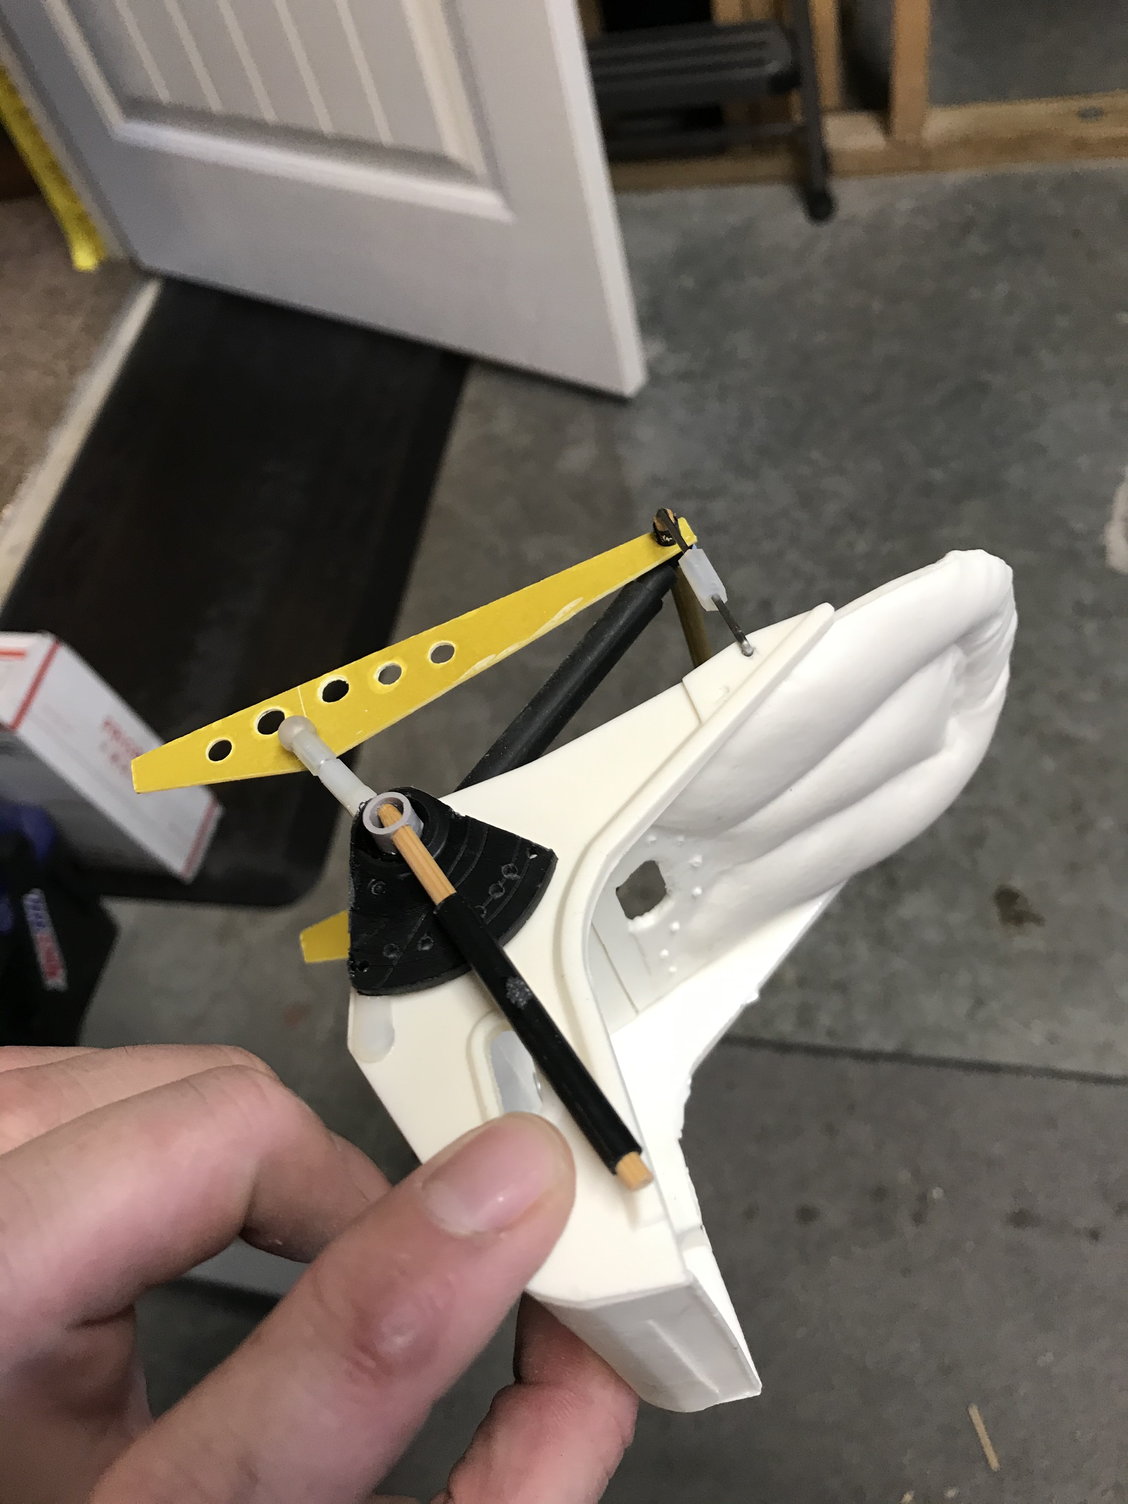
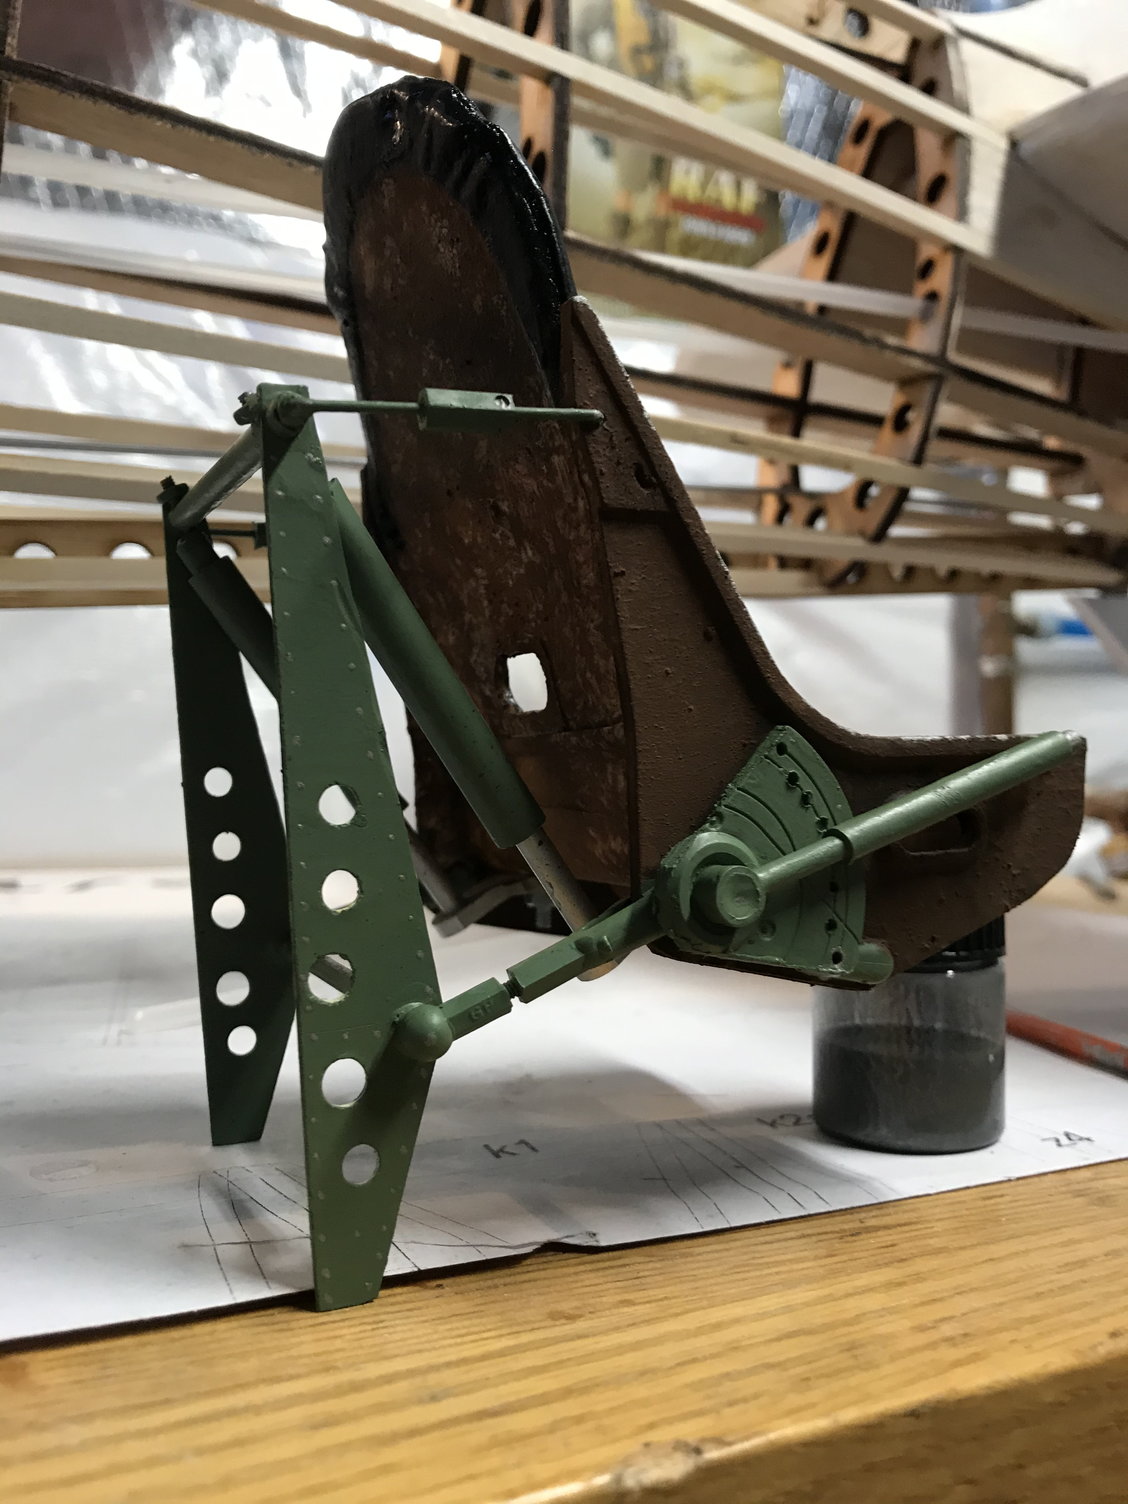
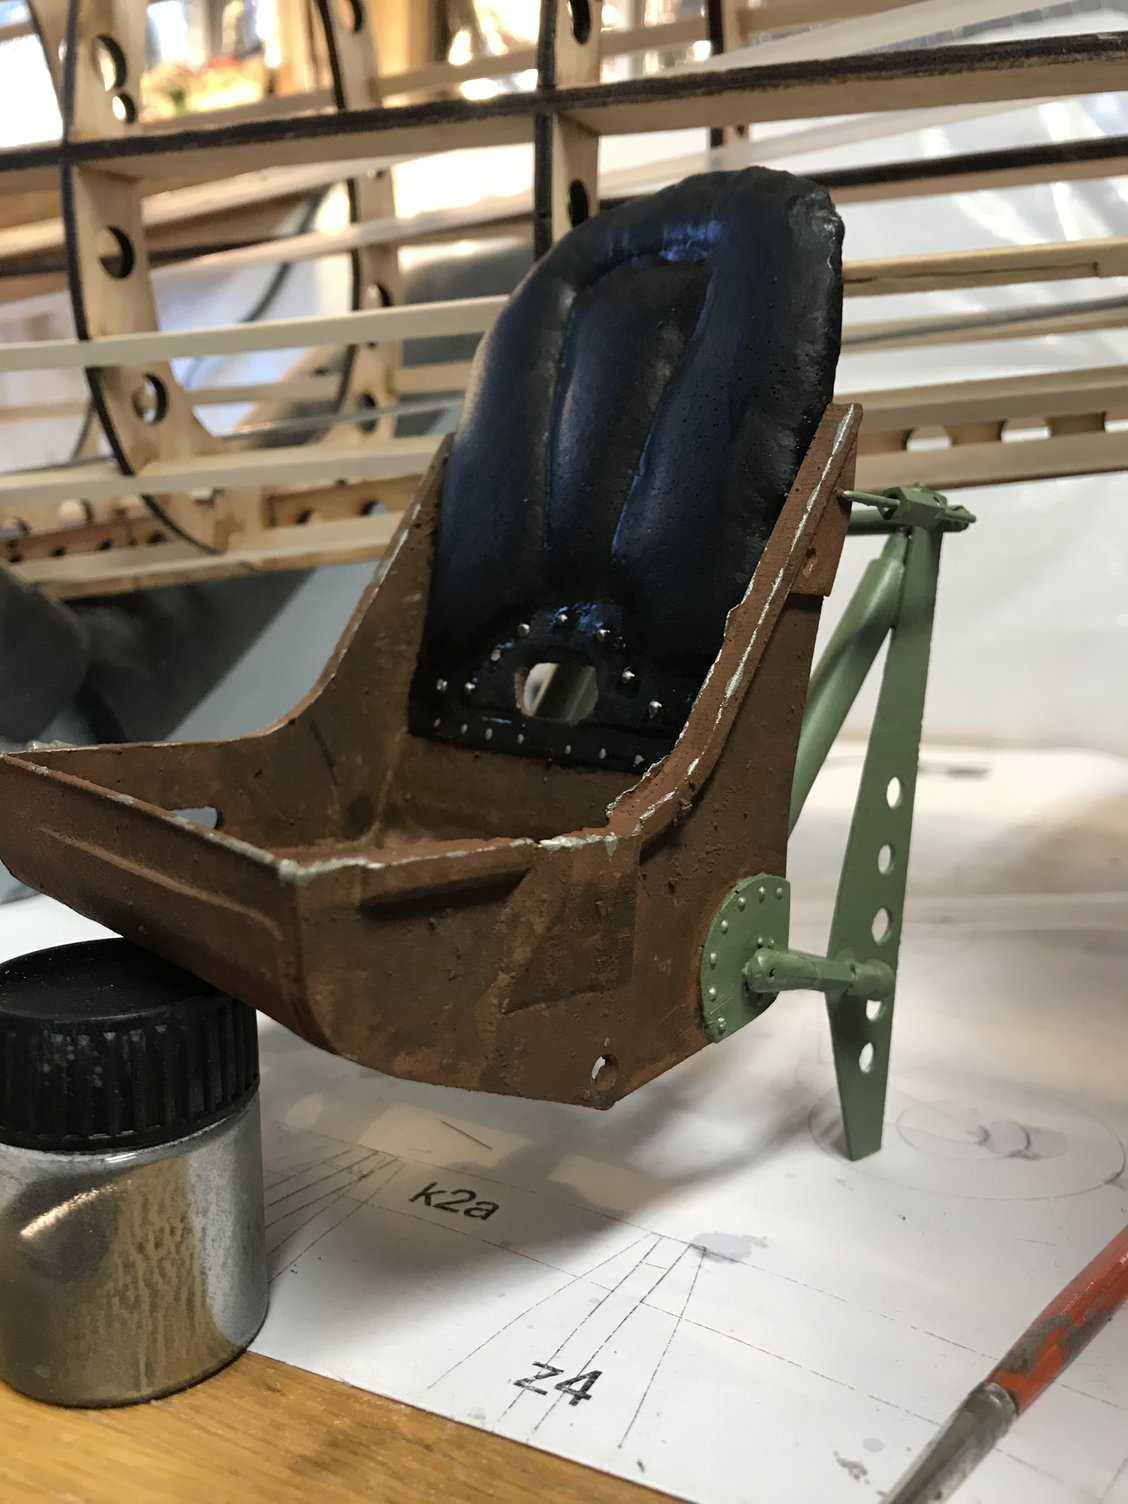
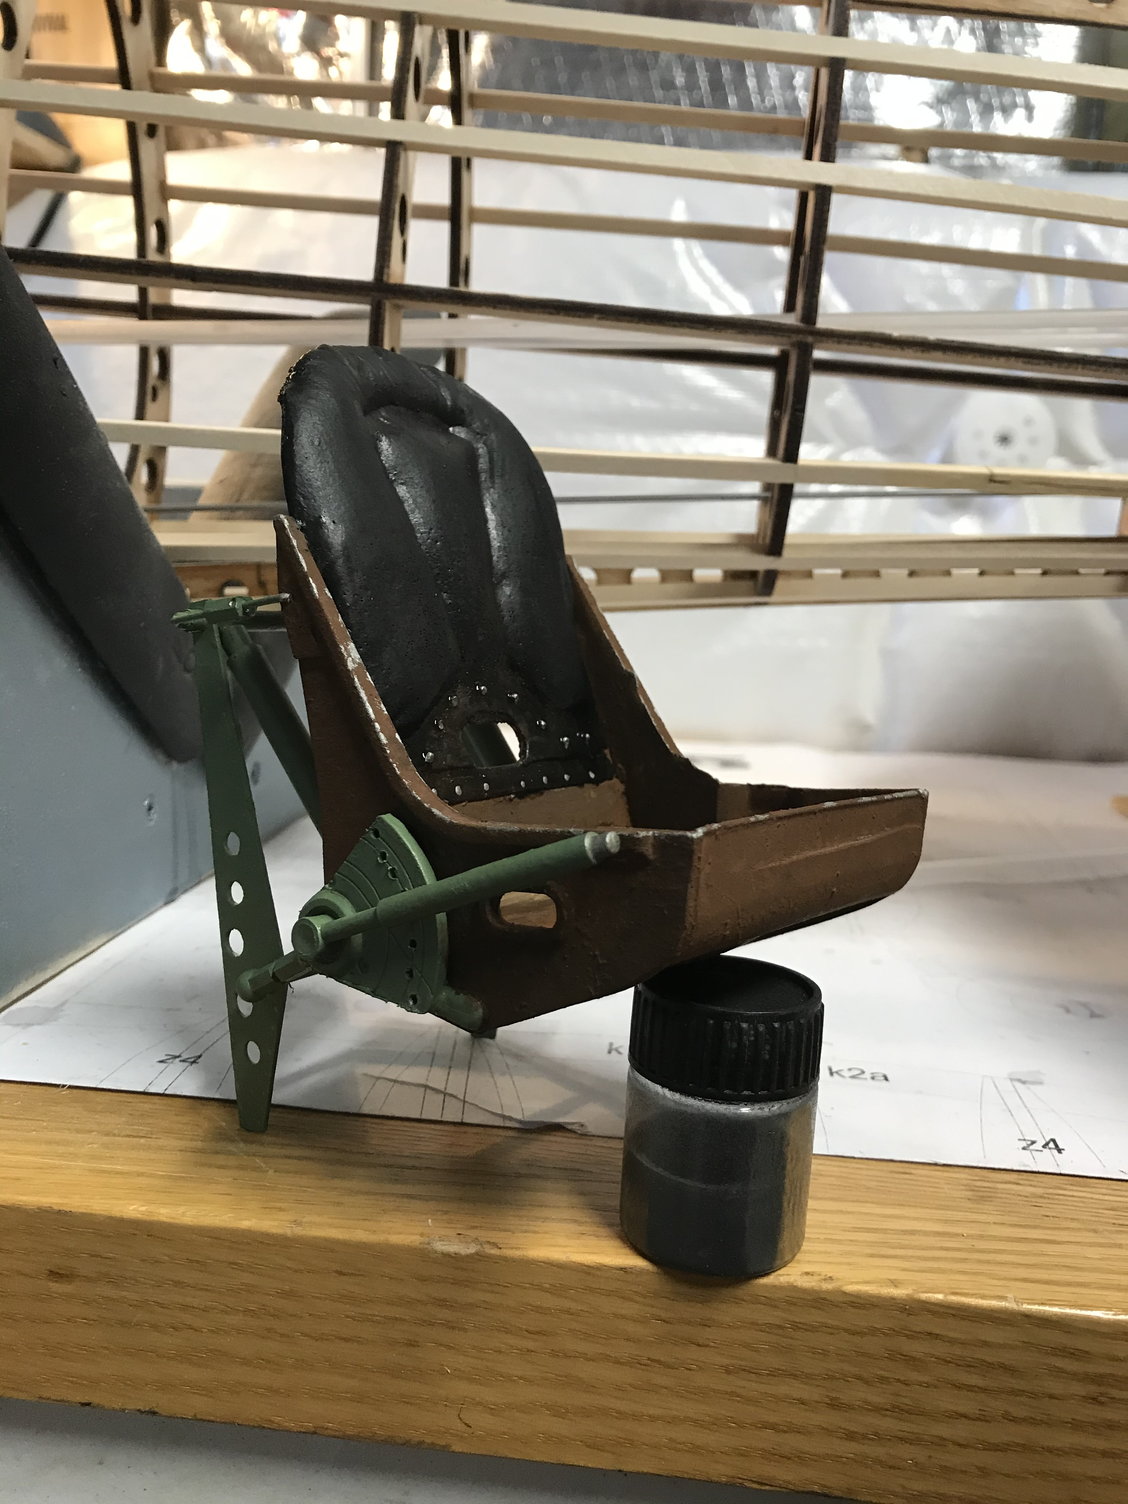
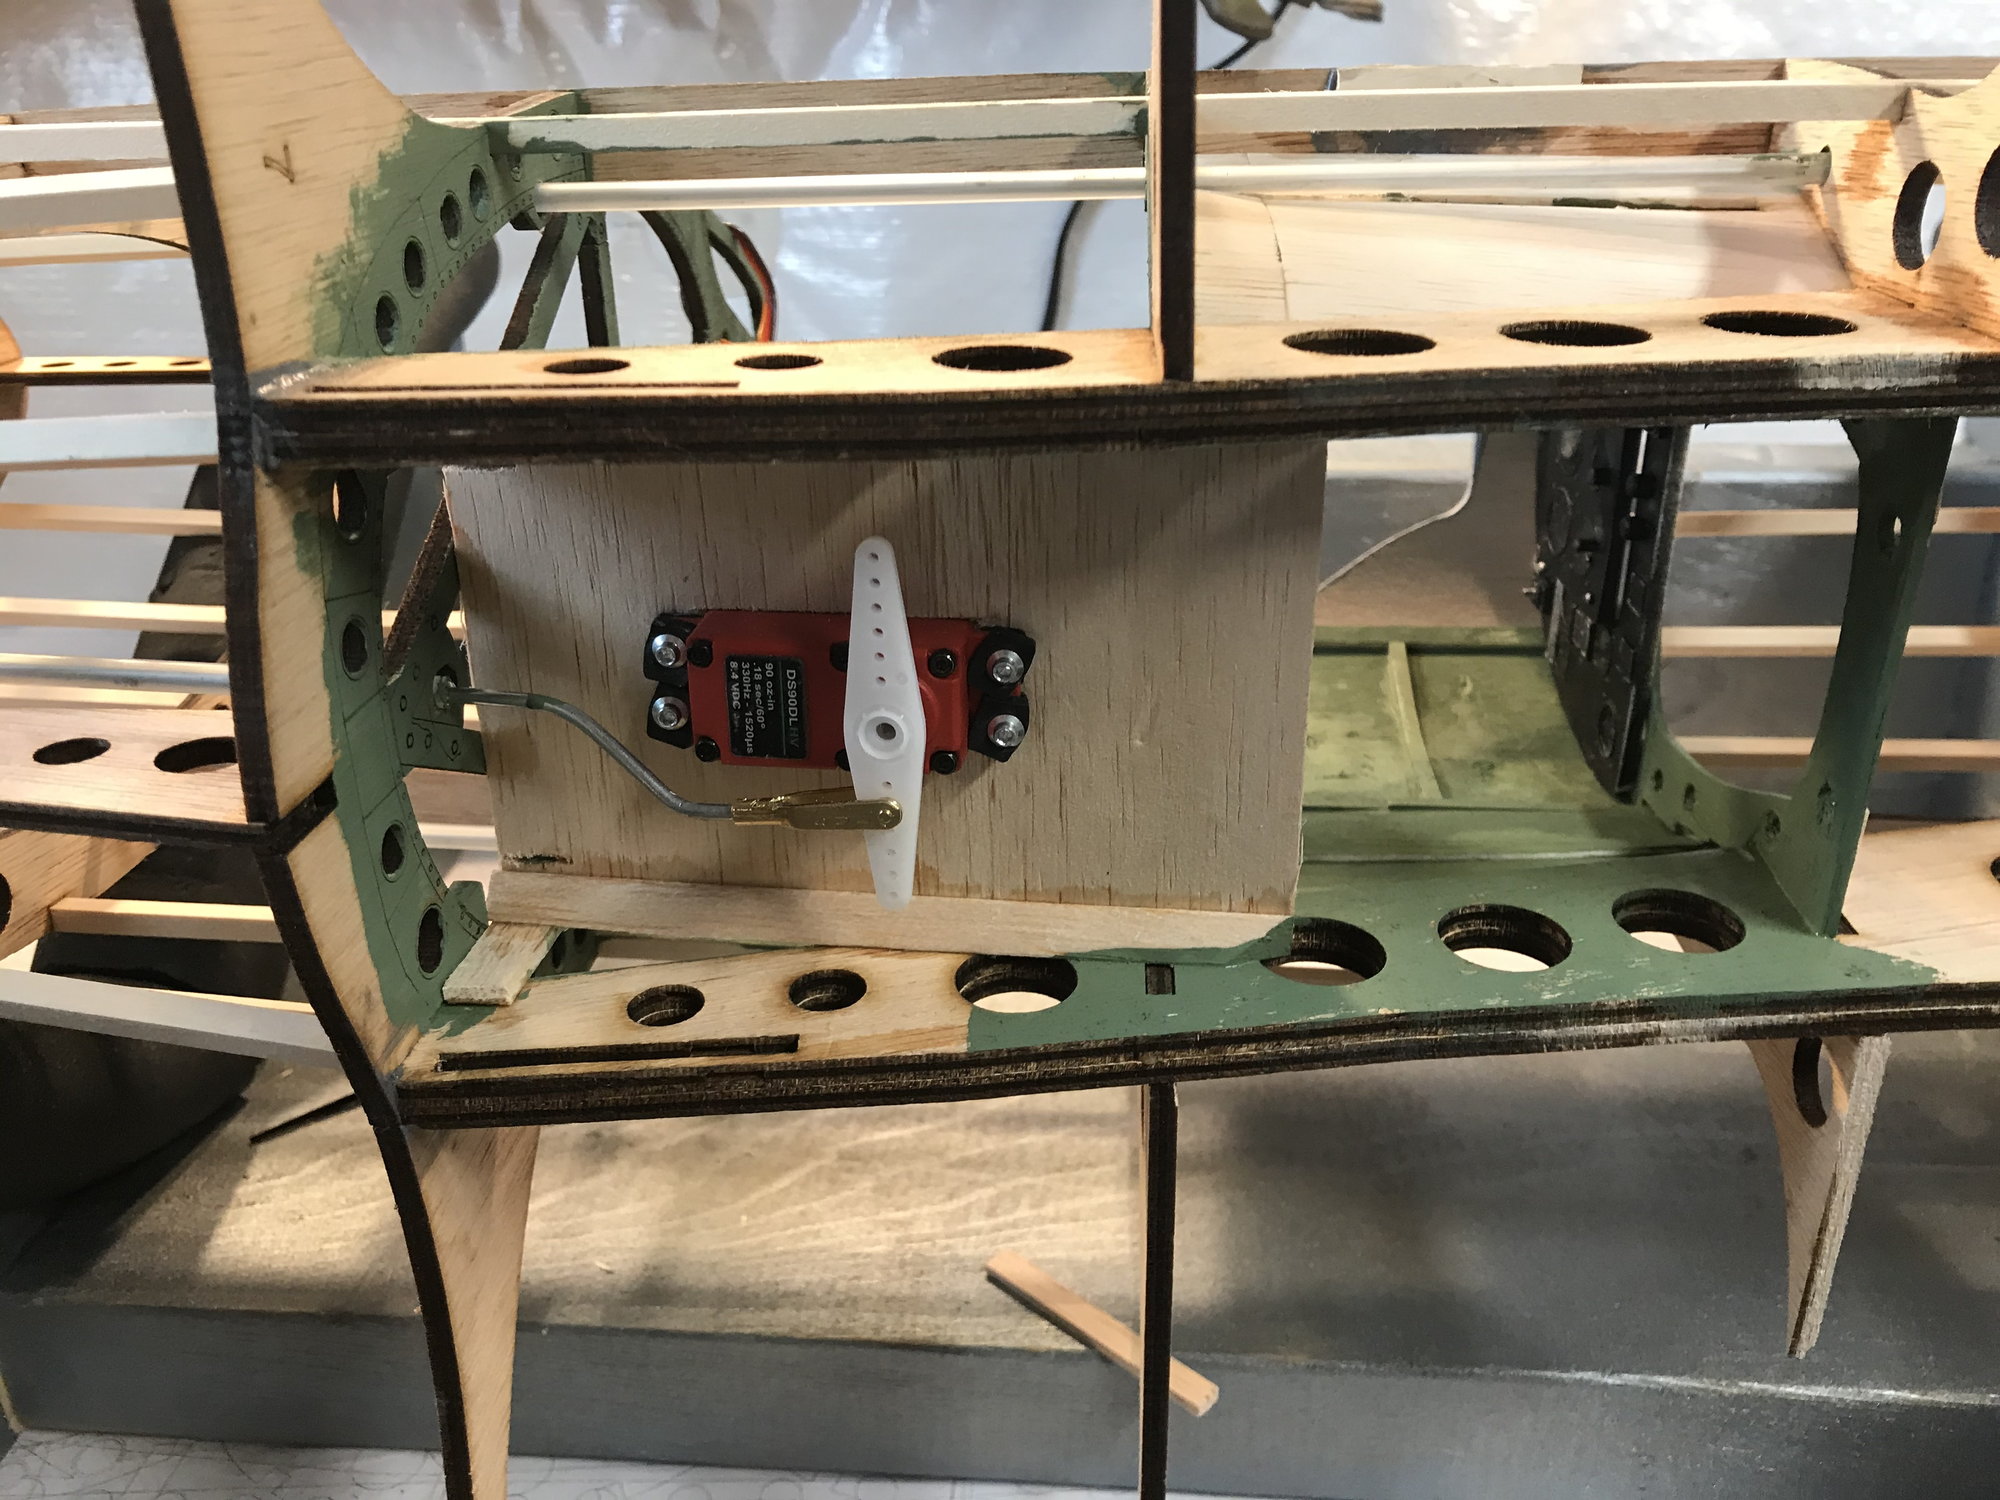
I began work on running pushrods and mapping out where I want servos to be installed. In doing so, I decided to get the cockpit fitted so I can work all them around it. I was going to just start with the cockpit itself but I was sidetracked working on the pilot seat. I grabbed the actual seat and seat pan from Jiri at JPWarbirds, then decided to mod up the suspension with spare parts and g10 I have around.


The following users liked this post:
raaf (01-20-2021)
Old 01-20-2021, 10:20 AM
  #84  
My Feedback: (14)
 
radfordc's Avatar
 
Join Date: Apr 2005
Location: Lansing, KS
Posts: 1,598
Received 1 Like on 1 Post
Default

Darn...now I feel even worse about my pitiful abilities! John, I bow to you in awe! This plane is going to be unbelievable.
Old 01-20-2021, 10:26 AM
  #85  
Thread Starter
 
Wyoturbine's Avatar
 
Join Date: May 2014
Location: Platte City, Mo
Posts: 241
Received 22 Likes on 18 Posts
Default

Haha Thanks Charlie, it’s not perfect by any means but it covers the highlights of the seat mechanism, and I’m all for finding uses for spare parts.
Old 01-21-2021, 06:48 AM
  #86  
Member
 
Join Date: Apr 2020
Posts: 45
Likes: 0
Received 2 Likes on 2 Posts
Default

I noticed that the spinner has not been cut for the prop. Are you doing that yourself?
Old 01-21-2021, 07:16 AM
  #87  
Thread Starter
 
Wyoturbine's Avatar
 
Join Date: May 2014
Location: Platte City, Mo
Posts: 241
Received 22 Likes on 18 Posts
Default

[QUOTE=nswords;12658502]I noticed that the spinner has not been cut for the prop. Are you doing that yourself?[.

It has not, I’ve got a retired machinist contact that will cut it. He’s done others for a friend of mine.
Old 01-26-2021, 04:14 PM
  #88  
Thread Starter
 
Wyoturbine's Avatar
 
Join Date: May 2014
Location: Platte City, Mo
Posts: 241
Received 22 Likes on 18 Posts
Default

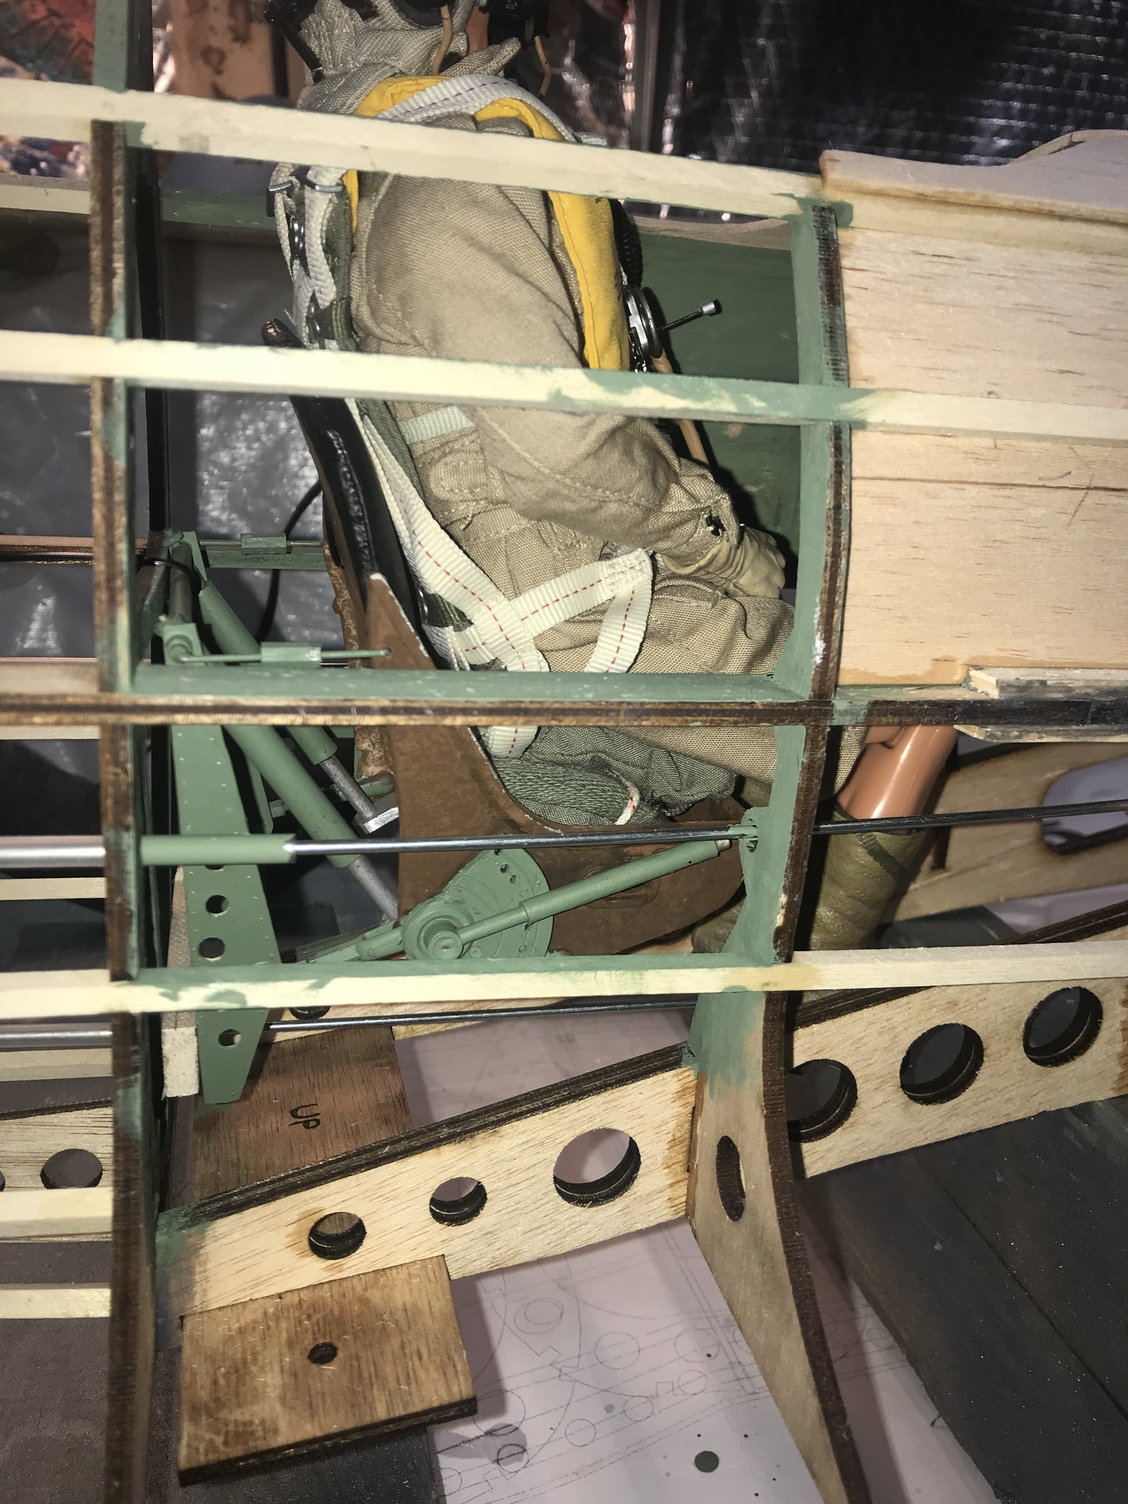
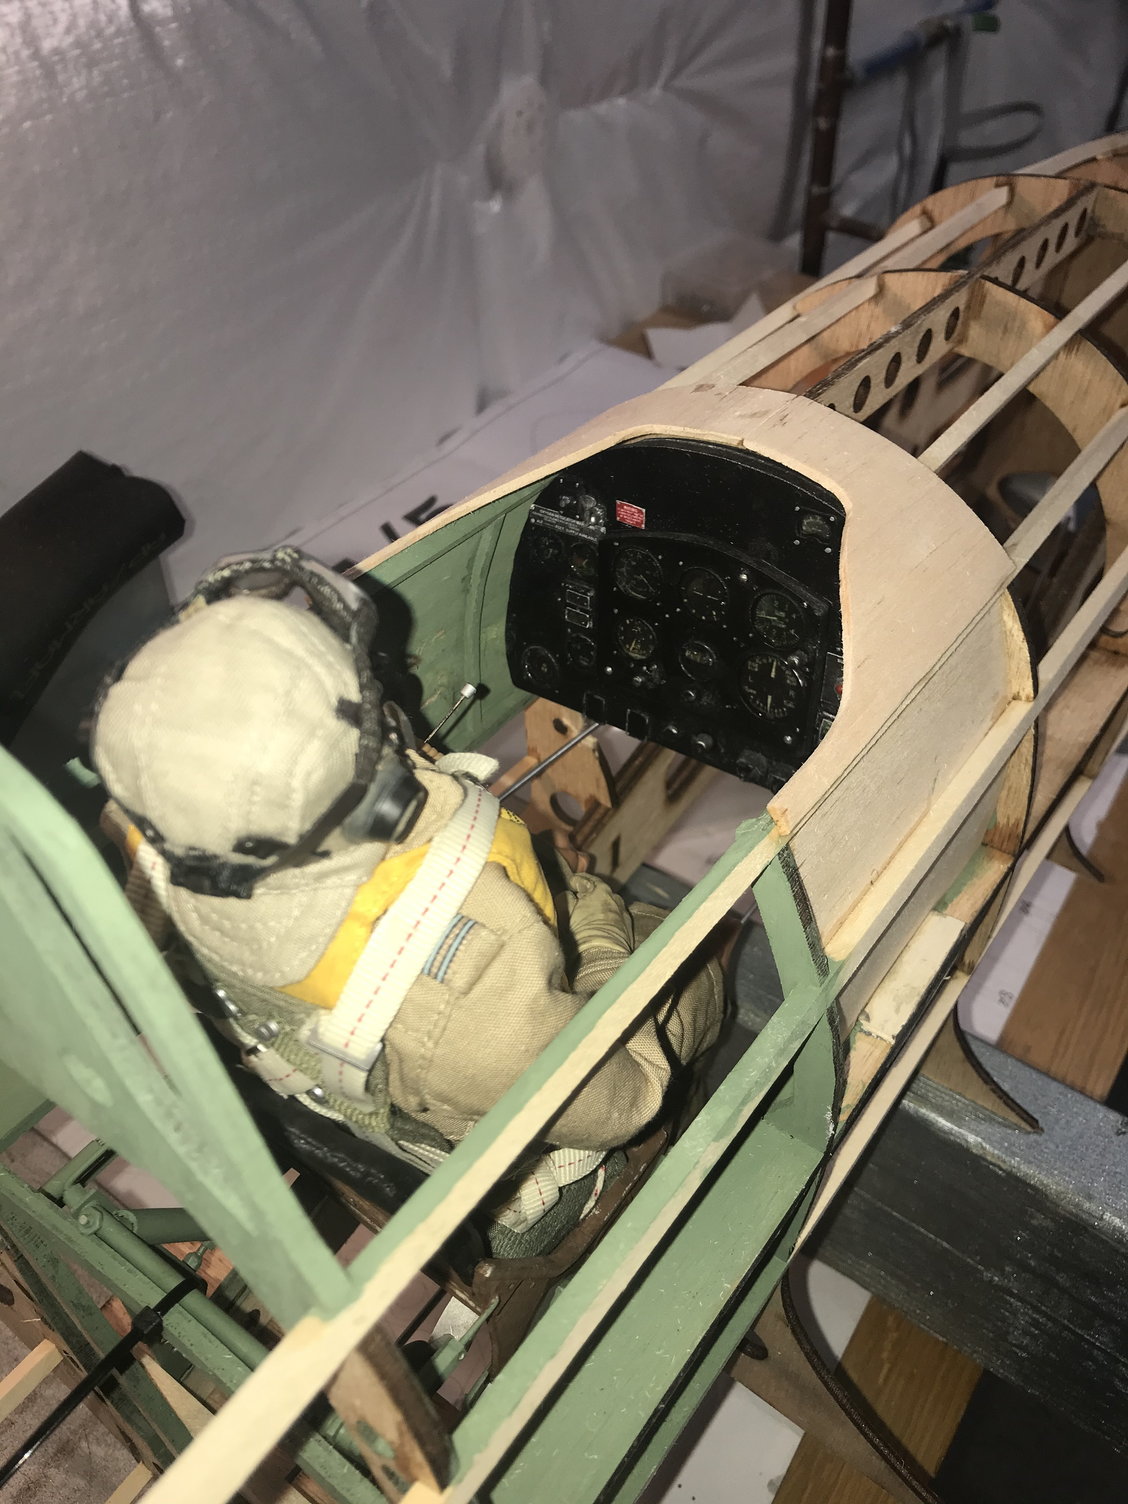
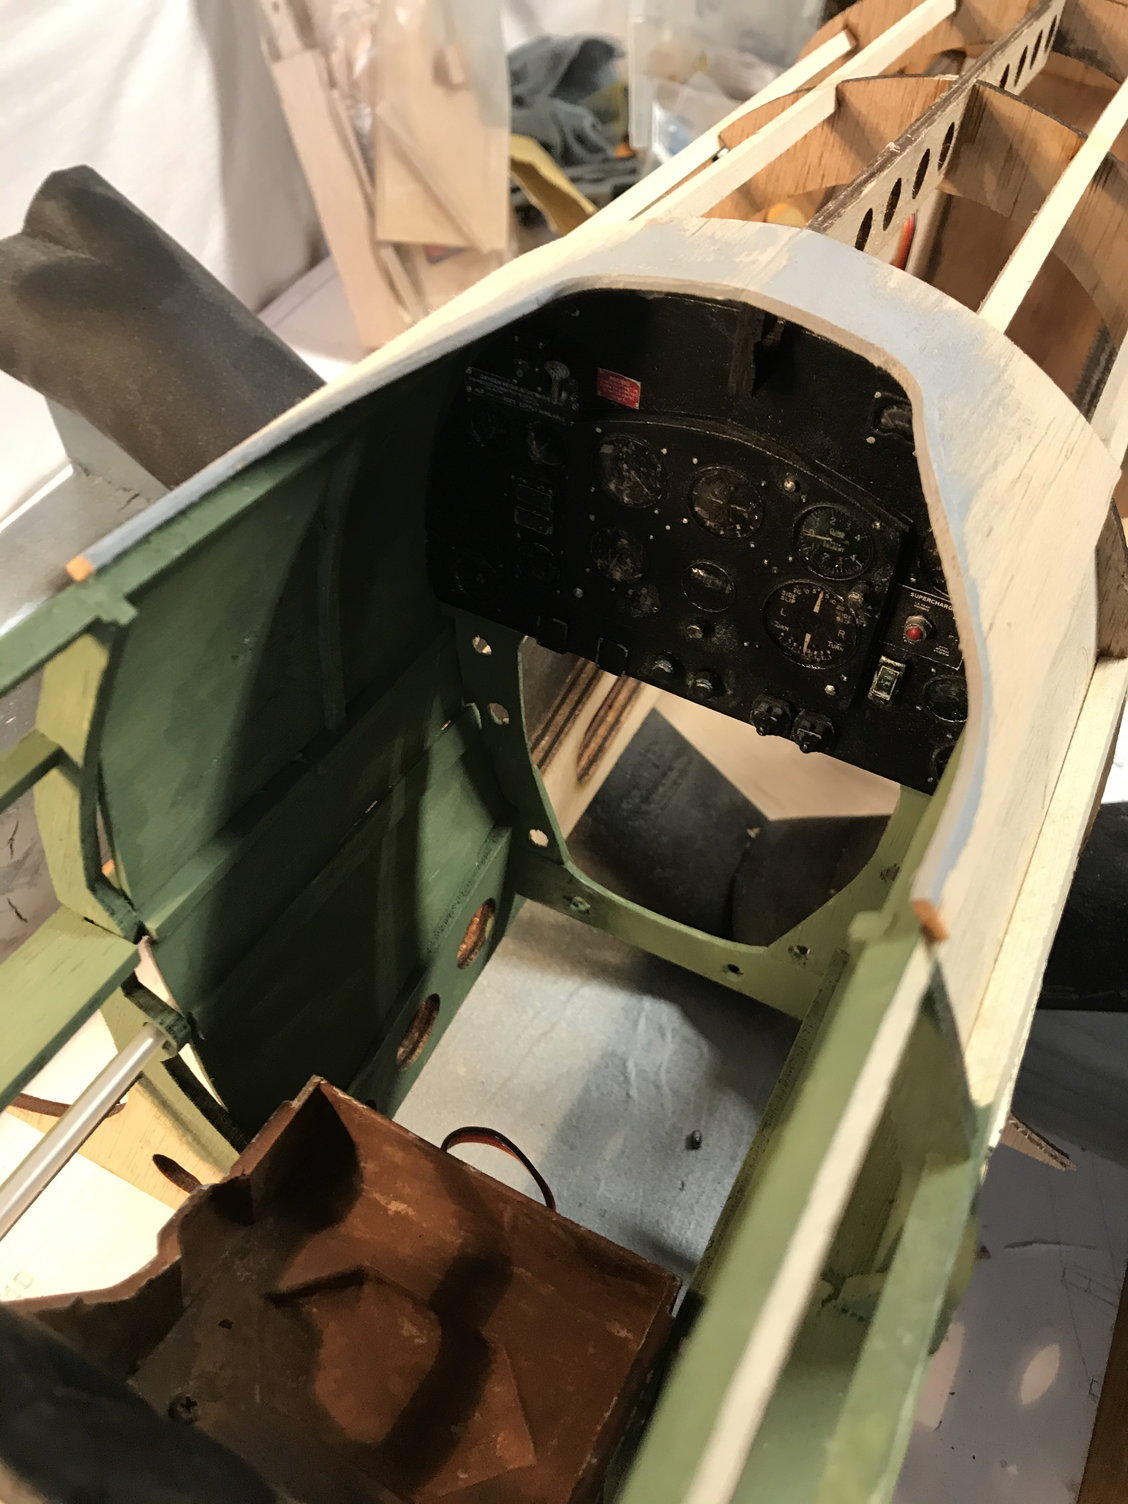
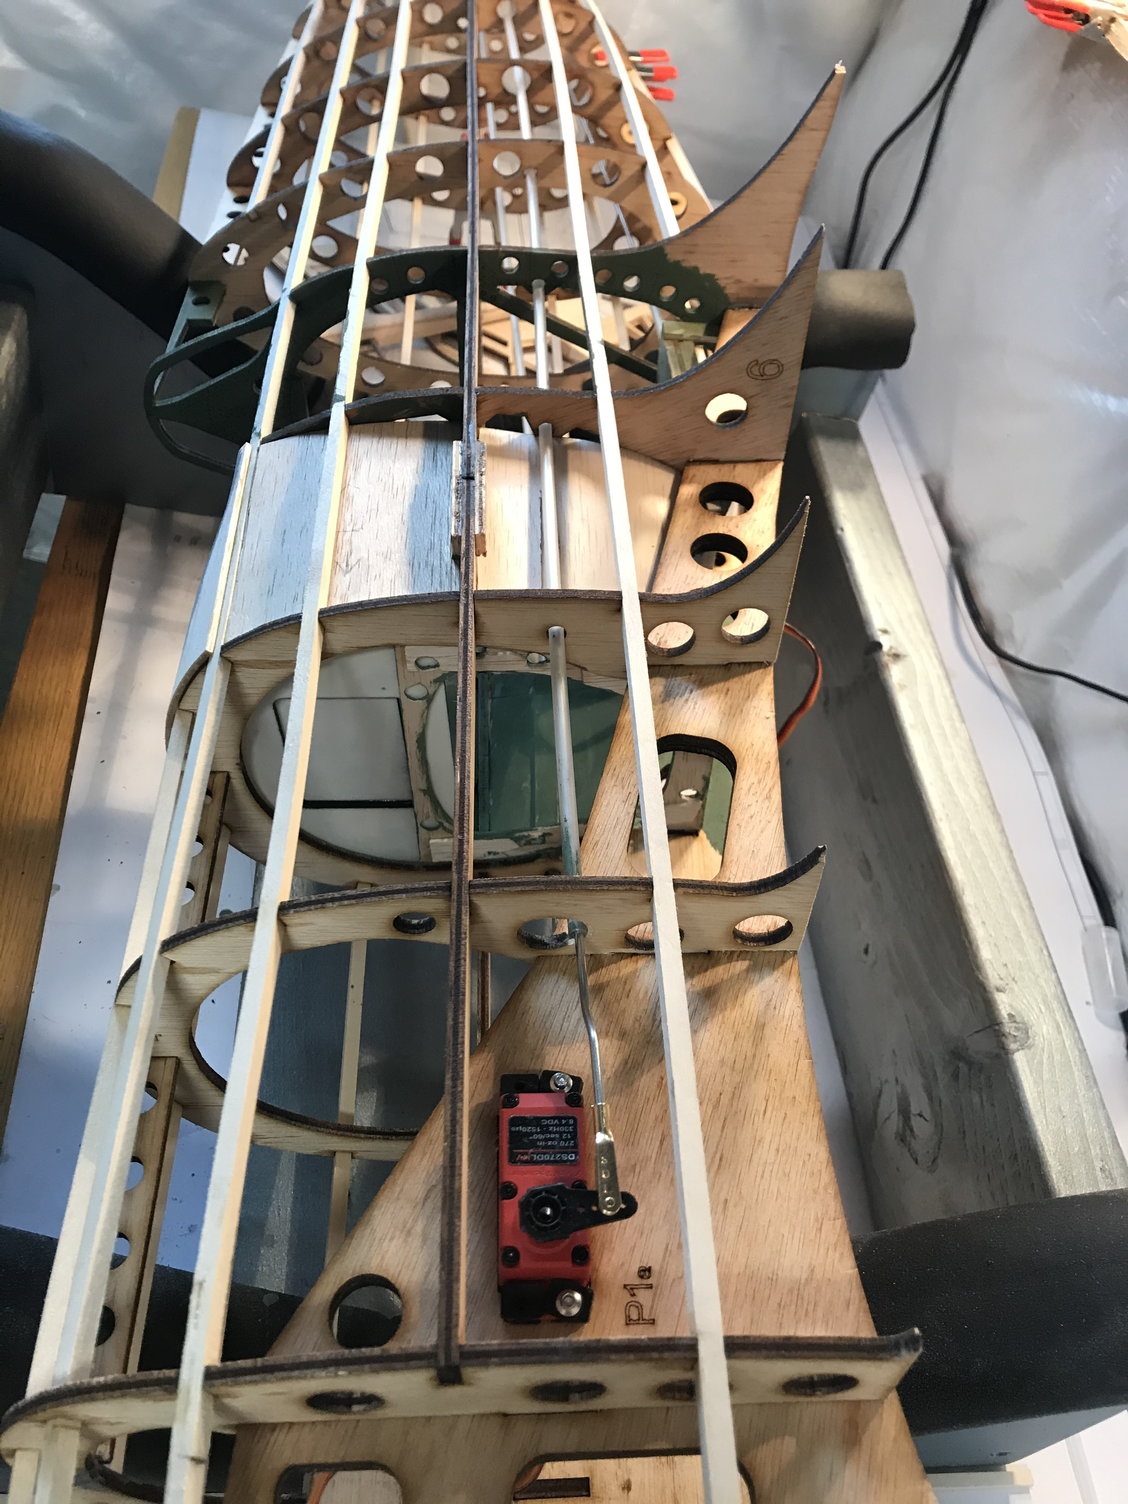
A bit more progress on the cockpit today. I was able to route the elevator pushrods around and through the forward sidewalls of the cockpit, I built these from balsa sheeting. I fitted the panel and dropped the pilot in so I could see where I’ll mount the seat. I’ll pull all this out and hold off on details until after I’ve glassed the fuse. Looks like the rudder/tailwheel servo will mount nicely under the seat pan. I’ll get the rear sidewalls and floor in next and once my sheeting arrives I’ll be able to begin skinning the fuse.


Old 01-26-2021, 08:28 PM
  #89  
My Feedback: (6)
 
FlyerInOKC's Avatar
 
Join Date: Nov 2004
Location: Oklahoma City, OK
Posts: 14,206
Received 278 Likes on 242 Posts
Default

Nice work!
Old 01-27-2021, 11:06 AM
  #90  
Member
 
Join Date: Apr 2020
Posts: 45
Likes: 0
Received 2 Likes on 2 Posts
Default

How is the fit on all of the laser cut pieces? They look good in the pictures.
Old 01-27-2021, 11:24 AM
  #91  
Thread Starter
 
Wyoturbine's Avatar
 
Join Date: May 2014
Location: Platte City, Mo
Posts: 241
Received 22 Likes on 18 Posts
Default

Originally Posted by nswords
How is the fit on all of the laser cut pieces? They look good in the pictures.
The fit is very good, I had to open/widen one or two stringer slots a mm or so but to give you an idea of how well everything fit, go back up to one of the very first fuselage photos I posted, you’ll see it’s framed completely minus stringers and I hadn’t laid a drop of glue yet. It’s a great design, and seems to be very strong.
Old 01-30-2021, 05:31 AM
  #92  
Thread Starter
 
Wyoturbine's Avatar
 
Join Date: May 2014
Location: Platte City, Mo
Posts: 241
Received 22 Likes on 18 Posts
Default

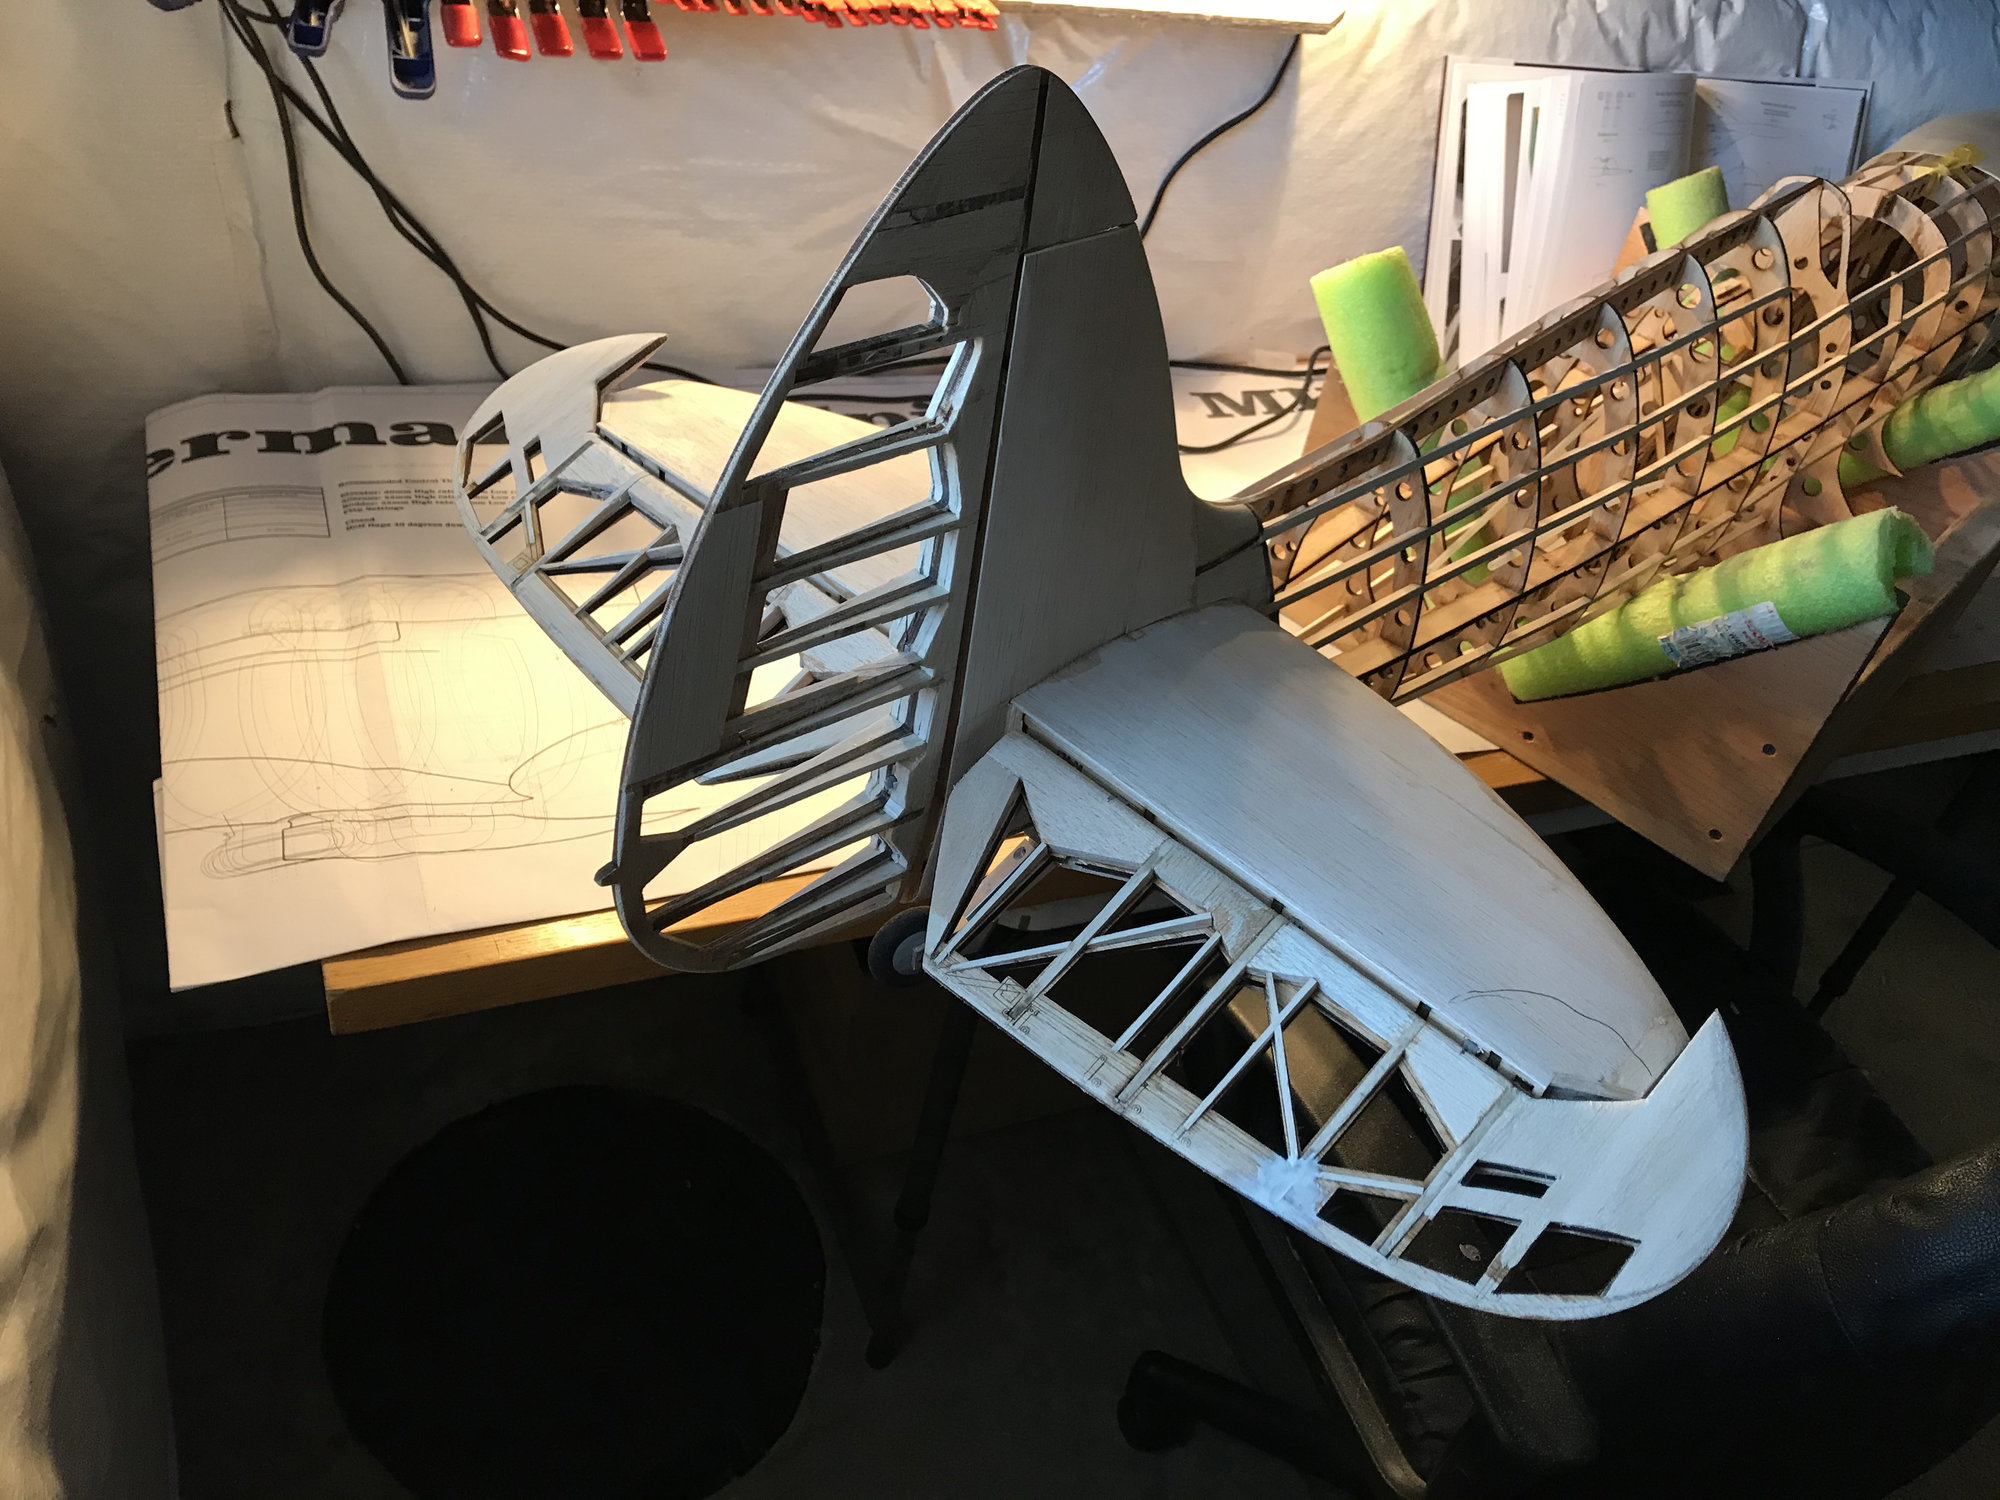
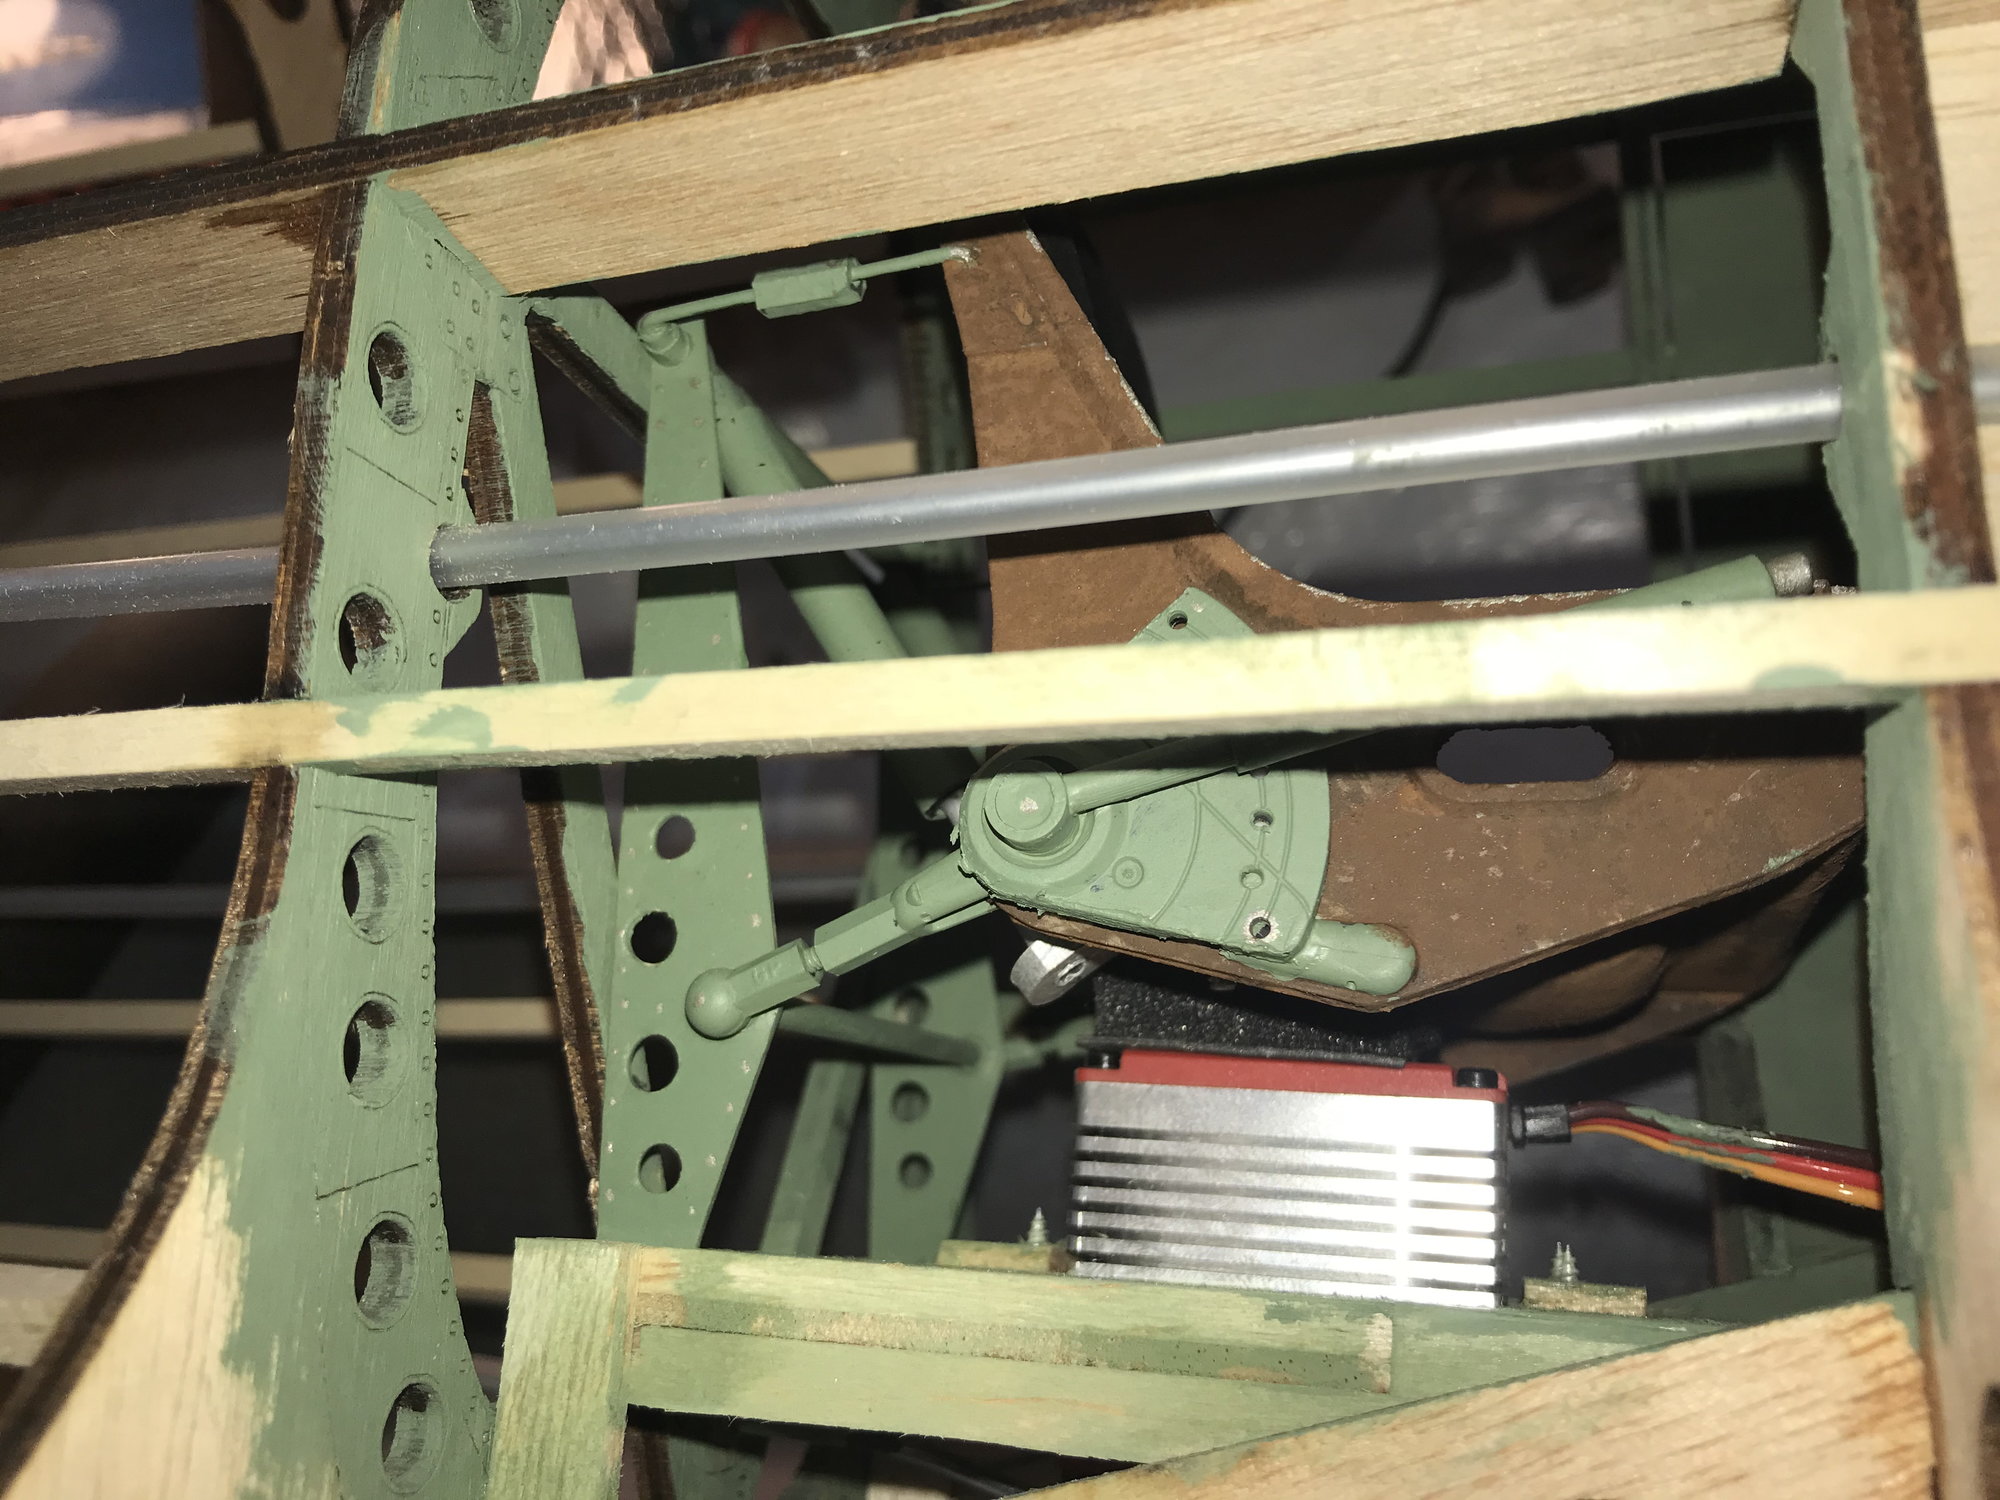
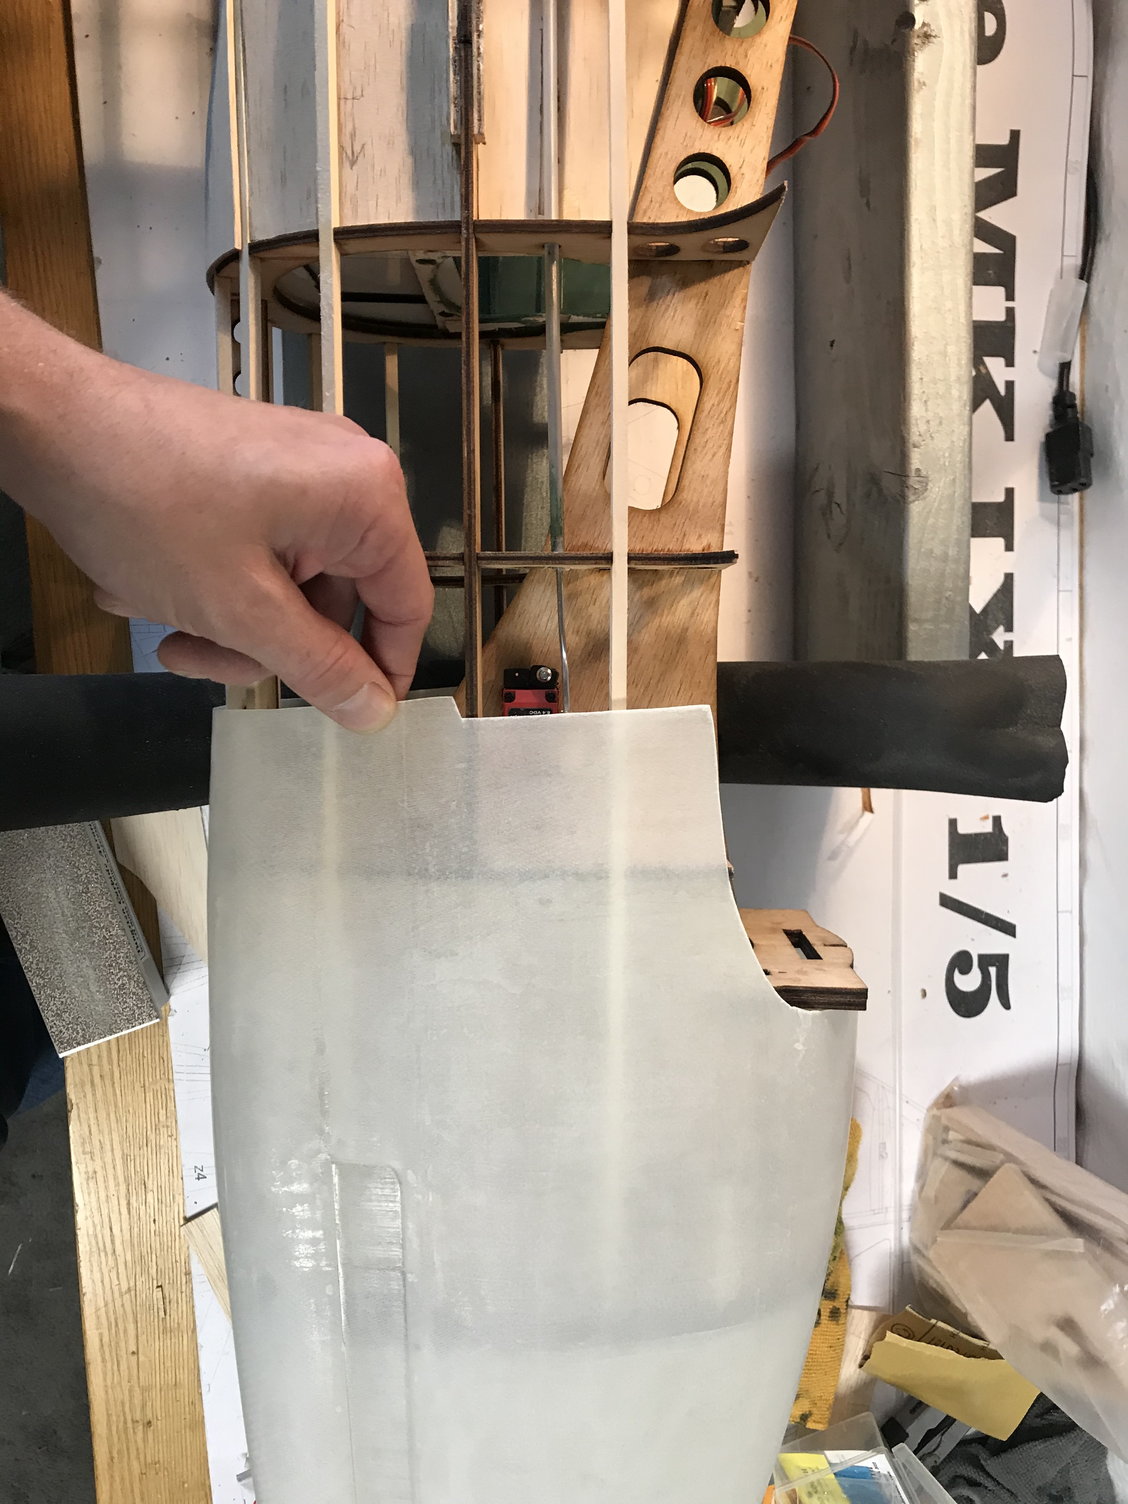
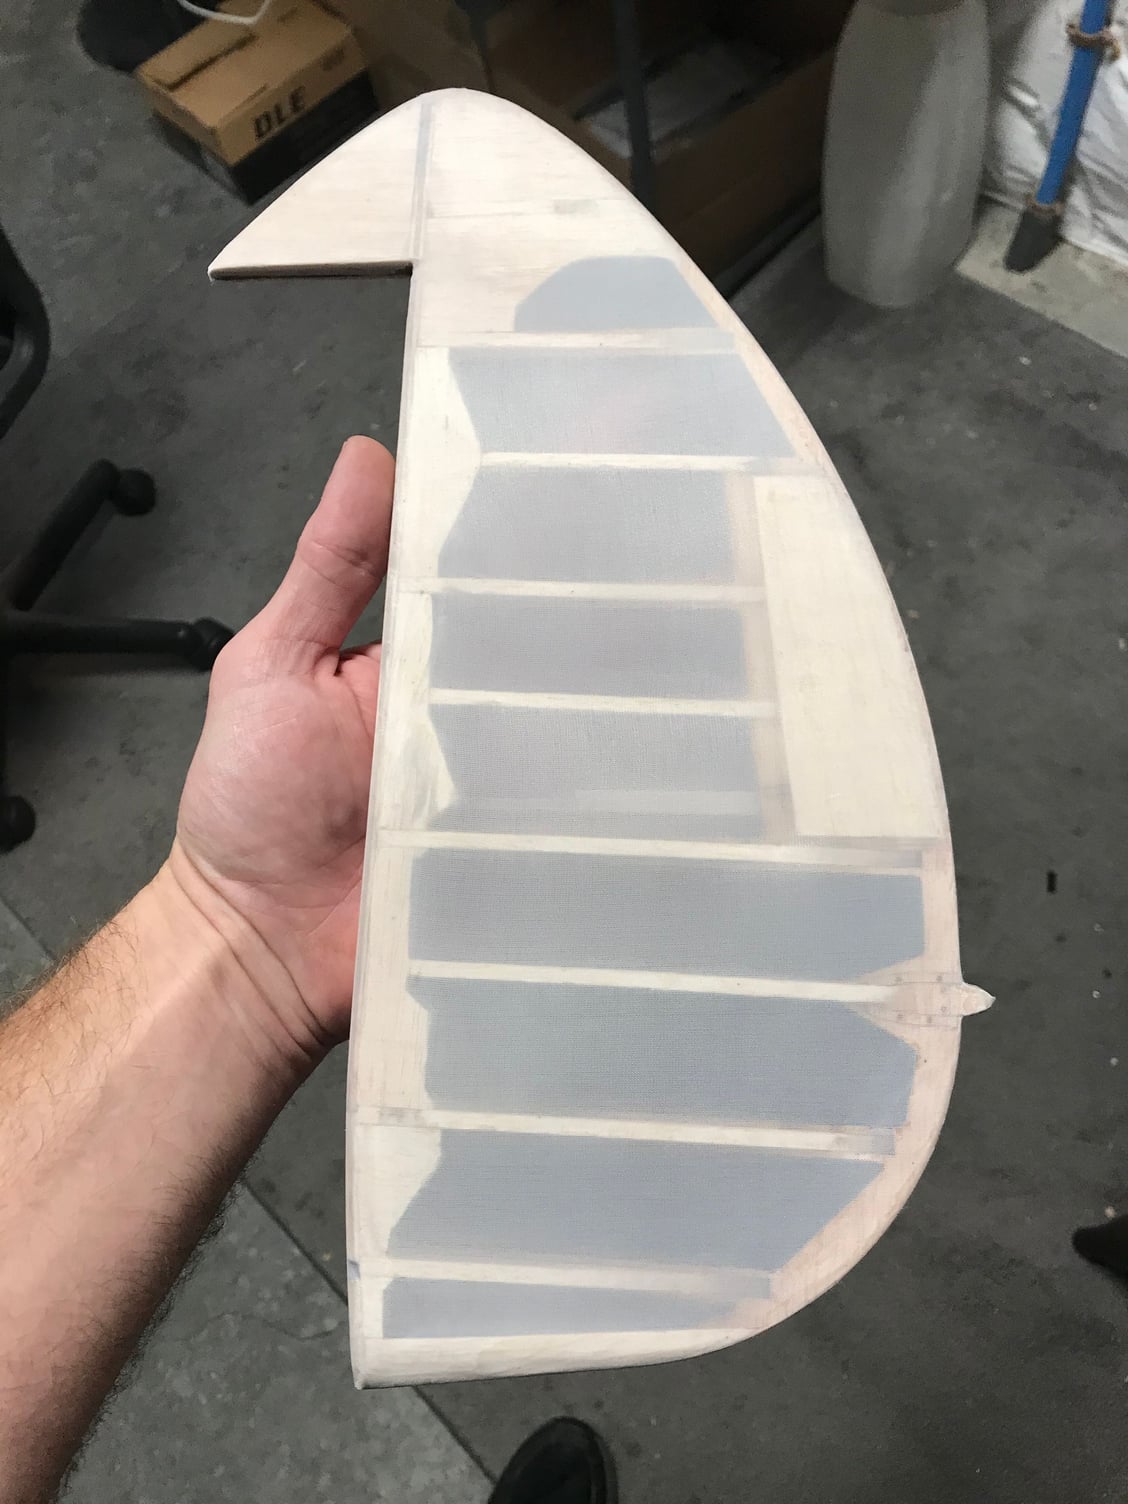
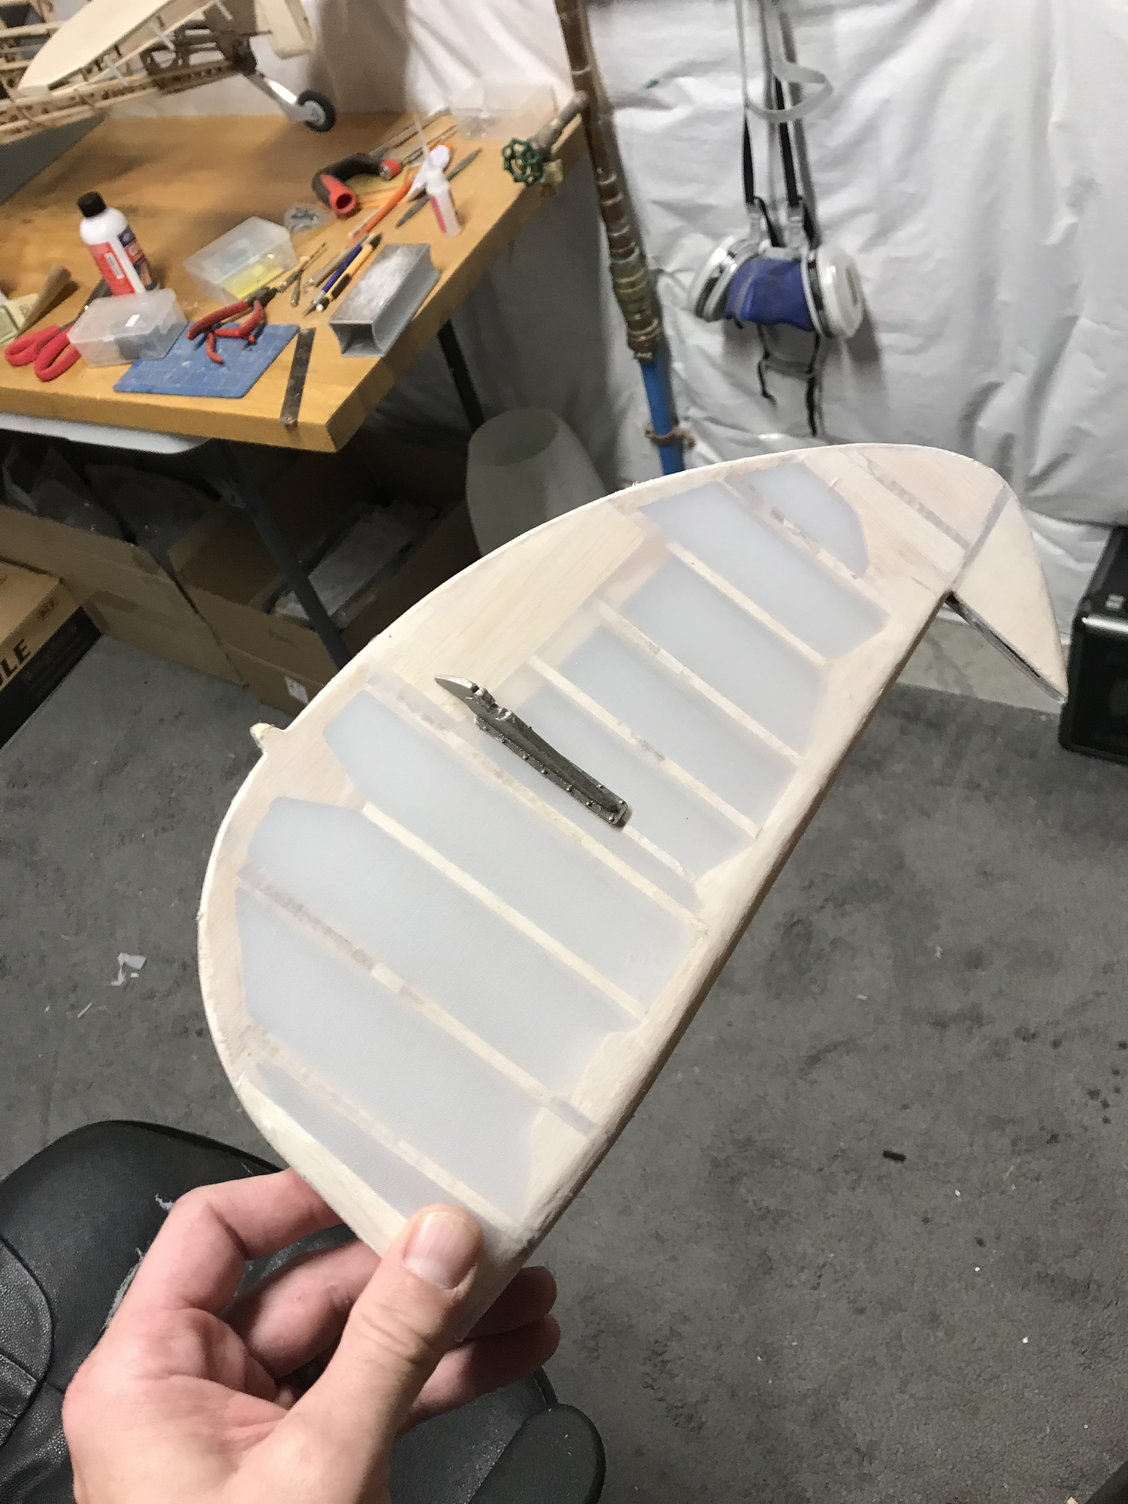
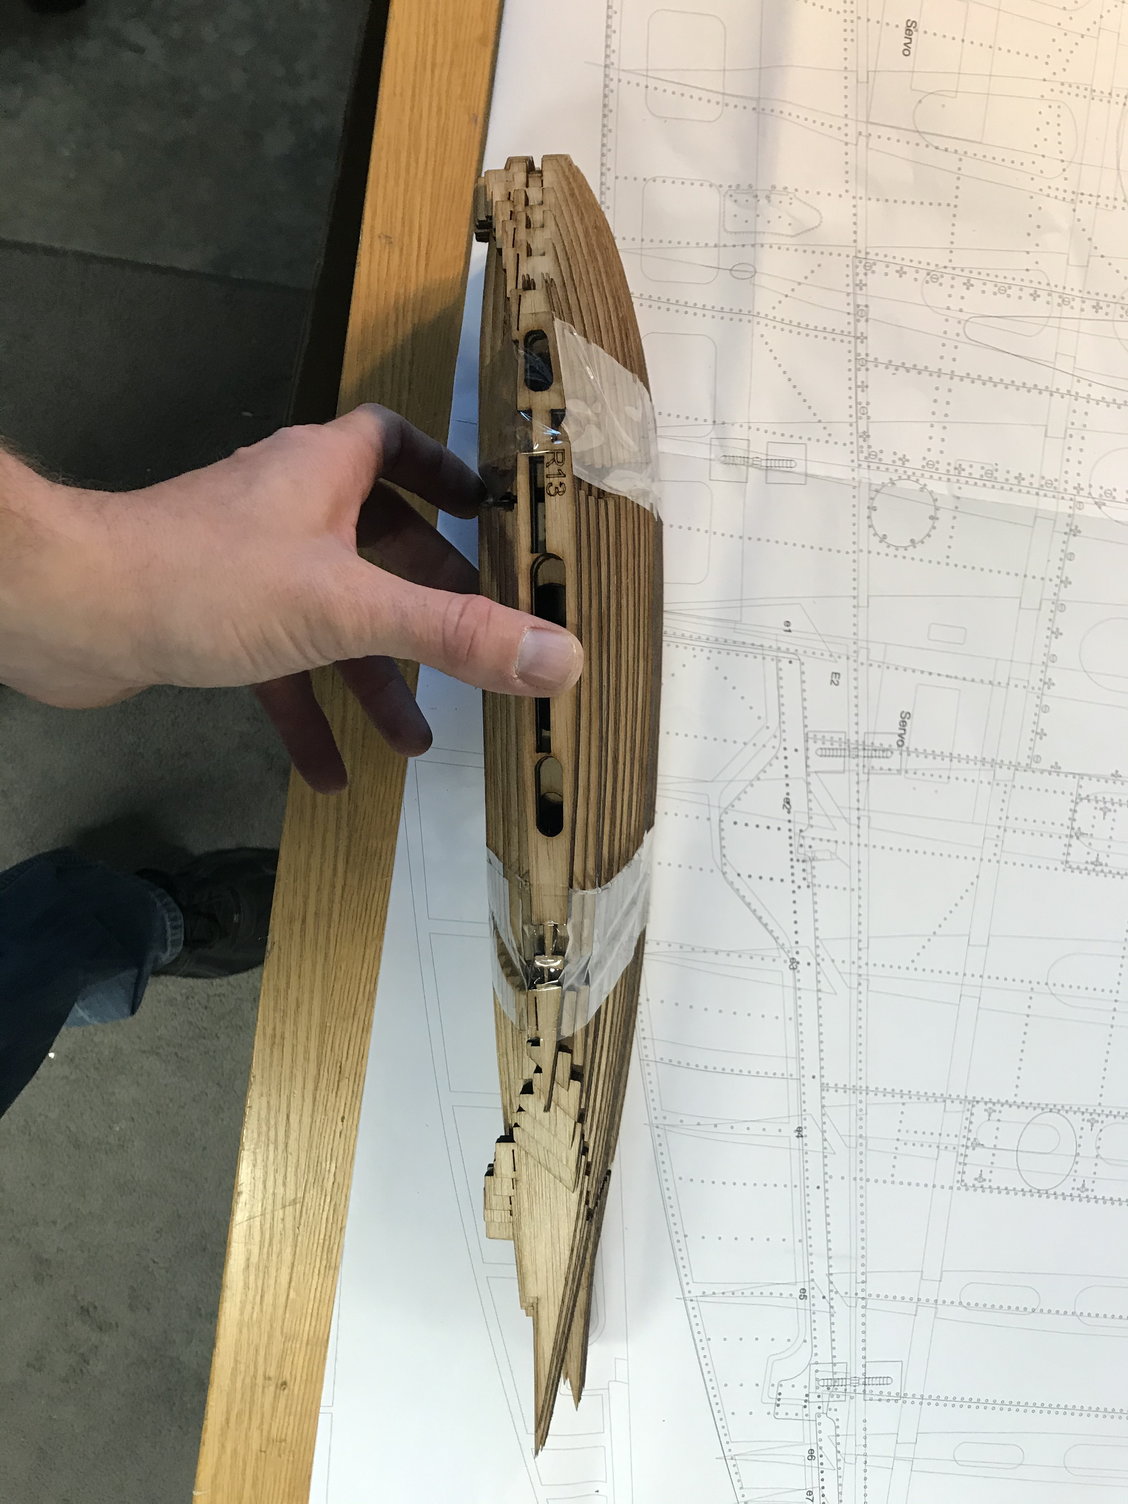
Finally got to dive in again, I worked out the rudder/tailwheel servo, and was able to mount it underneath the cockpit seat pan. I’m just waiting on a pull/pull system for the rudder to arrive. The elevator servos will be mounted either side of the forward fuse, being that they won’t be completely hidden by the cowl I’ll need to build an access hatch for each but this design saves some space for sure. I finished up the fit for the rudder and elevator halves and began applying the koverall. I’ll lay some more detail into them and then they’ll need a couple coats of nitrite dope to seal for paint.
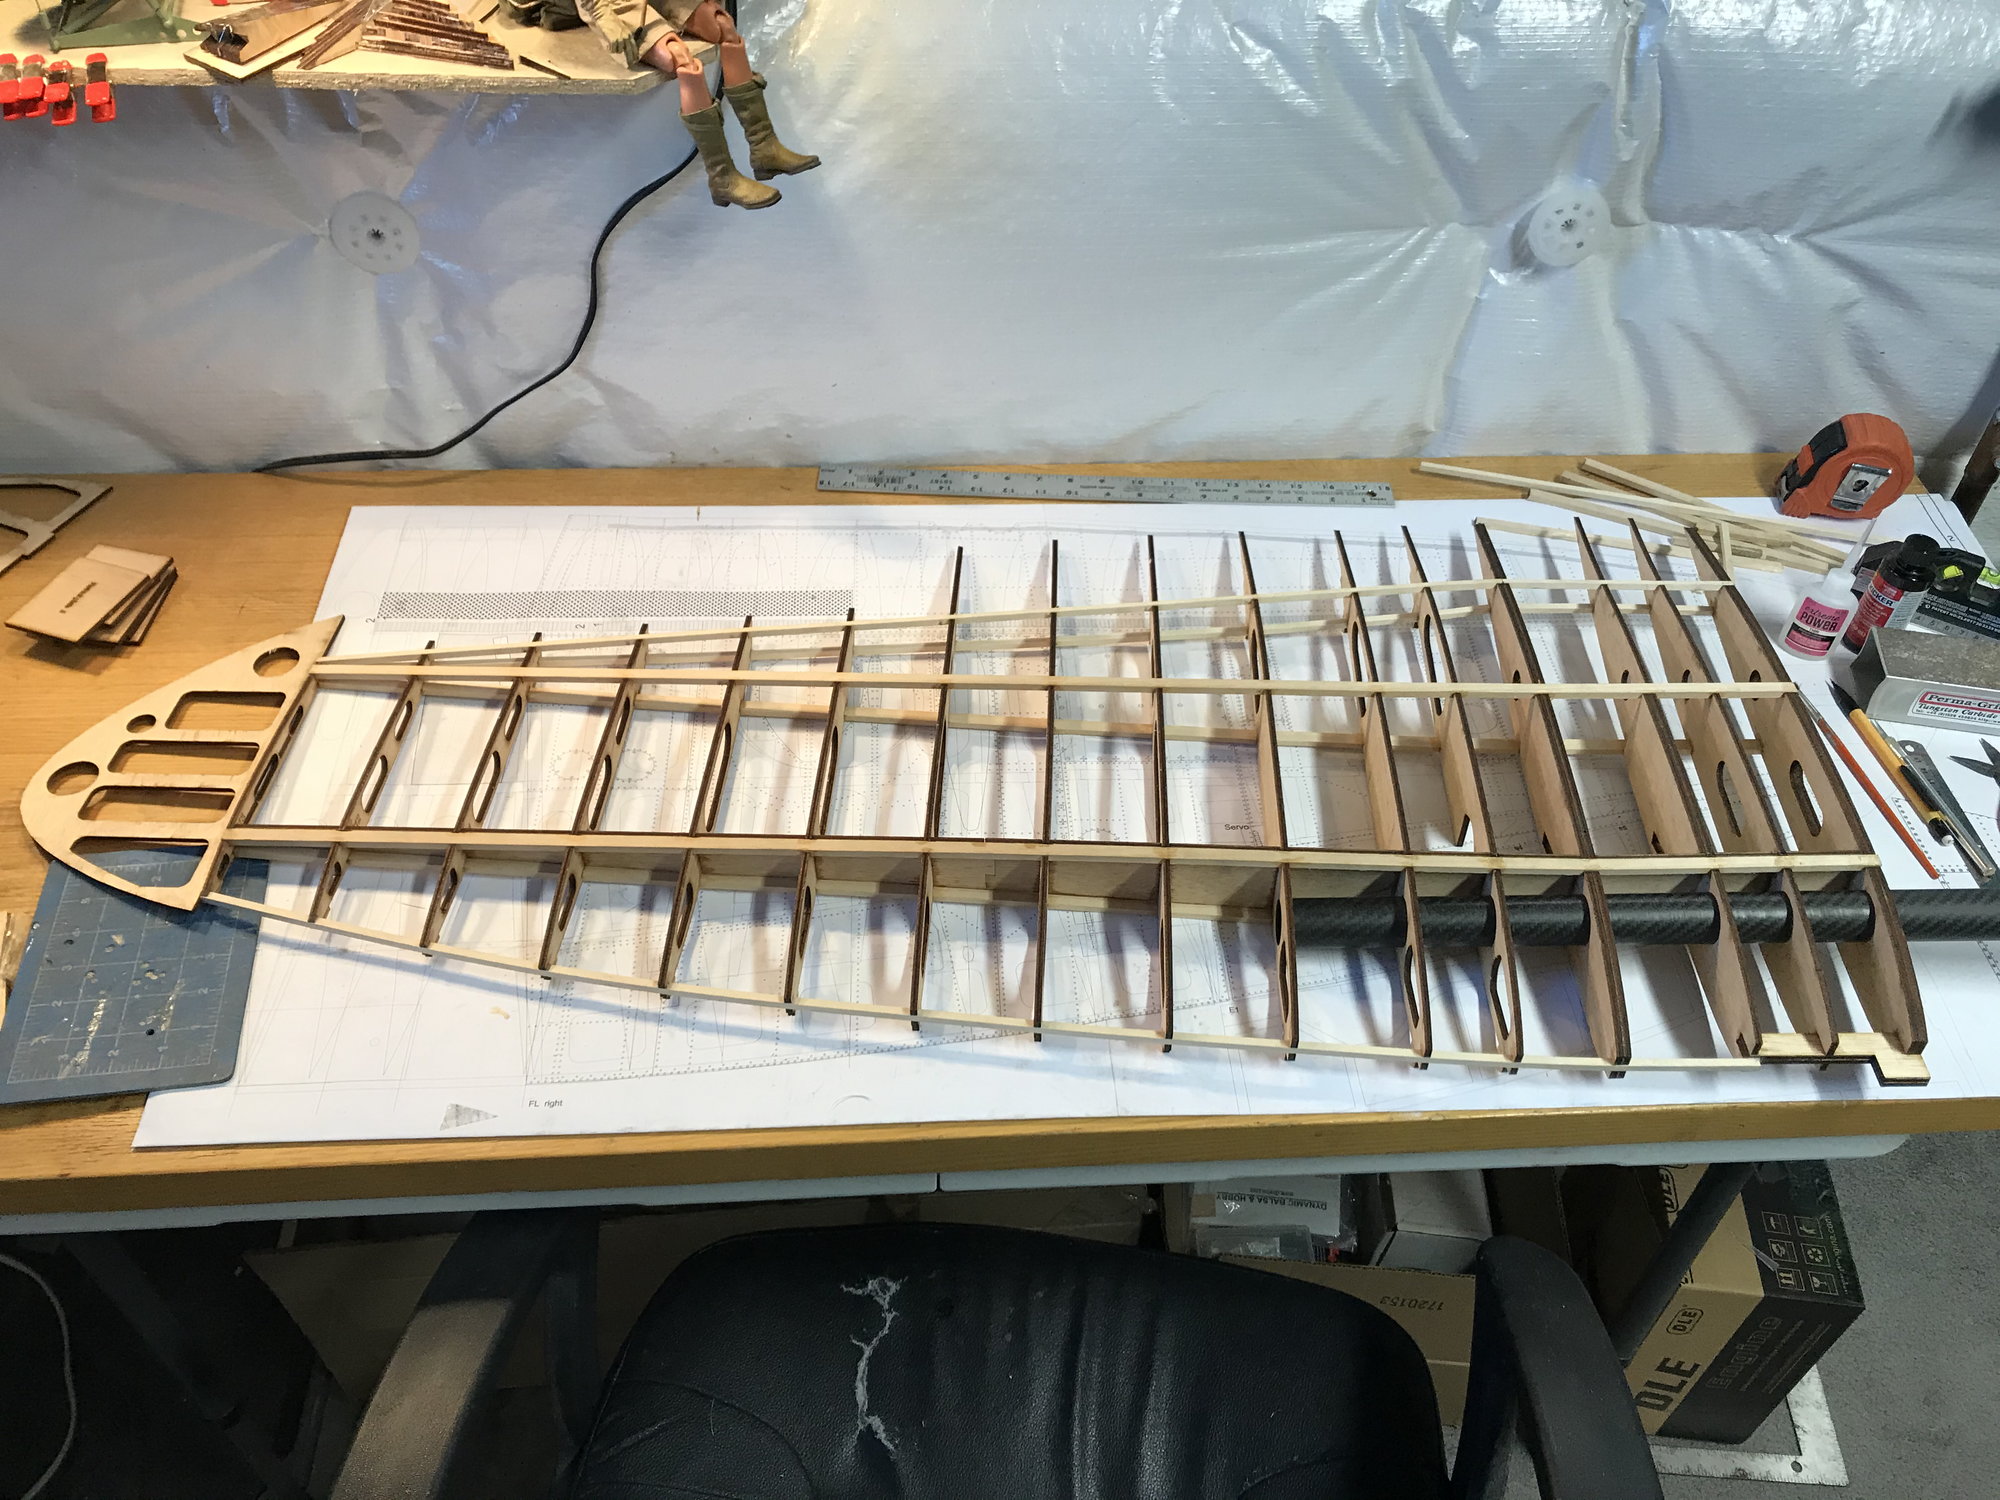
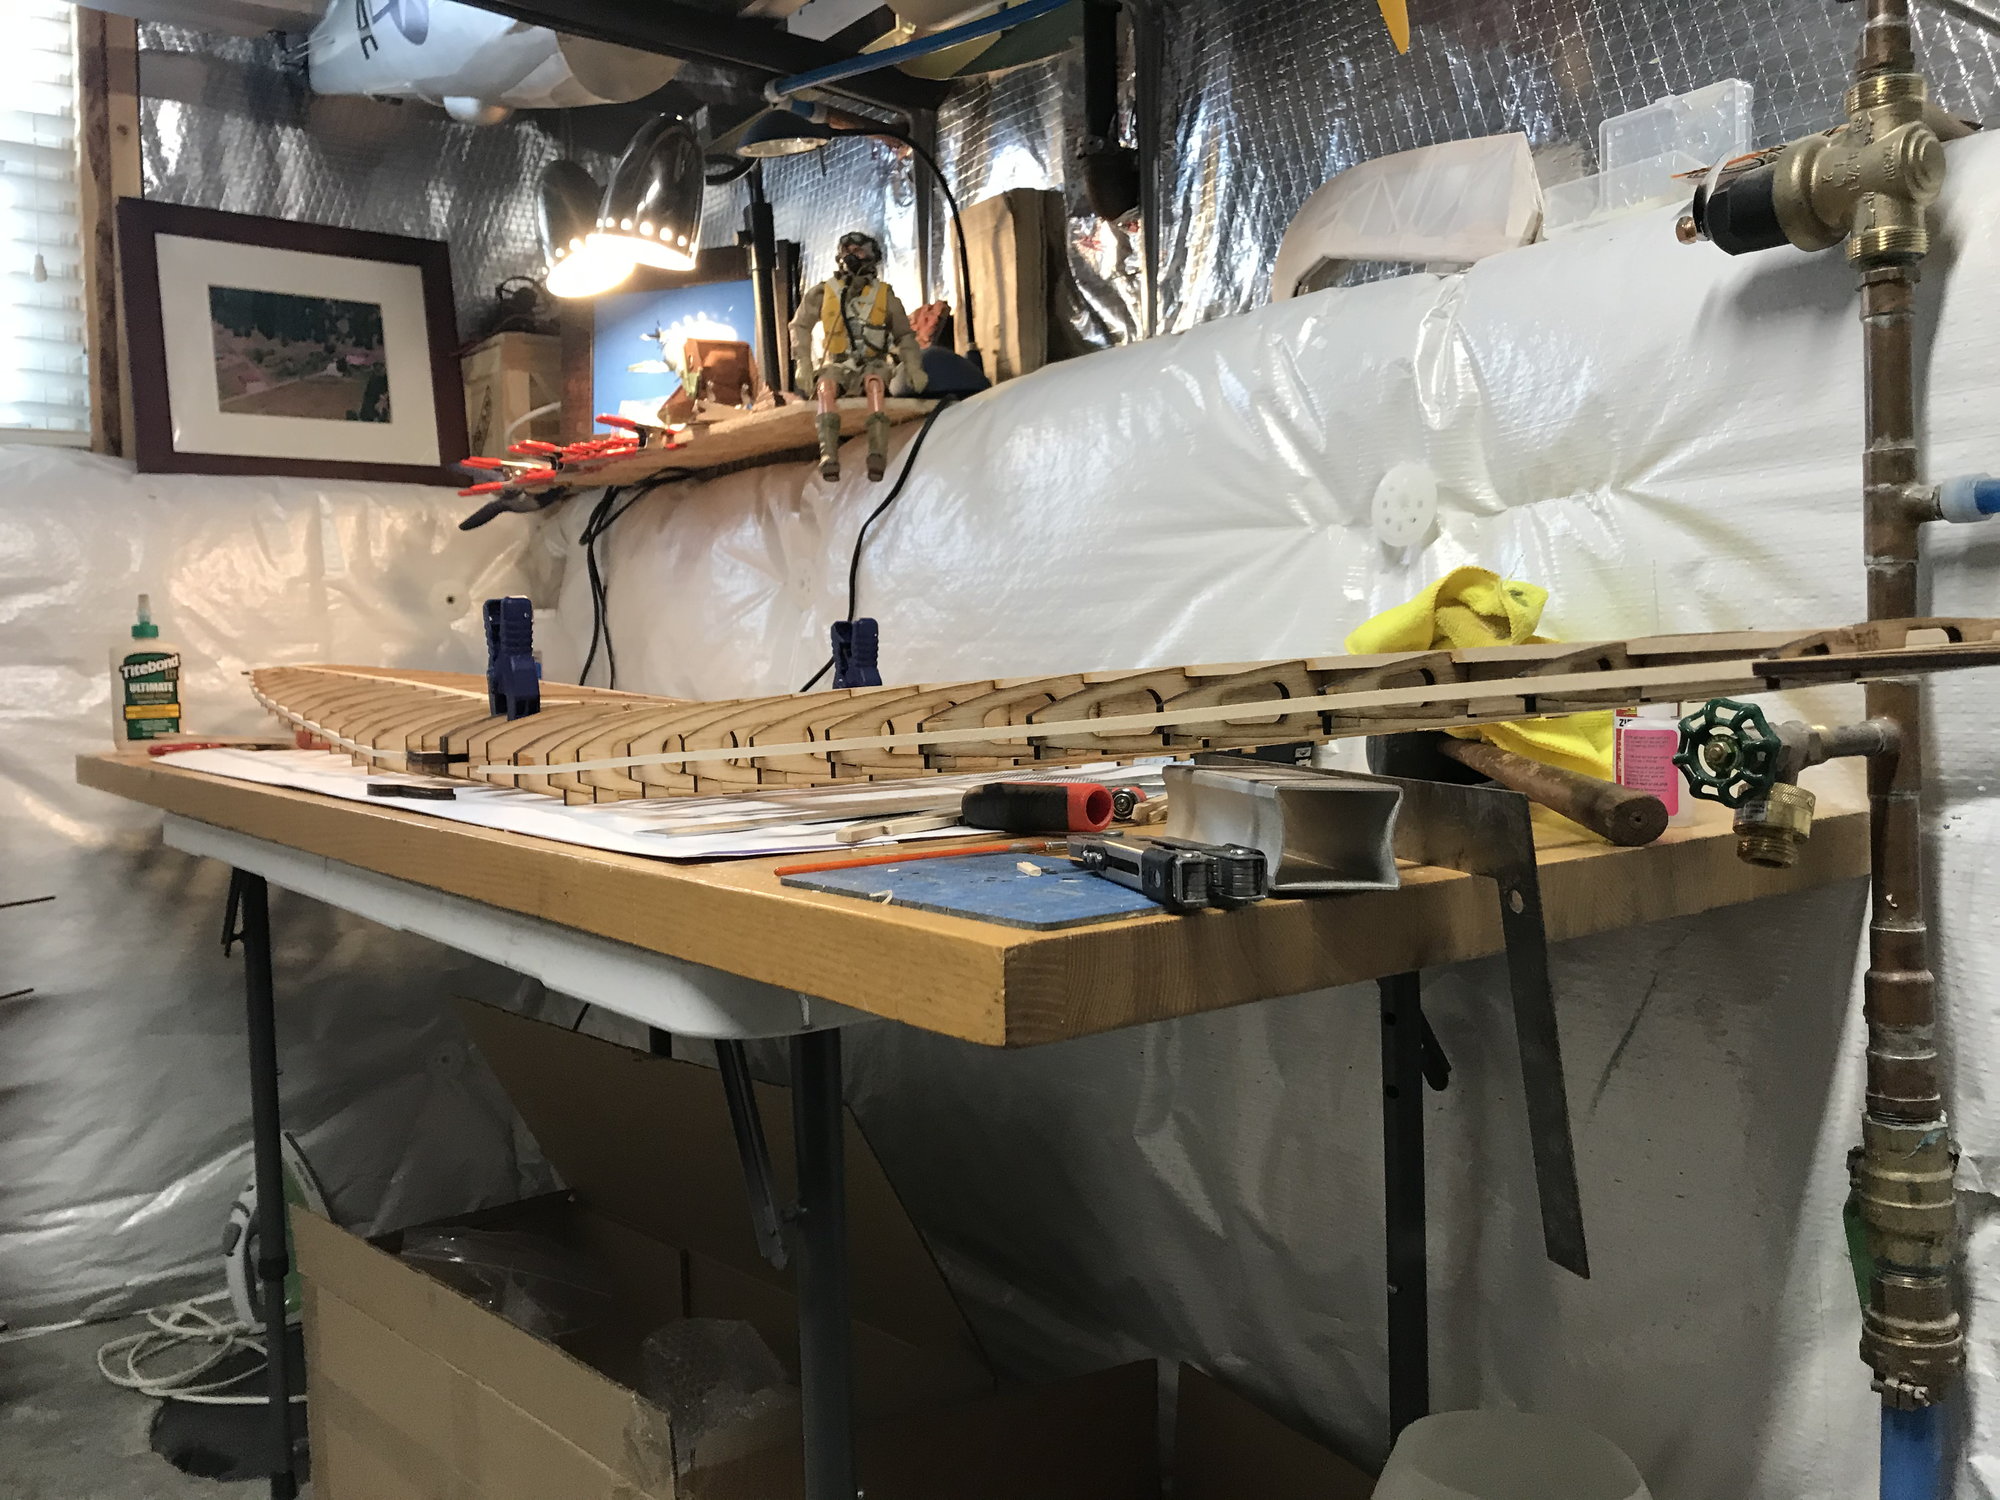
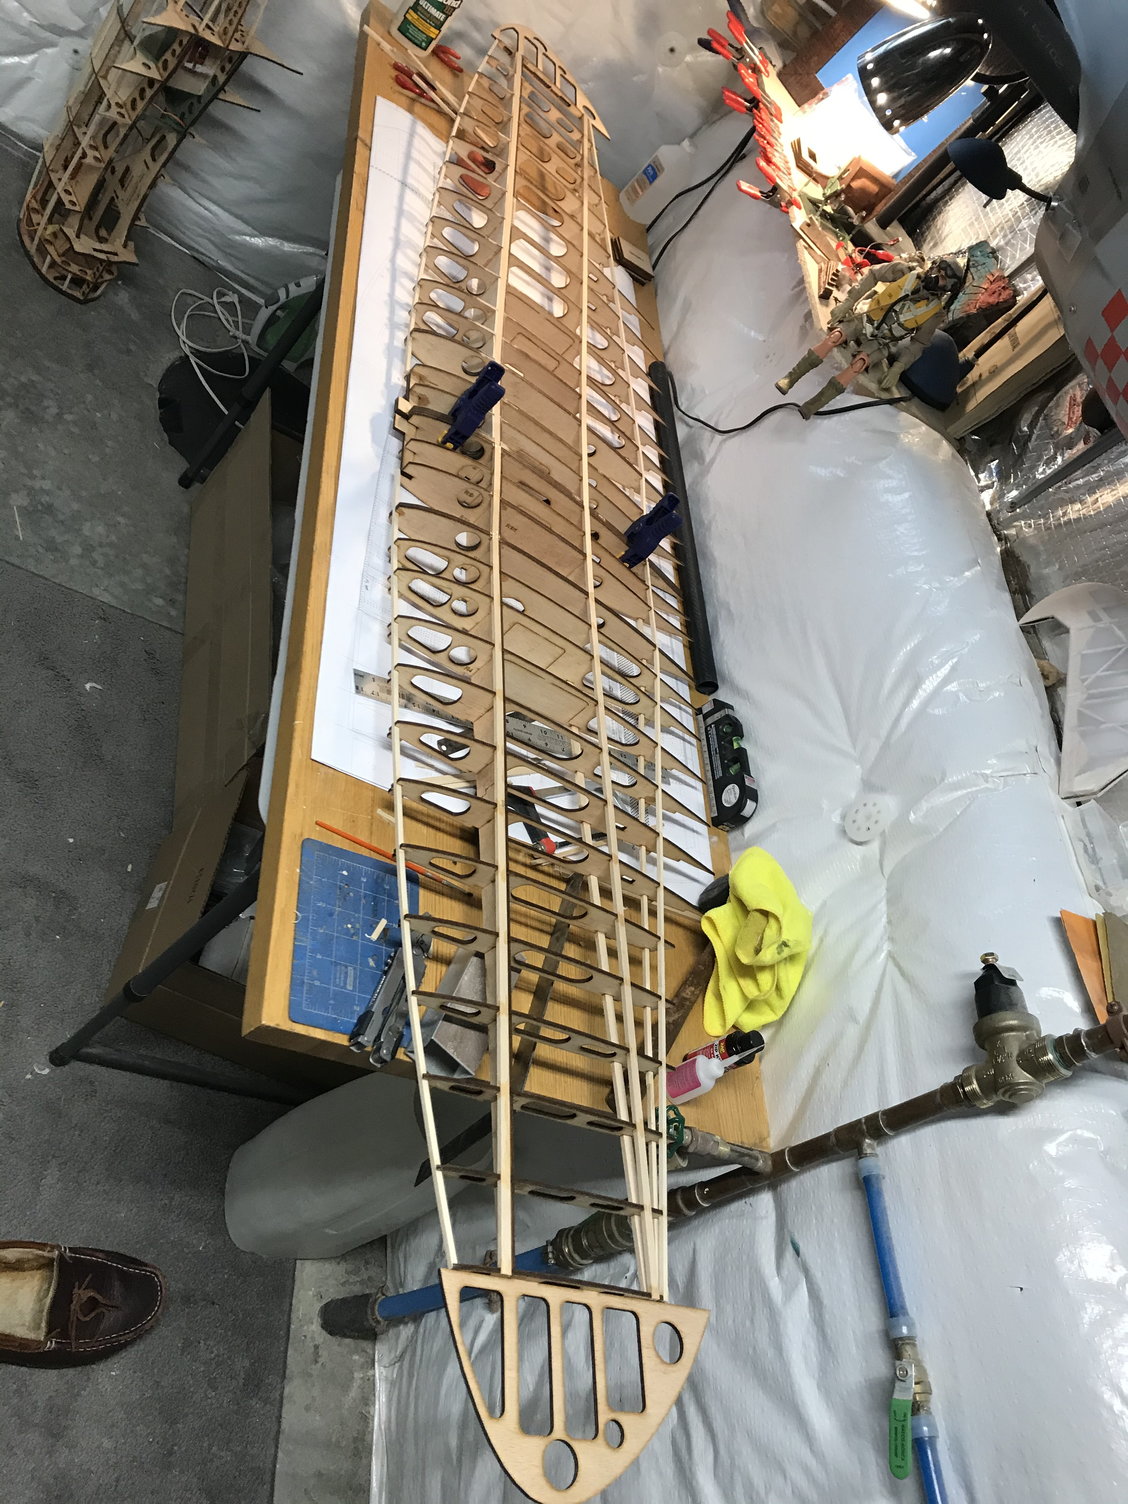
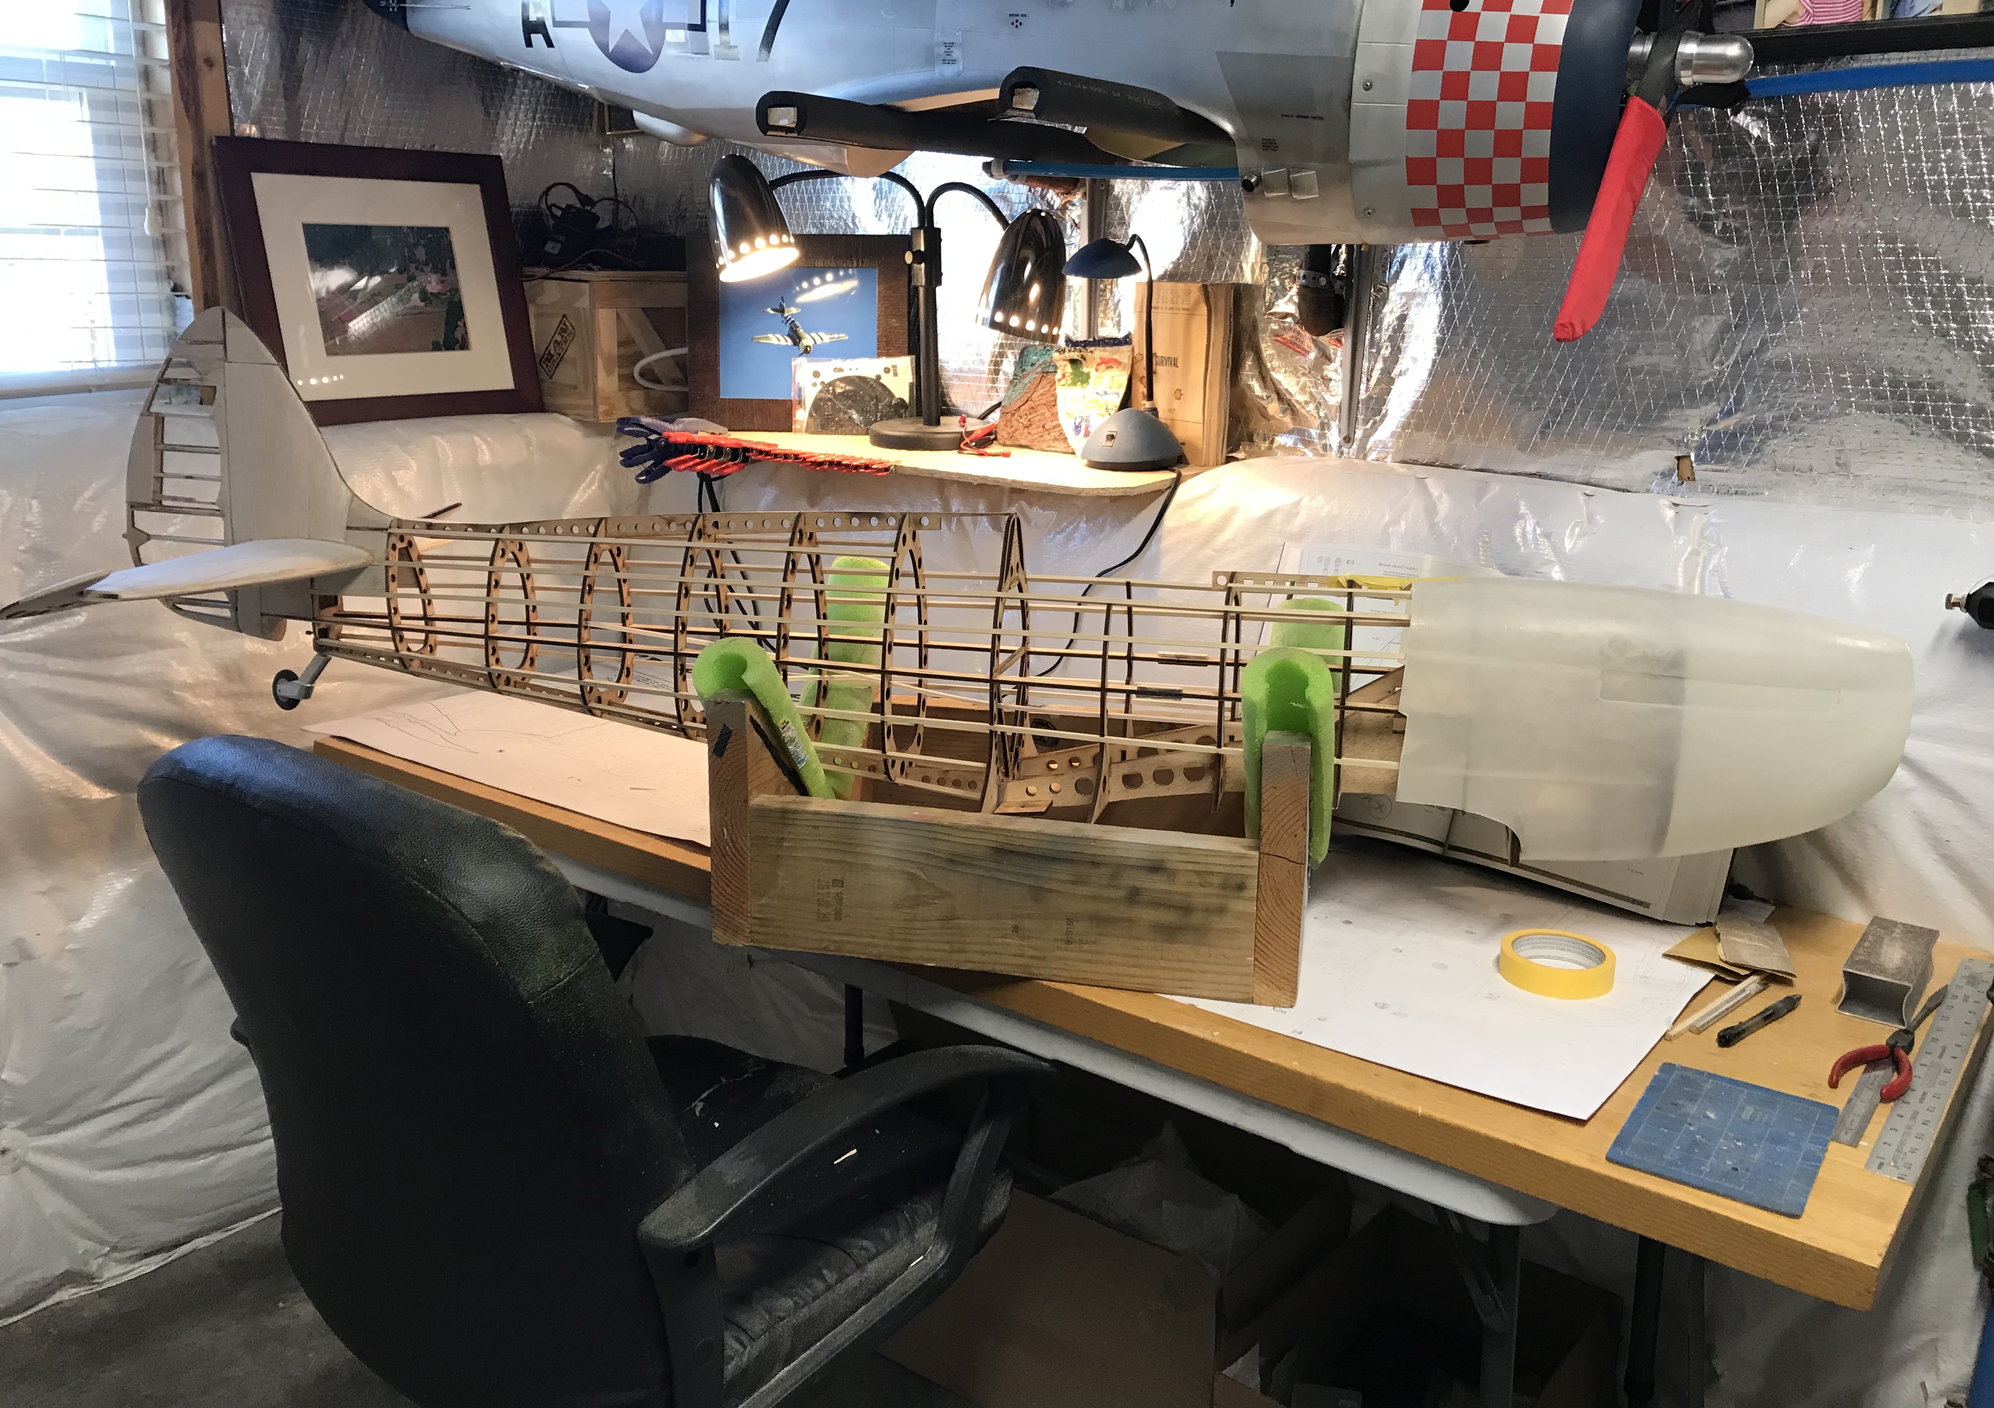
I’m at the point I believe I could start skinning the fuse but I’m still awaiting balsa sheeting to arrive, so I began work on the wing. I’ve laid out the right half, cut my carbon spar to length and dry fit the main spar and ribs. Everything is a crisp fit, very satisfied. They’ve supplied cut away tabs on the underside of the outer 2/3 to make it a flat build, nice touch! One thing I may look into modifying are the ailerons, they come with an upper and lower ply template, separated by ribs, which in turn creates a very thick surface, since I’ll be covering these with fliteskin, I may make templates out of thinner ply as to cut down on the thickness.


Old 01-30-2021, 07:02 AM
  #93  
My Feedback: (6)
 
FlyerInOKC's Avatar
 
Join Date: Nov 2004
Location: Oklahoma City, OK
Posts: 14,206
Received 278 Likes on 242 Posts
Default

Drool!
Old 01-30-2021, 08:10 AM
  #94  
Thread Starter
 
Wyoturbine's Avatar
 
Join Date: May 2014
Location: Platte City, Mo
Posts: 241
Received 22 Likes on 18 Posts
Default

Originally Posted by FlyerInOKC
Drool!
haha! I wish I didn’t have to go to work! I wanted to keep working on her!
Old 01-30-2021, 08:30 AM
  #95  
My Feedback: (6)
 
FlyerInOKC's Avatar
 
Join Date: Nov 2004
Location: Oklahoma City, OK
Posts: 14,206
Received 278 Likes on 242 Posts
Default

Originally Posted by Wyoturbine
haha! I wish I didn’t have to go to work! I wanted to keep working on her!
Yeah it sucks having to work for a living (and support your hobby)!

I work from home and every time the dog comes in during my meetings wanting to play I tell her I have to work o I can buy her food and treets.
Old 01-30-2021, 09:10 AM
  #96  
Thread Starter
 
Wyoturbine's Avatar
 
Join Date: May 2014
Location: Platte City, Mo
Posts: 241
Received 22 Likes on 18 Posts
Default

Originally Posted by FlyerInOKC
Yeah it sucks having to work for a living (and support your hobby)!

I work from home and every time the dog comes in during my meetings wanting to play I tell her I have to work o I can buy her food and treets.
Right?! My time gets divided up between kids wife work dog annnnnd then rc if there’s any left lol
Old 01-30-2021, 11:39 AM
  #97  
My Feedback: (6)
 
FlyerInOKC's Avatar
 
Join Date: Nov 2004
Location: Oklahoma City, OK
Posts: 14,206
Received 278 Likes on 242 Posts
Default

Originally Posted by Wyoturbine
Right?! My time gets divided up between kids wife work dog annnnnd then rc if there’s any left lol
Trust me, I can relate!
Old 02-05-2021, 04:06 PM
  #98  
Thread Starter
 
Wyoturbine's Avatar
 
Join Date: May 2014
Location: Platte City, Mo
Posts: 241
Received 22 Likes on 18 Posts
Default

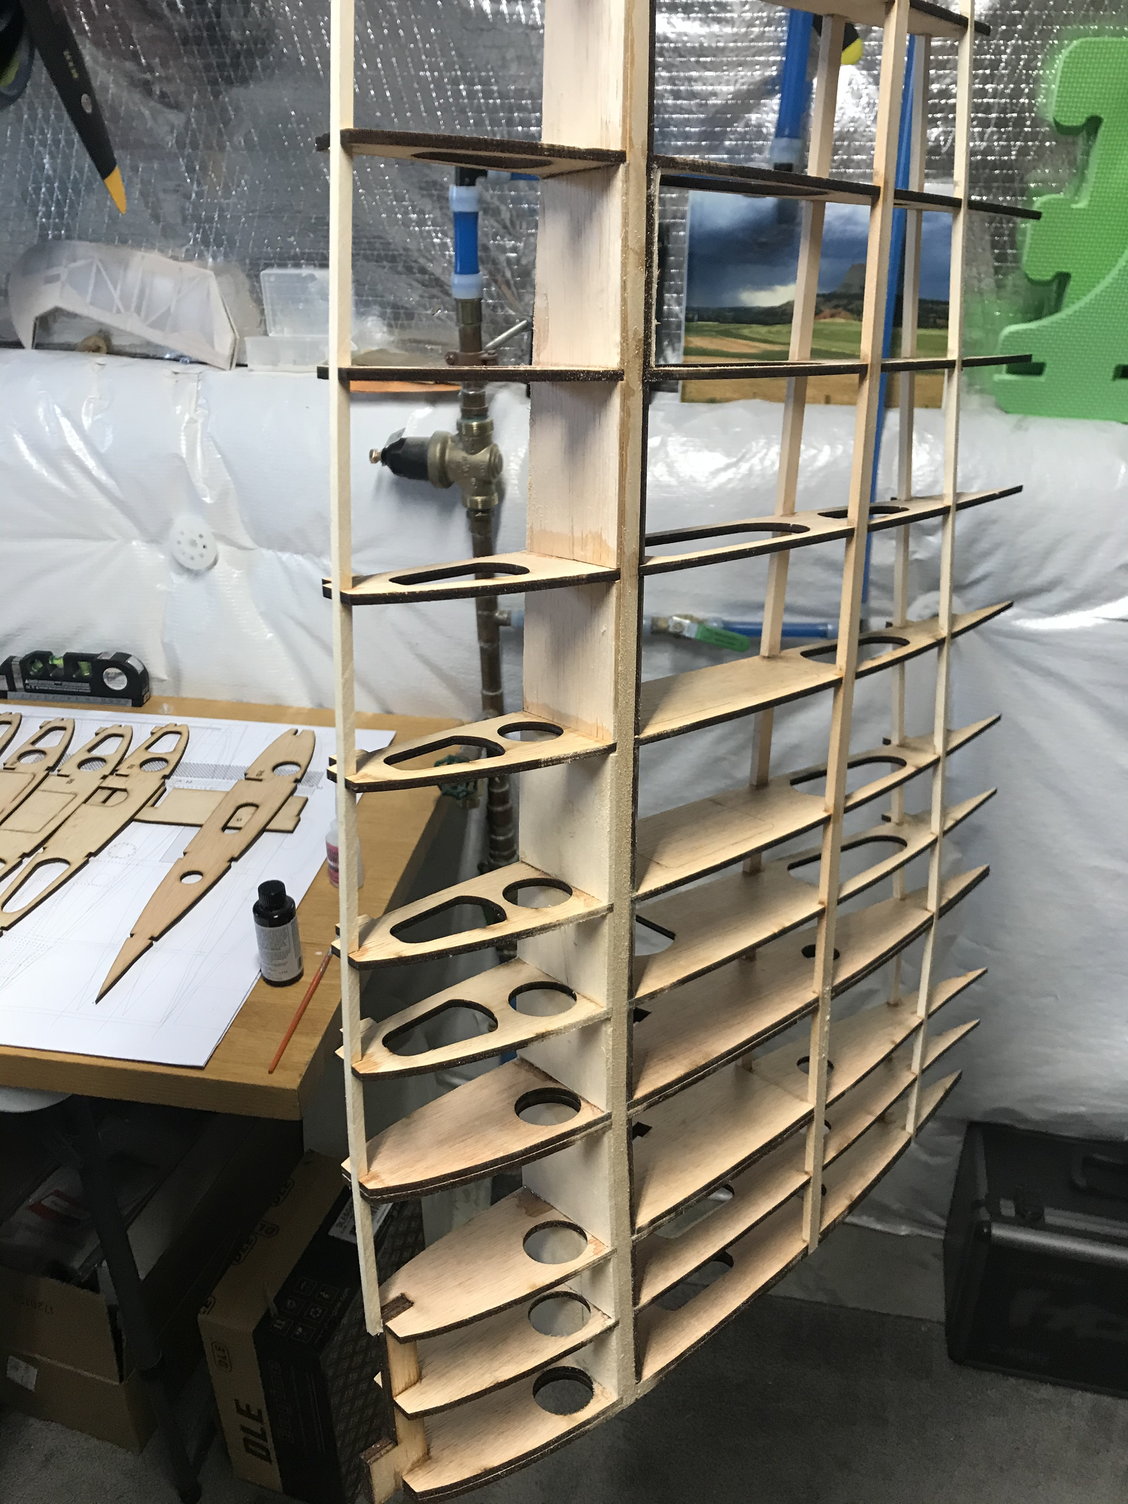
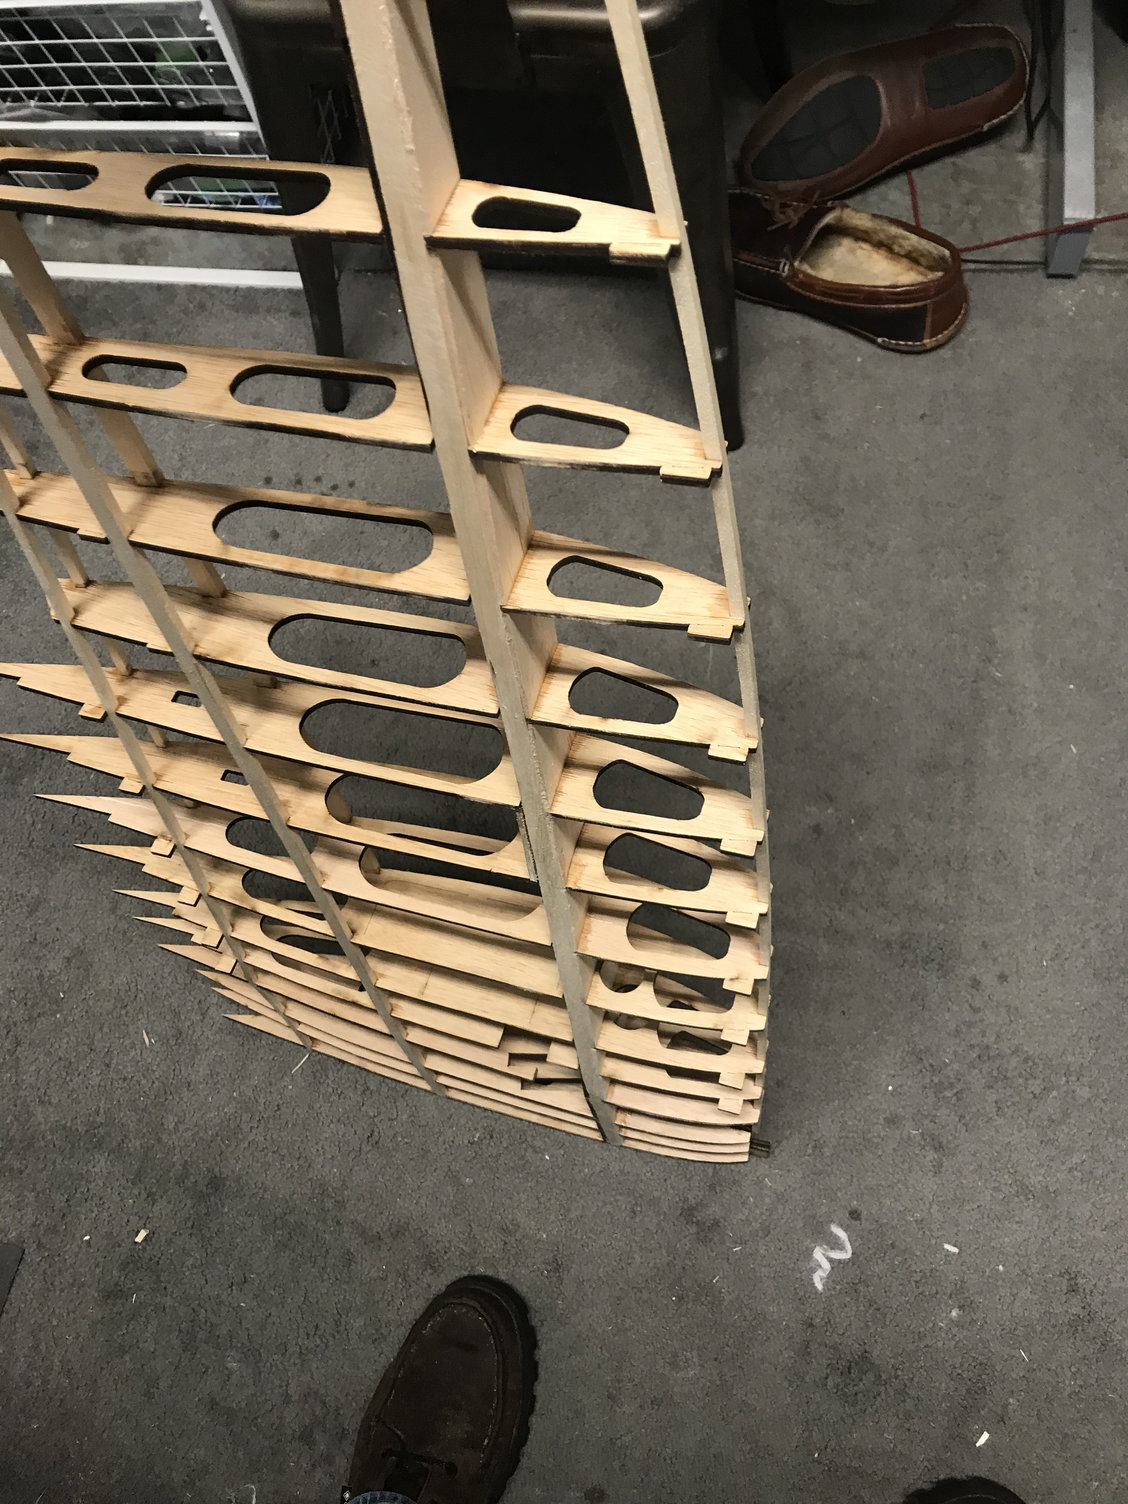
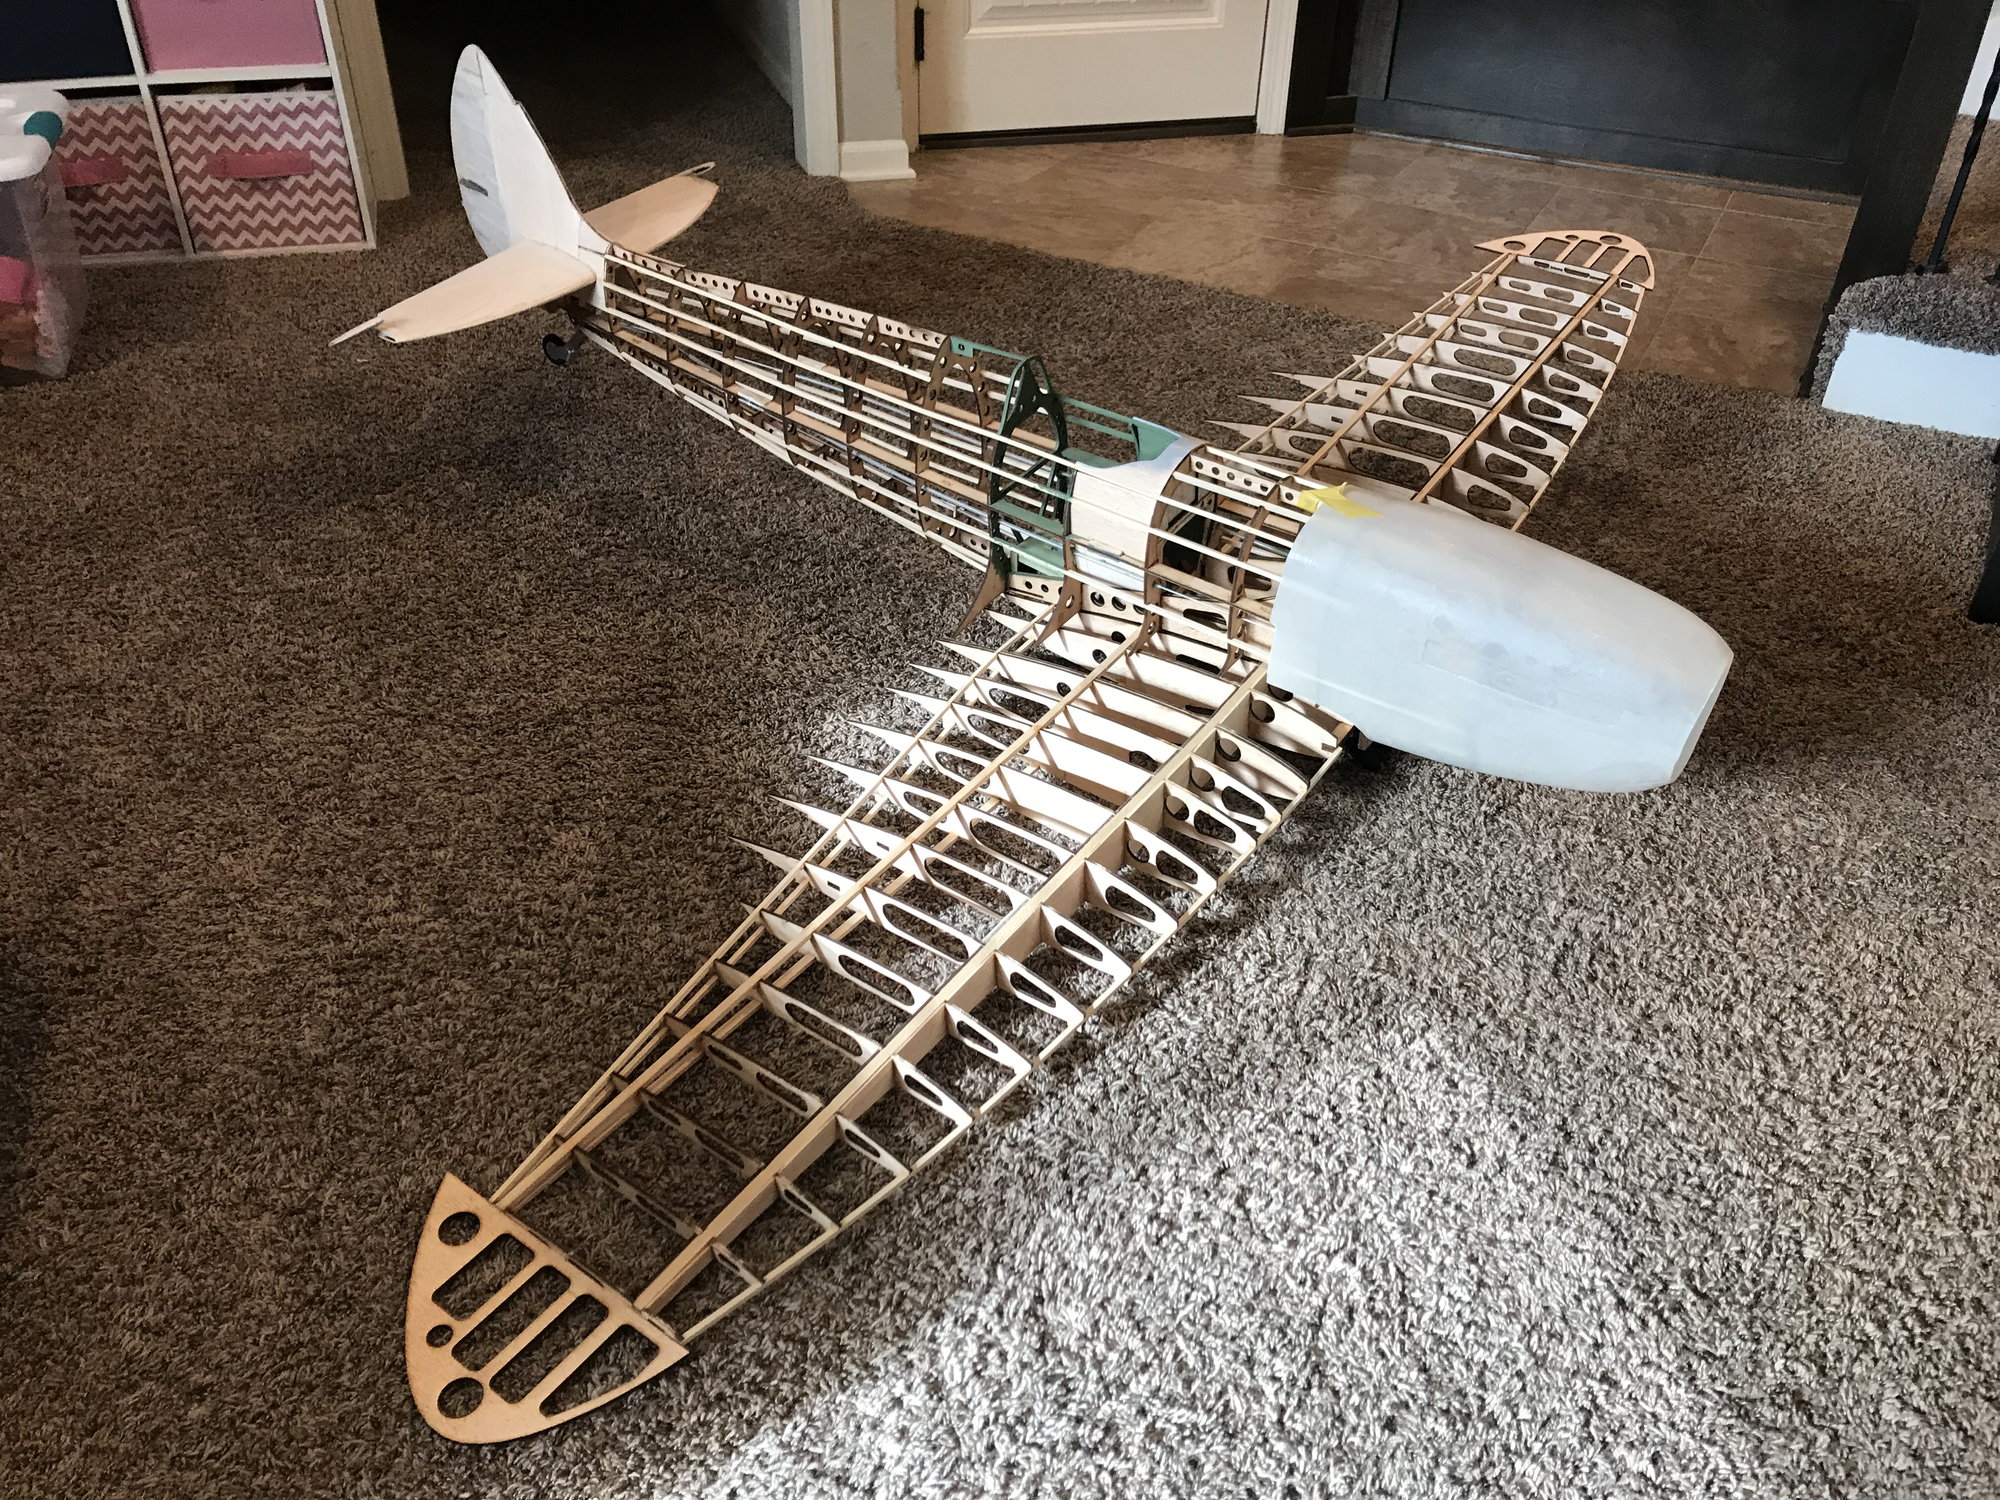
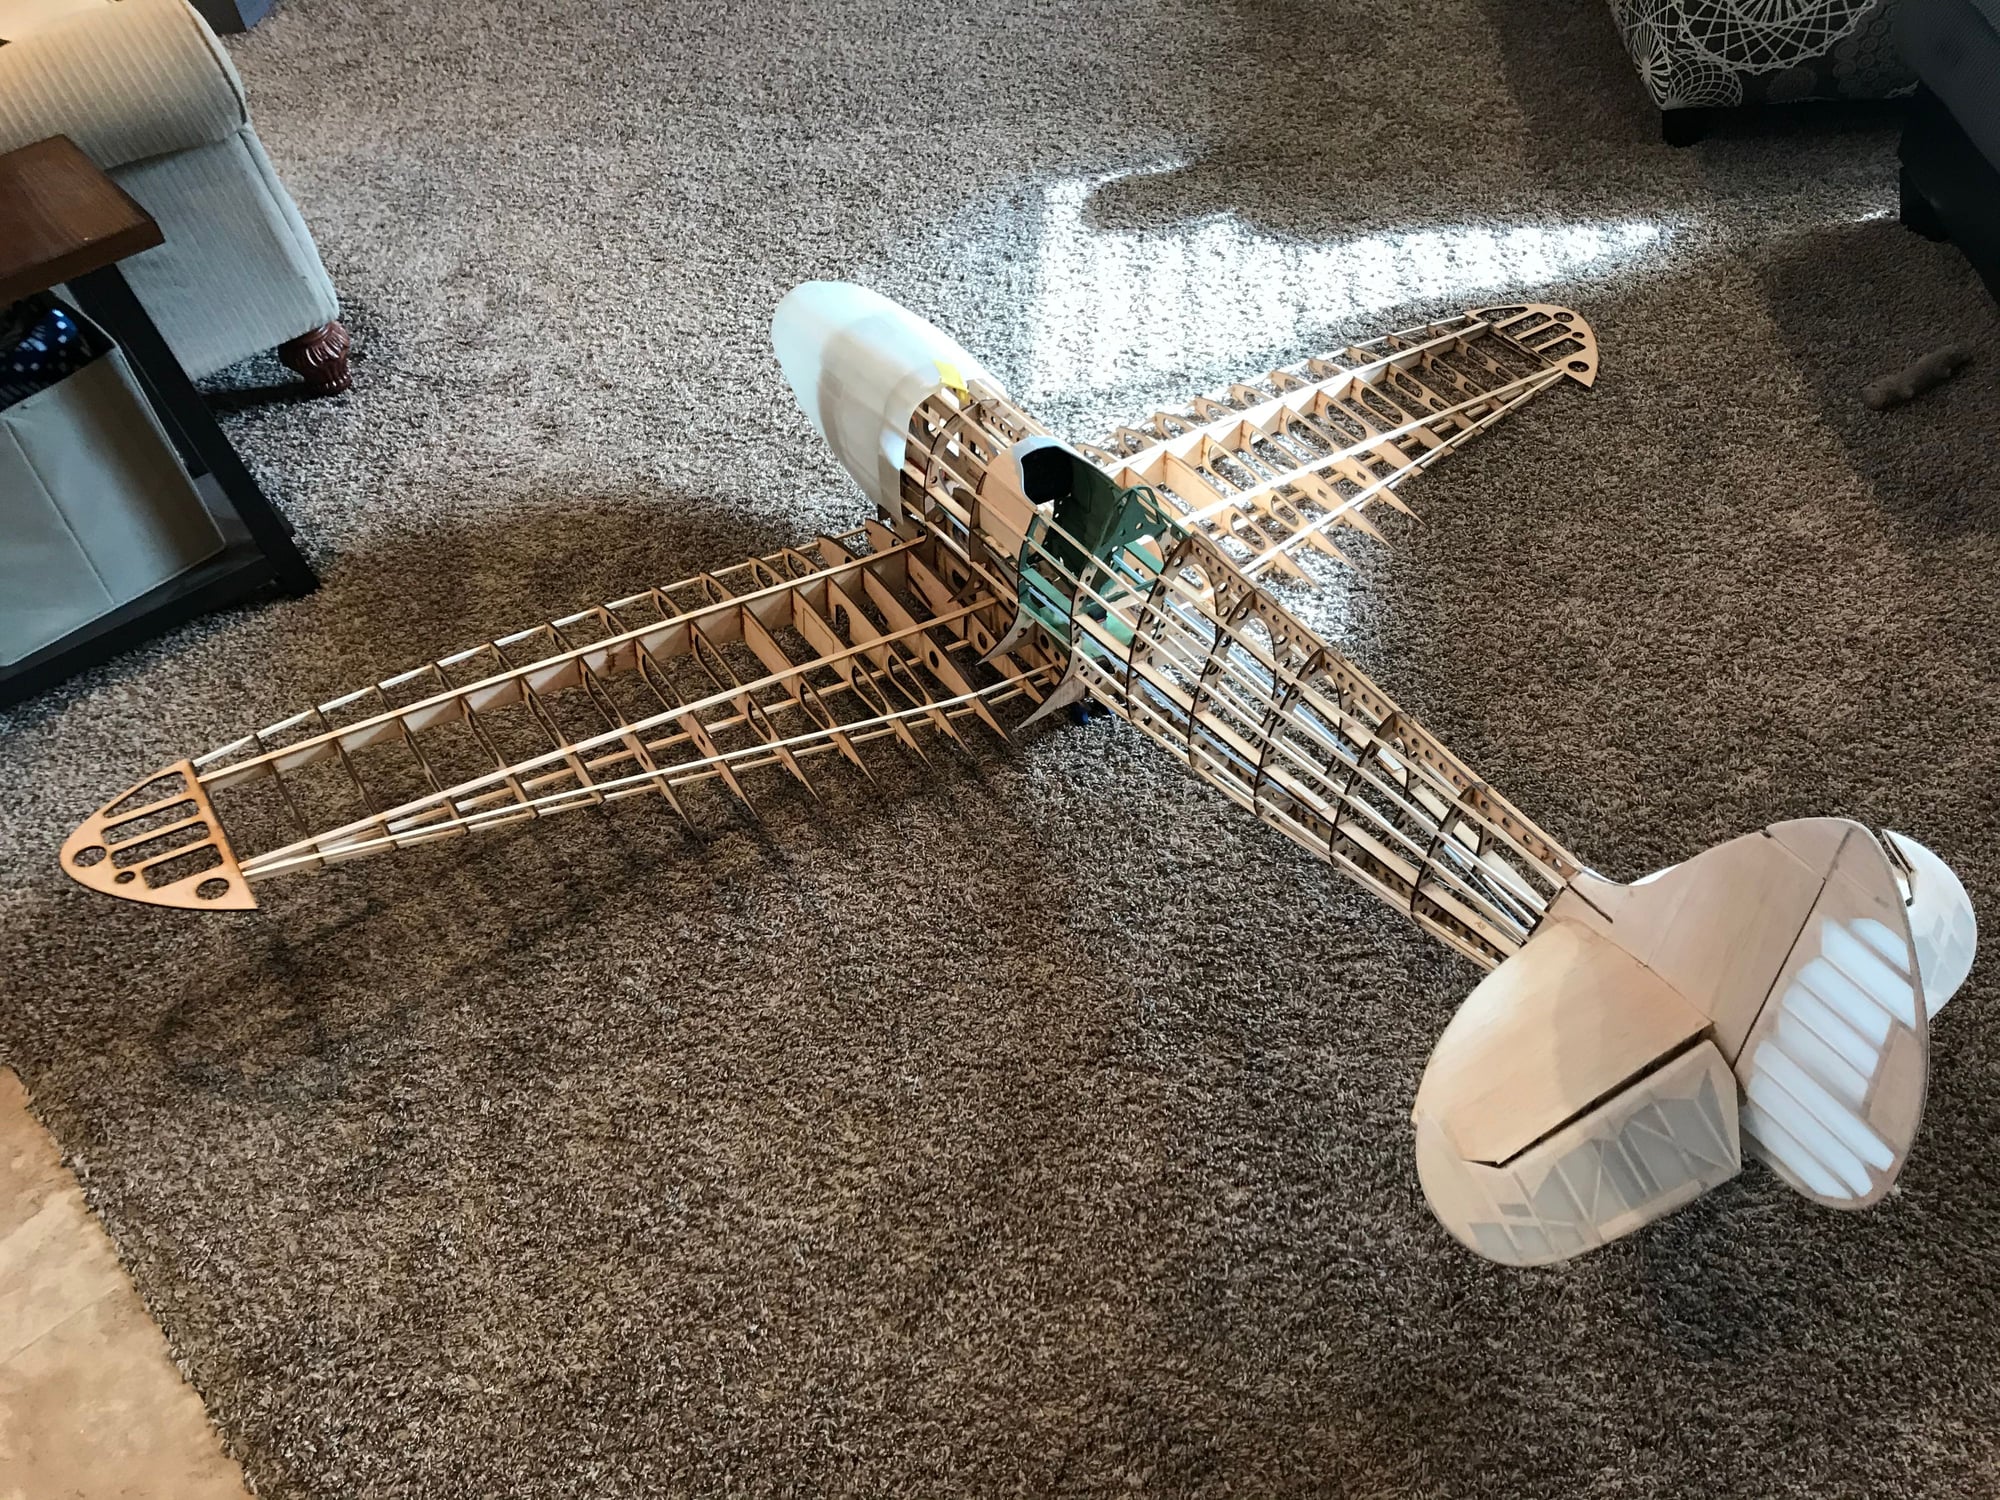
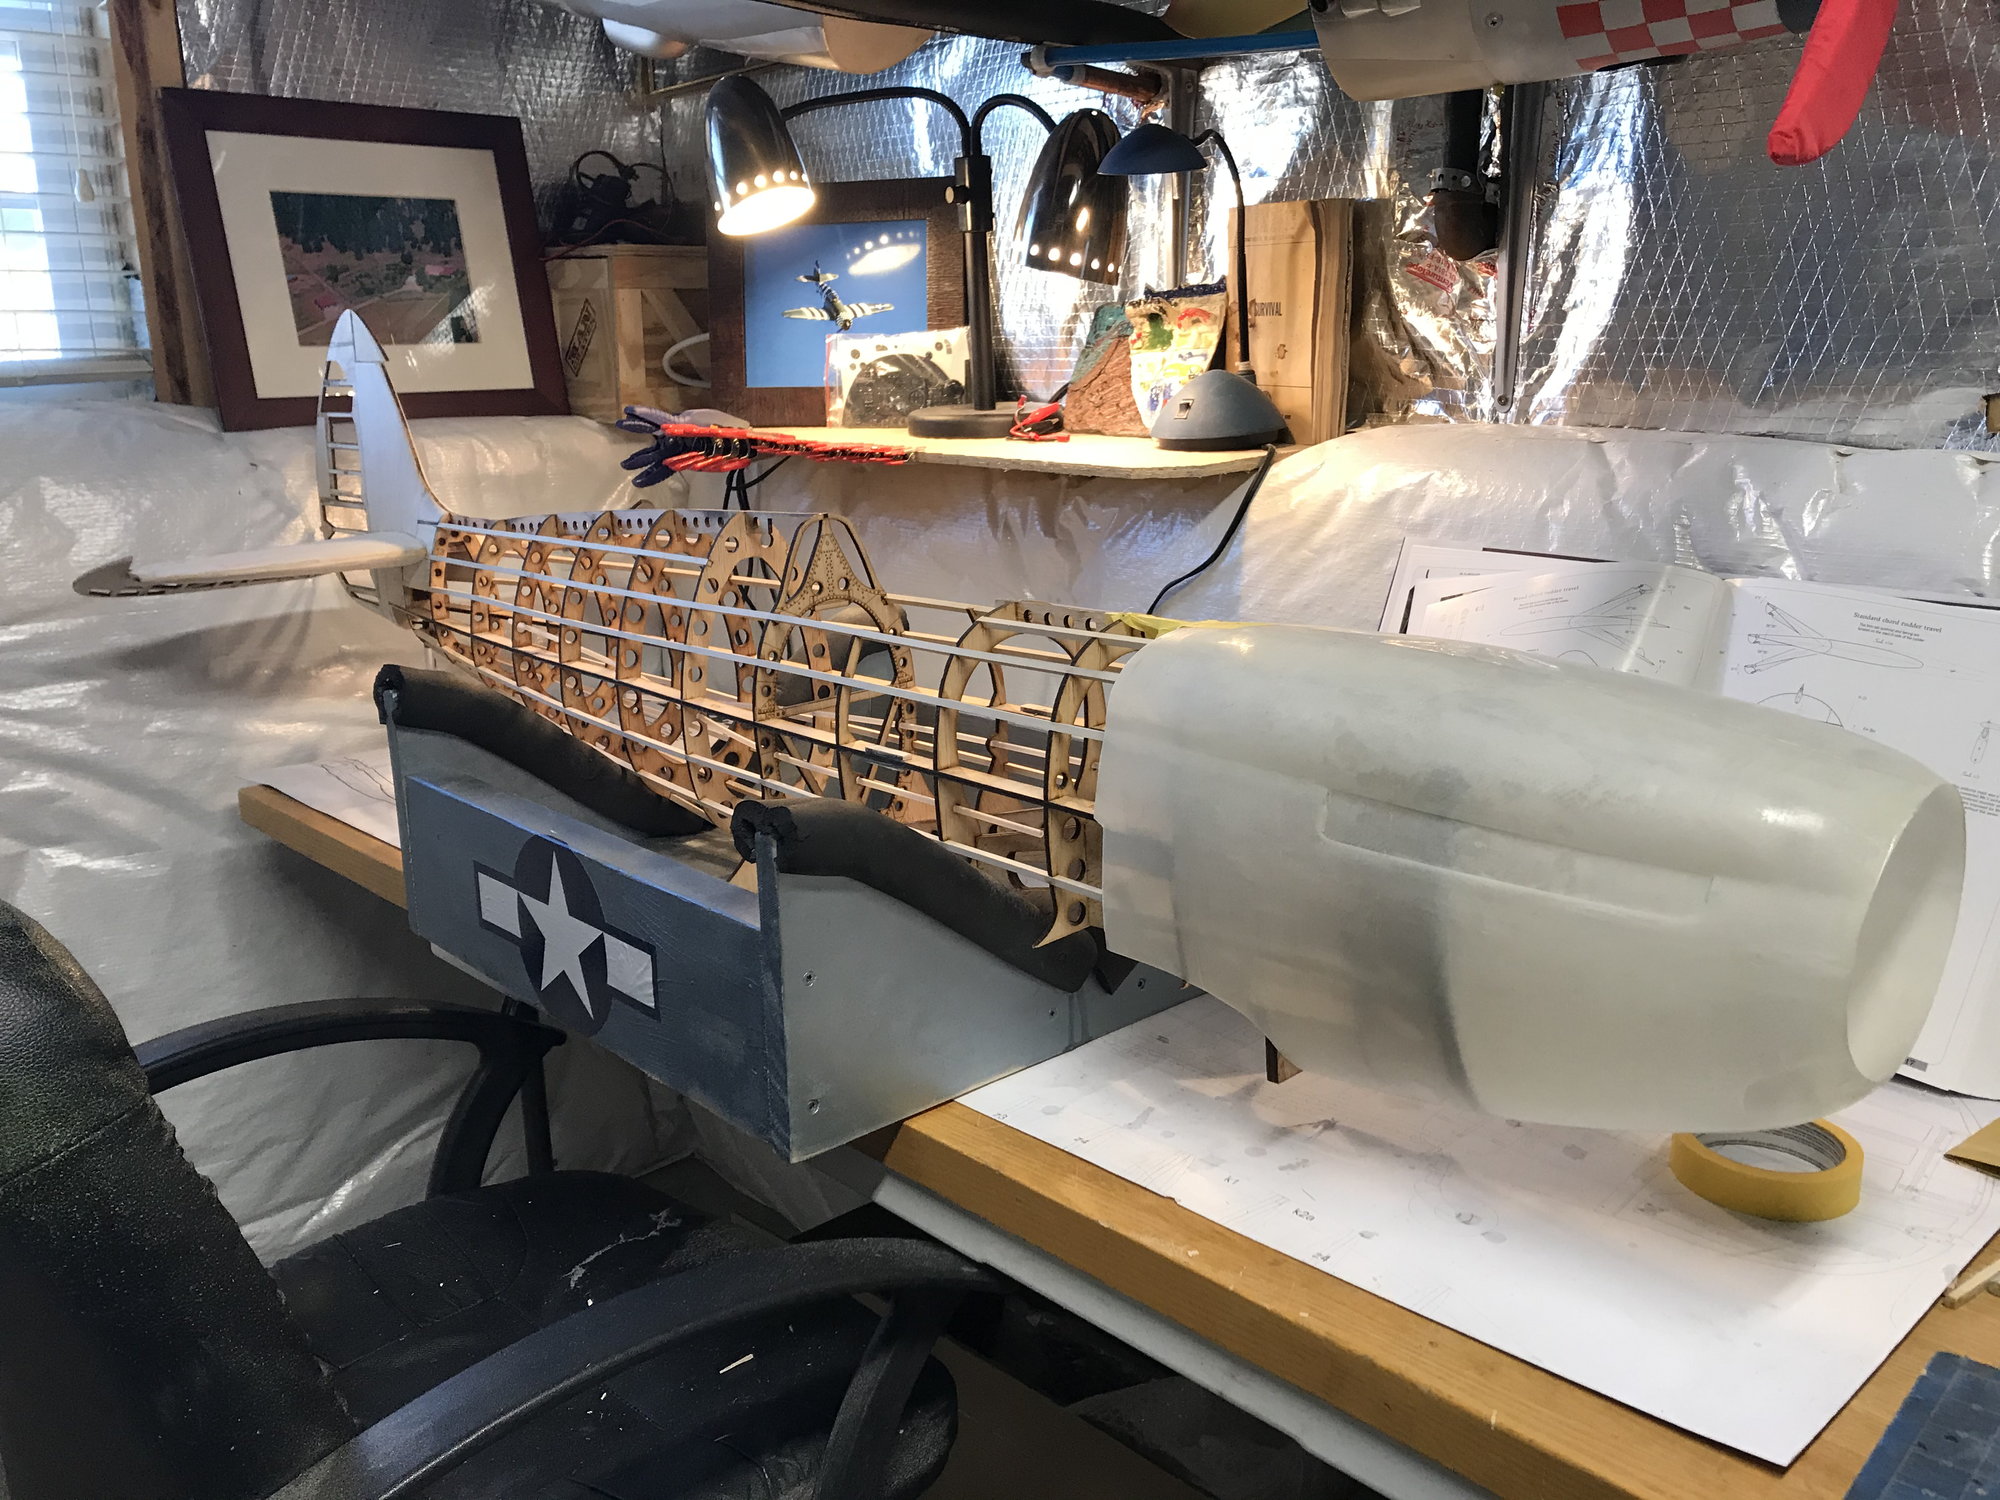
I was able to get back at it yesterday, between yesterday and today finished up the basic frame up of the wing. Dihedral and incidence are looking good. I finished the shear webbing on the right half and will do the left side next. Then I can begin on the leading edges and tips. The carbon fiber tube is a very snug fit, I think I’ll sand the guide holes a bit to leave some area for hysol when it comes time to bond the halves together. I had to take a couple of photos with the fuse and wing. Awesome seeing it come together!


Old 02-05-2021, 04:09 PM
  #99  
My Feedback: (1)
 
Lifer's Avatar
 
Join Date: Aug 2008
Location: Kansas City, MO
Posts: 4,532
Likes: 0
Received 30 Likes on 29 Posts
Default

Looks like the pilot is observing the build.....
Old 02-05-2021, 04:29 PM
  #100  
Thread Starter
 
Wyoturbine's Avatar
 
Join Date: May 2014
Location: Platte City, Mo
Posts: 241
Received 22 Likes on 18 Posts
Default

Originally Posted by Lifer
Looks like the pilot is observing the build.....
haha yea he’s chillin up there patiently waiting.


Contact Us - Manage Preferences Archive - Advertising - Cookie Policy - Privacy Statement - Terms of Service

Copyright © 2024 MH Sub I, LLC dba Internet Brands. All rights reserved. Use of this site indicates your consent to the Terms of Use.