FokkeRC 1/5 Spitfire MKIX build log
 01-15-2023, 09:08 AM
#301


Hi Wyoturbine!
Just received my Spit Mk9c from Rumen (aren’t he and Jiri at JP Warbirds great!). Many, many years since I last built a kit (and more years since I built a 13’ 3” sailing dinghy) and so laying the plans out was essential. The kit is great and the plans are excellent, containing a lot of information. That said, as I looked them over I can see your photos are going ot be a huge time saver - helping map pre-cut parts onto the plan in correct orientations. Thank you for your excellent posts.
Just received my Spit Mk9c from Rumen (aren’t he and Jiri at JP Warbirds great!). Many, many years since I last built a kit (and more years since I built a 13’ 3” sailing dinghy) and so laying the plans out was essential. The kit is great and the plans are excellent, containing a lot of information. That said, as I looked them over I can see your photos are going ot be a huge time saver - helping map pre-cut parts onto the plan in correct orientations. Thank you for your excellent posts.

https://www.fokkerc.com/user-builds/
 01-15-2023, 11:49 AM
#302

Thread Starter

Hi Wyoturbine!
Just received my Spit Mk9c from Rumen (aren’t he and Jiri at JP Warbirds great!). Many, many years since I last built a kit (and more years since I built a 13’ 3” sailing dinghy) and so laying the plans out was essential. The kit is great and the plans are excellent, containing a lot of information. That said, as I looked them over I can see your photos are going ot be a huge time saver - helping map pre-cut parts onto the plan in correct orientations. Thank you for your excellent posts.
Just received my Spit Mk9c from Rumen (aren’t he and Jiri at JP Warbirds great!). Many, many years since I last built a kit (and more years since I built a 13’ 3” sailing dinghy) and so laying the plans out was essential. The kit is great and the plans are excellent, containing a lot of information. That said, as I looked them over I can see your photos are going ot be a huge time saver - helping map pre-cut parts onto the plan in correct orientations. Thank you for your excellent posts.
As Rumen posted his site has a lot of builds attached to it for more ideas and help, and there is a very nice 1/4 scale mkix build going on rcu right now as well.

 01-31-2023, 06:00 AM
#306
Thread Starter
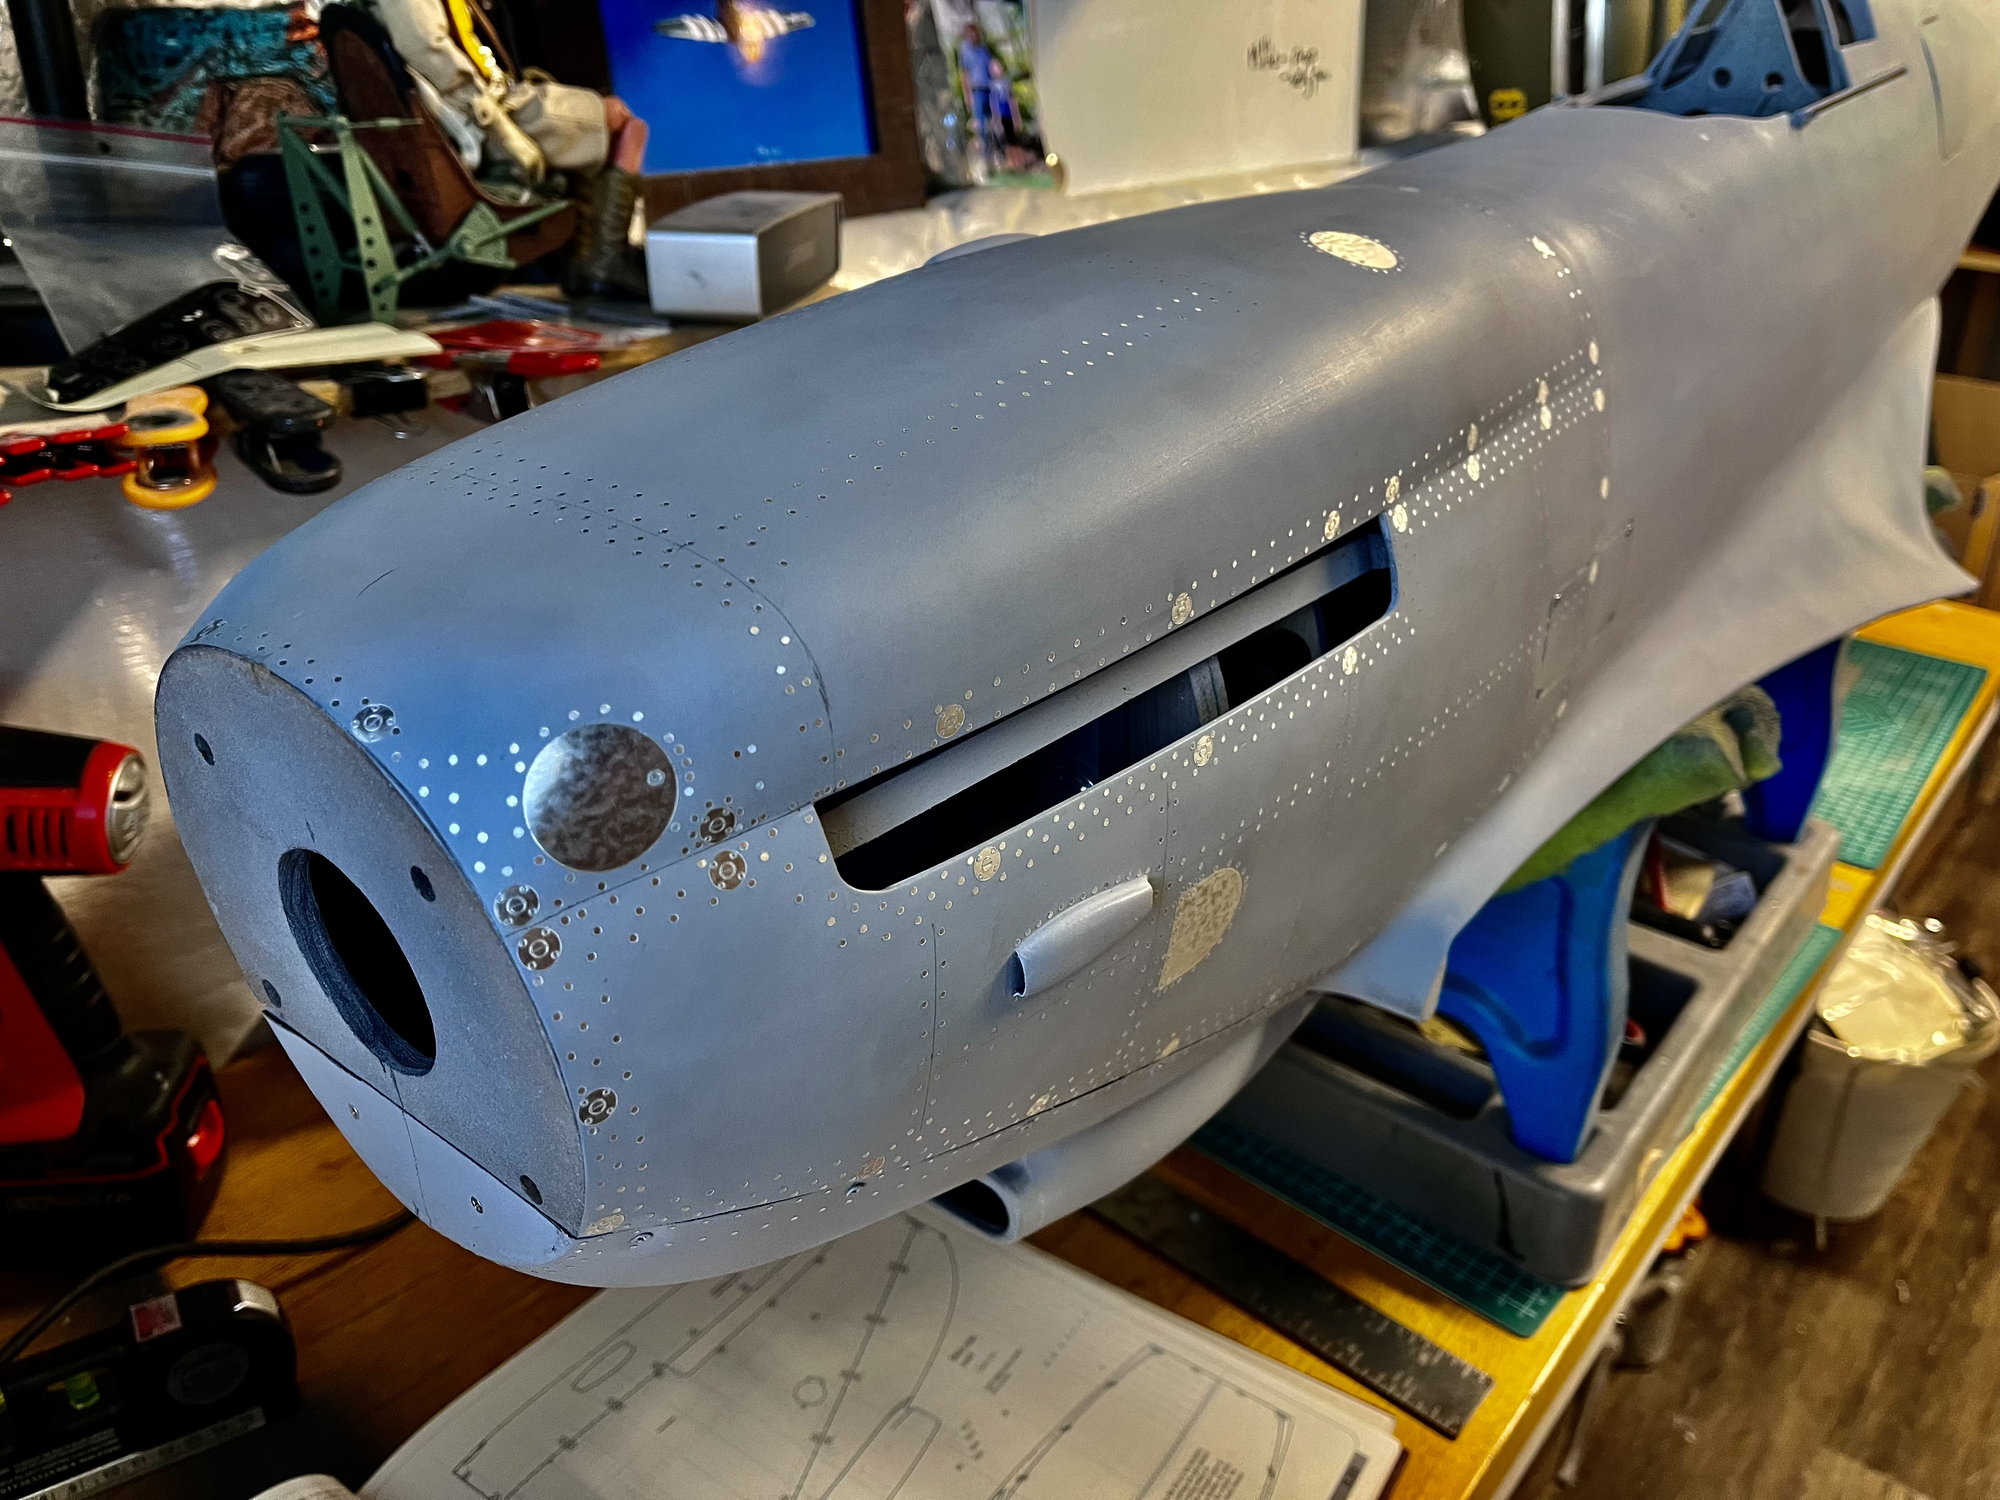
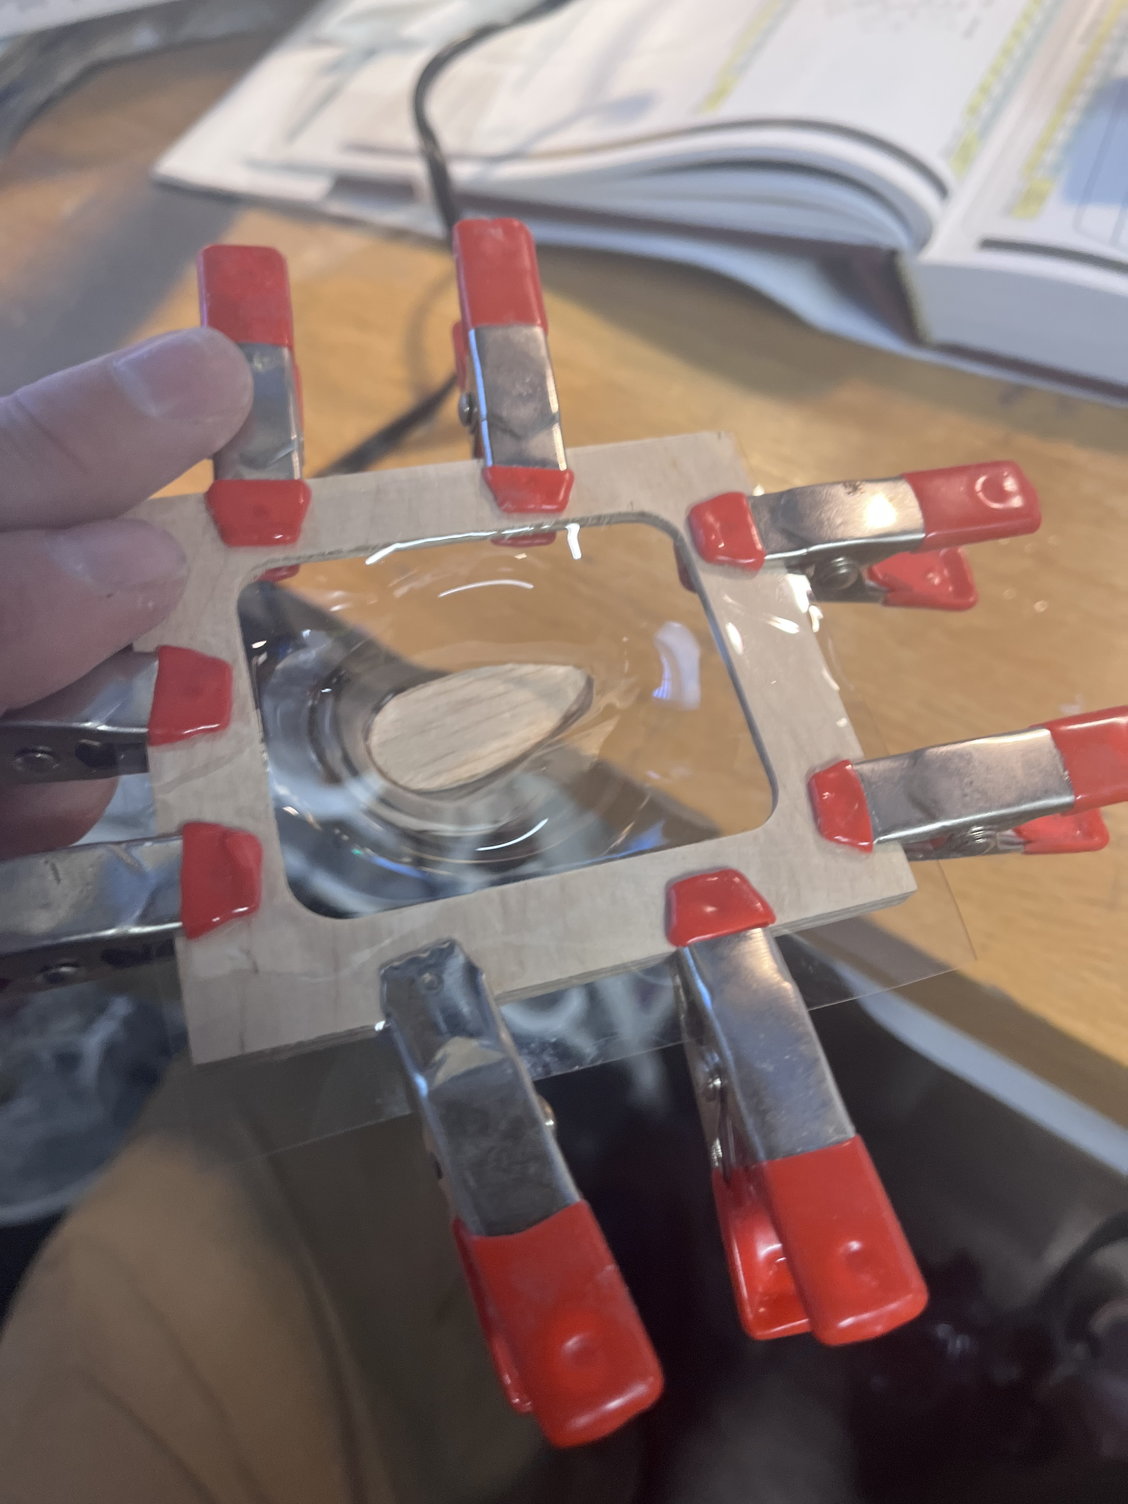
Finished up the ailerons and started in working on the fuselage, beginning with right side cowl. Paul Monforton’s “Spitfire Engineered” has again been my go to manual for this.

The following users liked this post:
fokke (01-31-2023)
01-31-2023, 08:26 AM
#309
Thread Starter
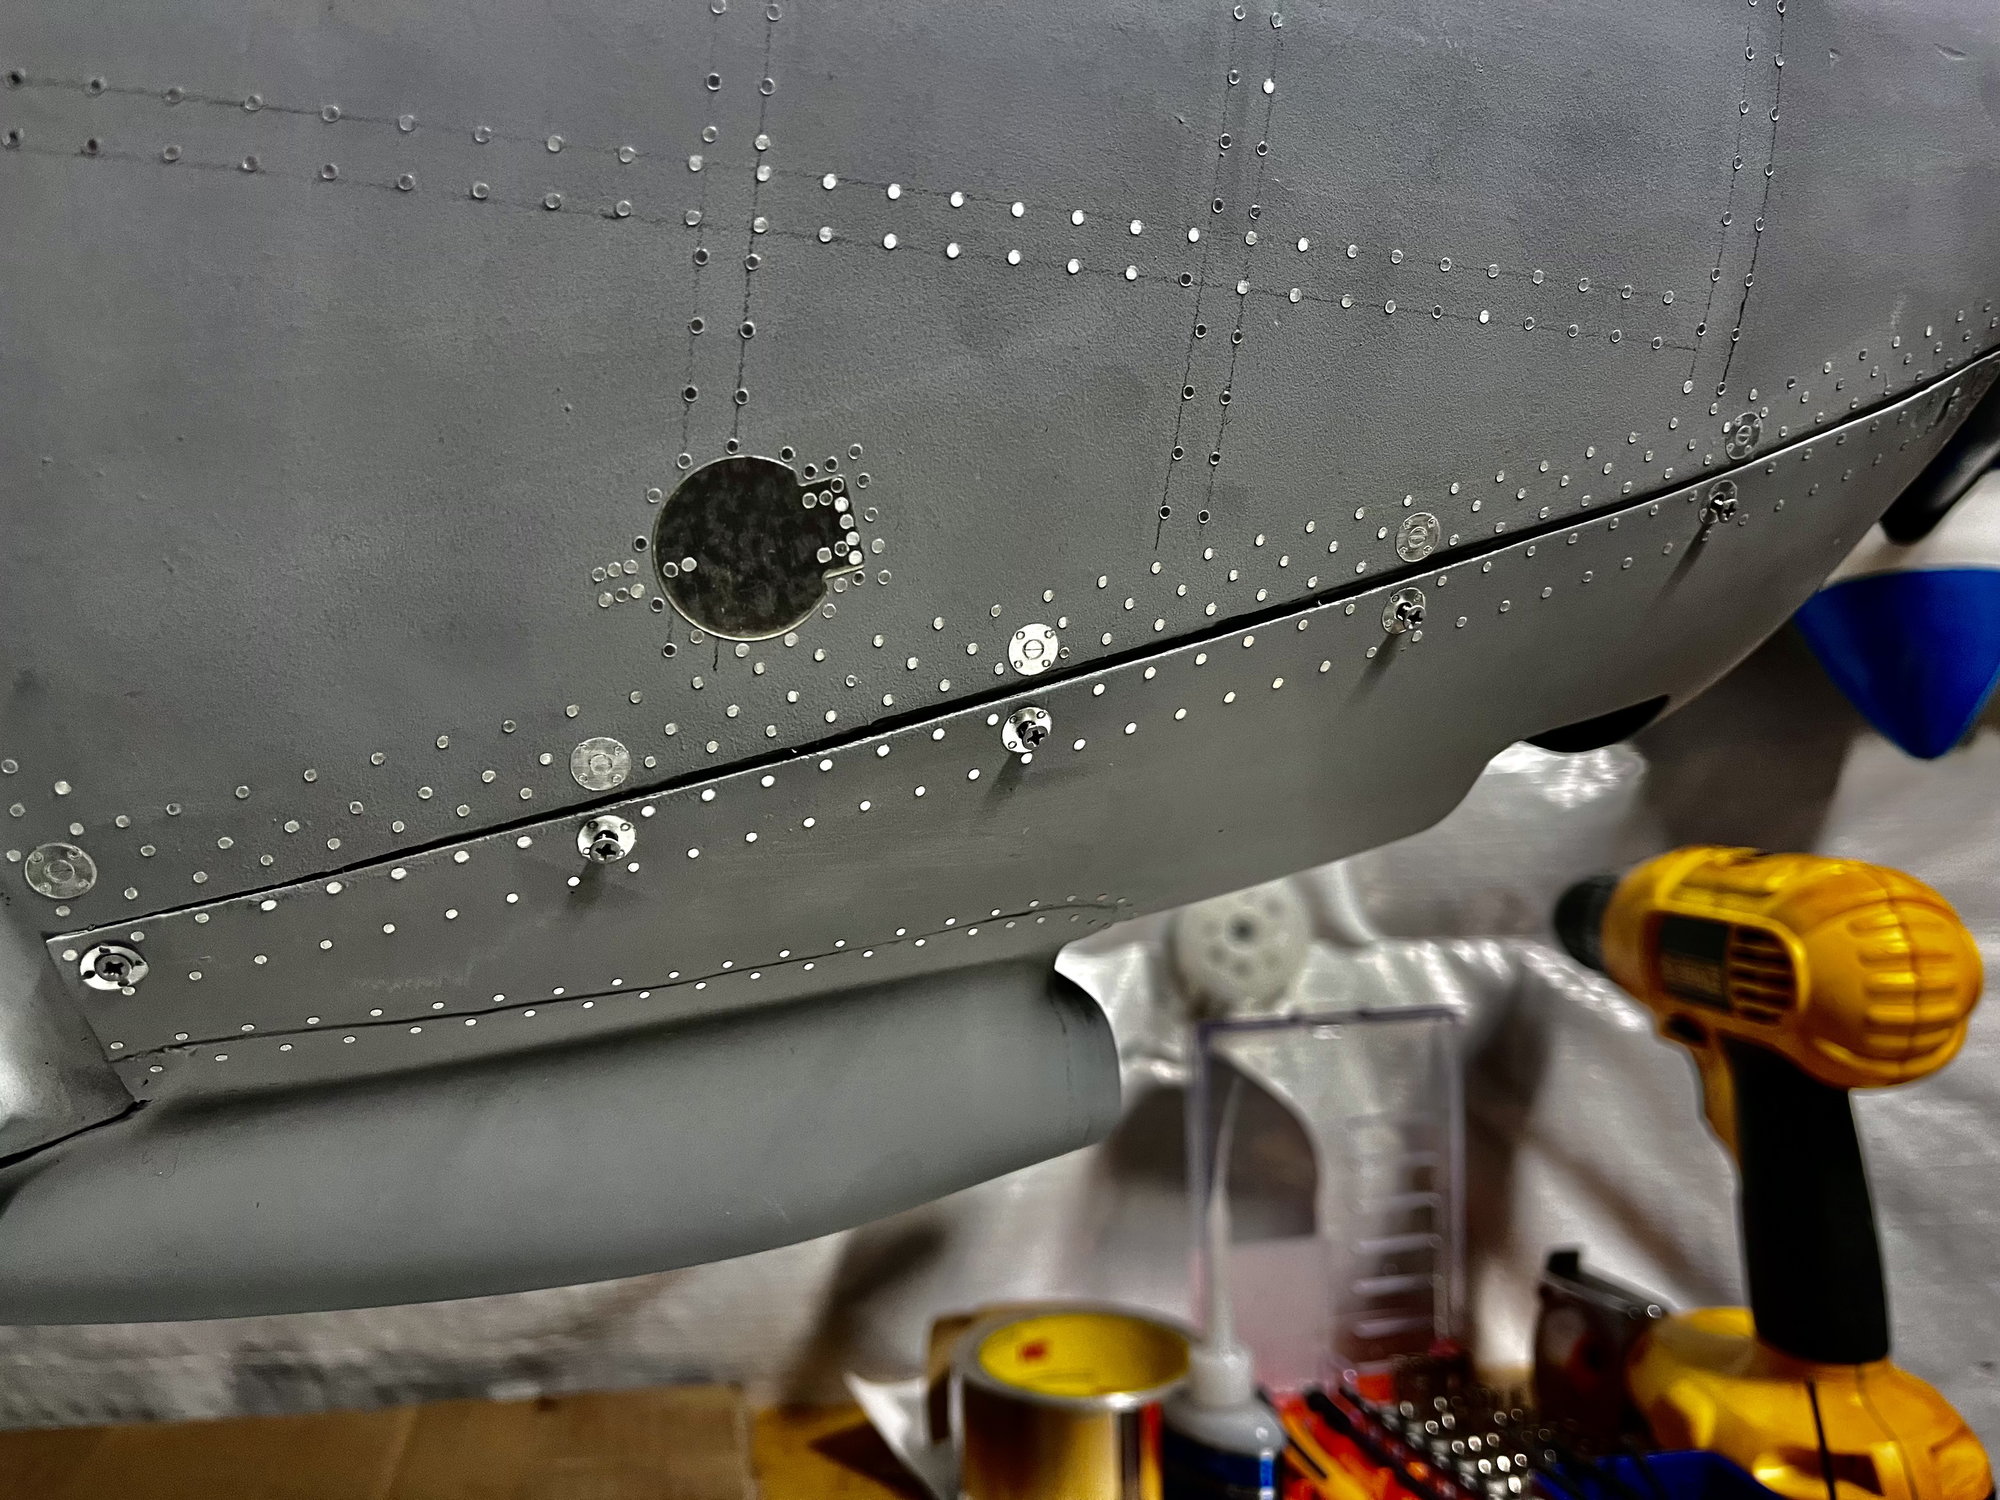
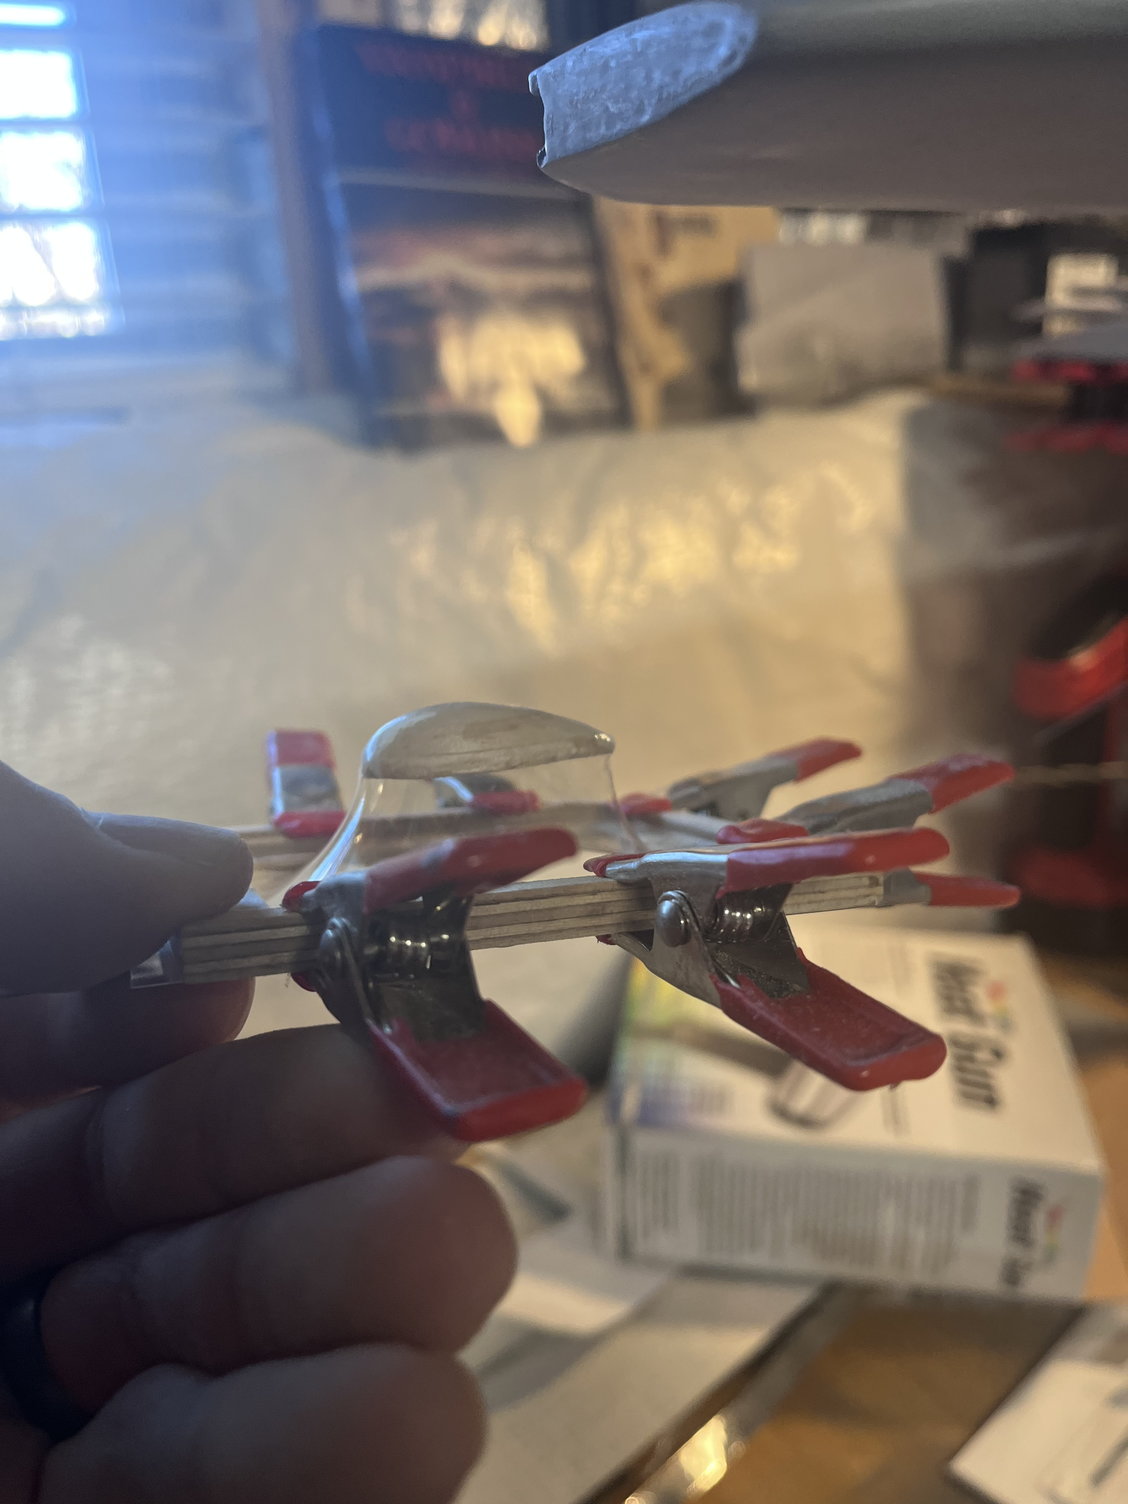
Getting there, but it’s slow going, but I’m really enjoying the process. And I need to say Thank you to Chad Veich for his rivet and hatchwork kit. Cutting all of this out of metal foil while do-able would be even more time consuming. Some of the leading edge material on the ailerons I still had to cut out myself but for scale square hatches and circular ones his kit has been a massive help.
02-02-2023, 01:27 PM
#310
Thread Starter
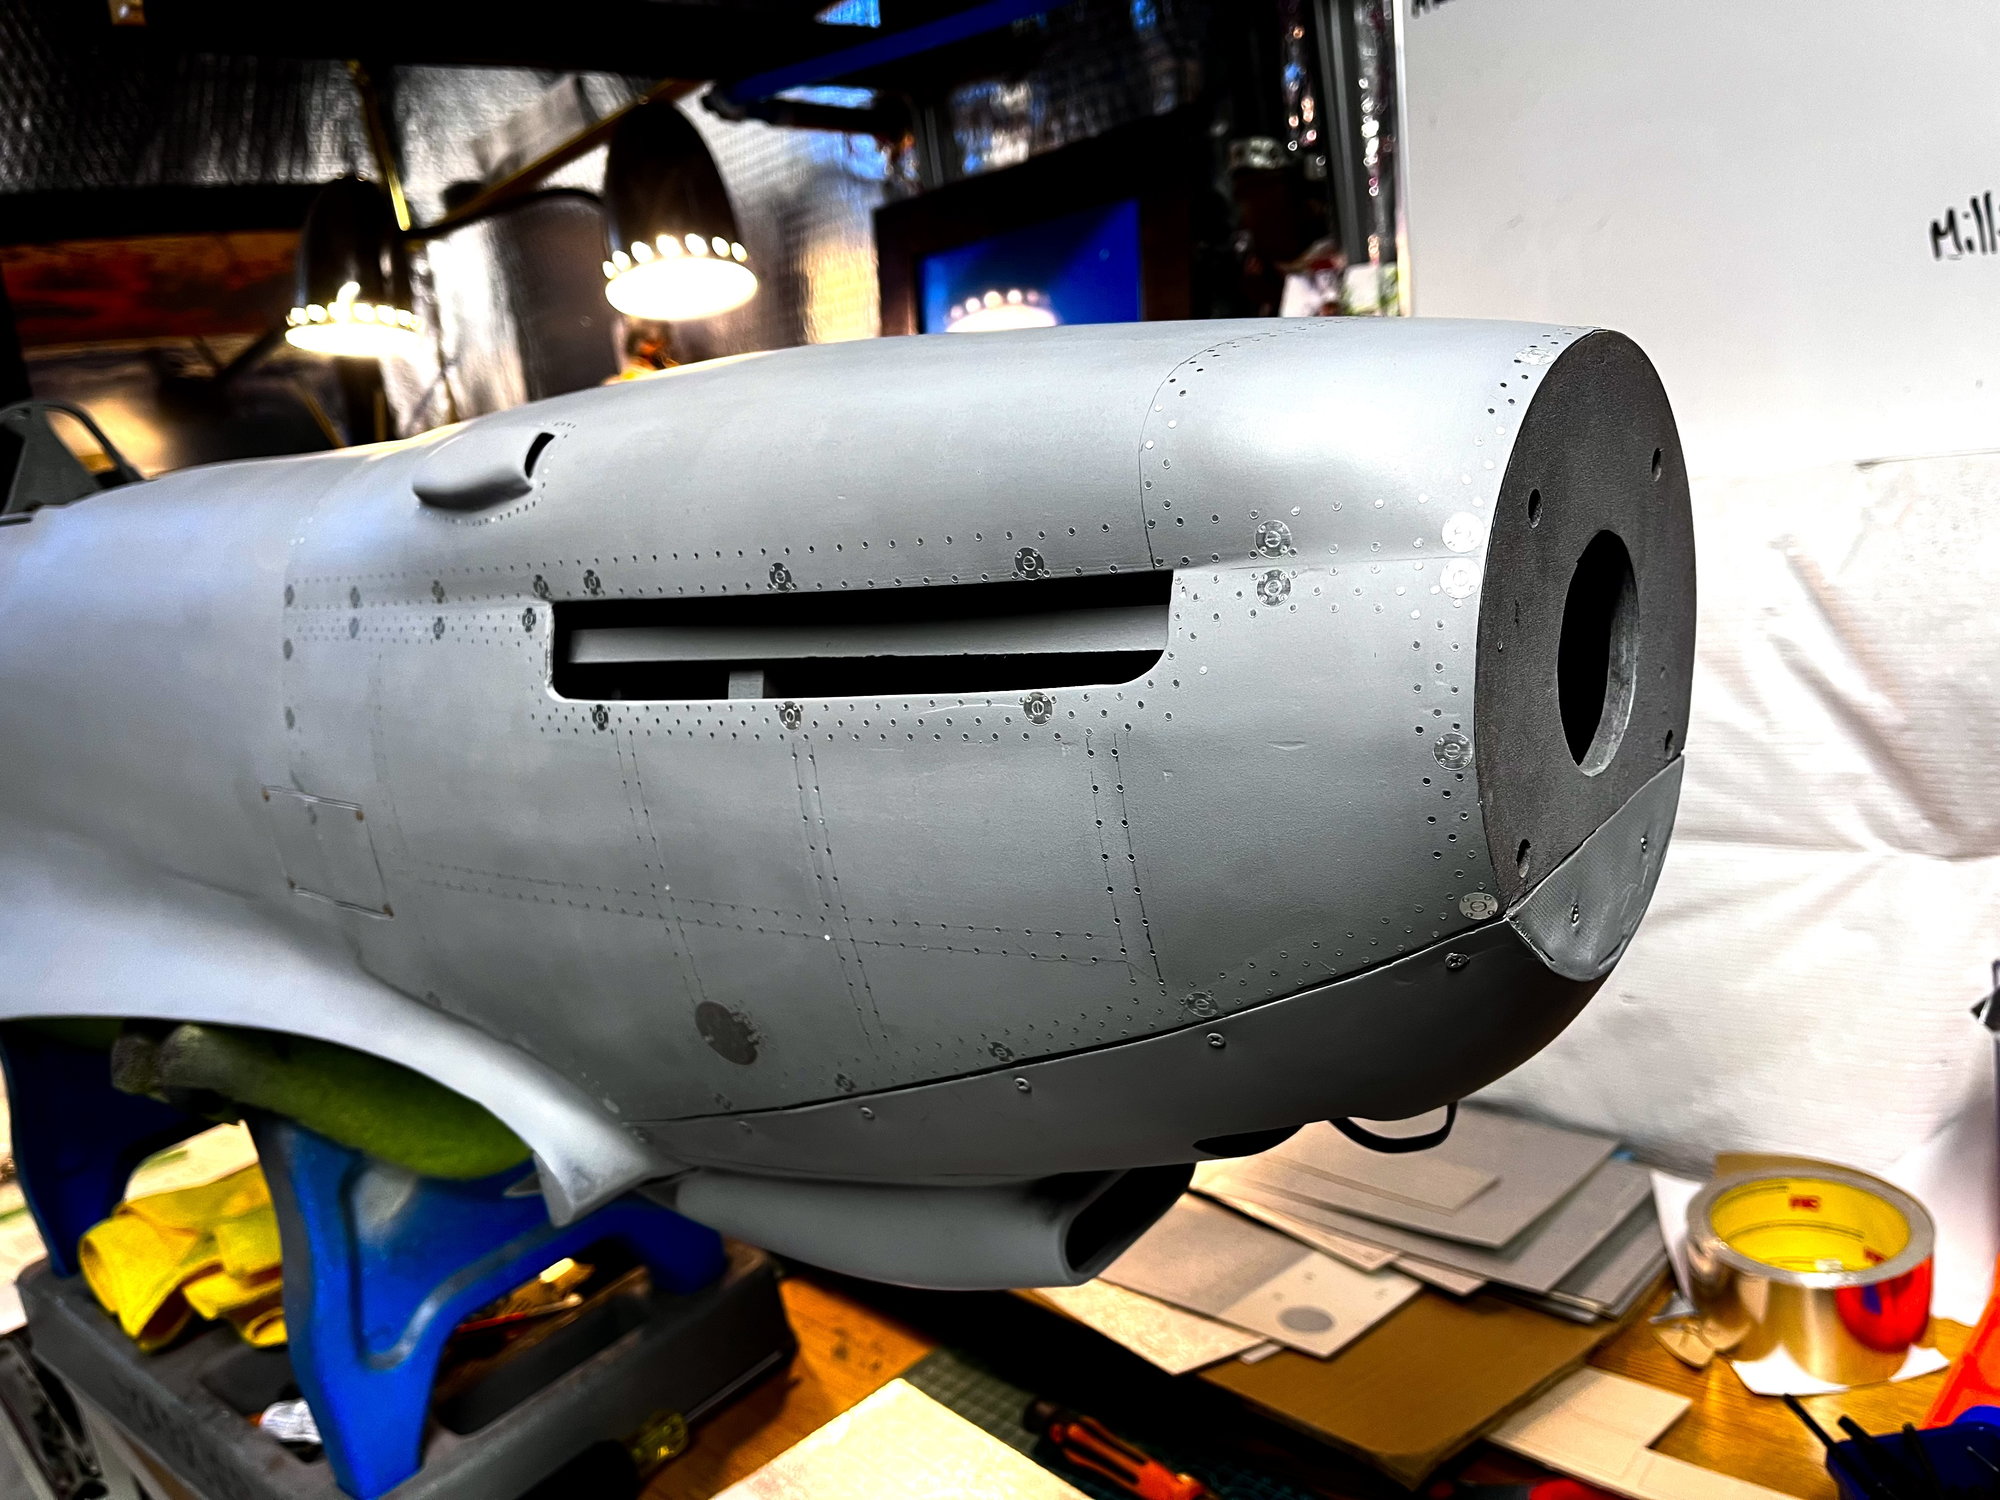
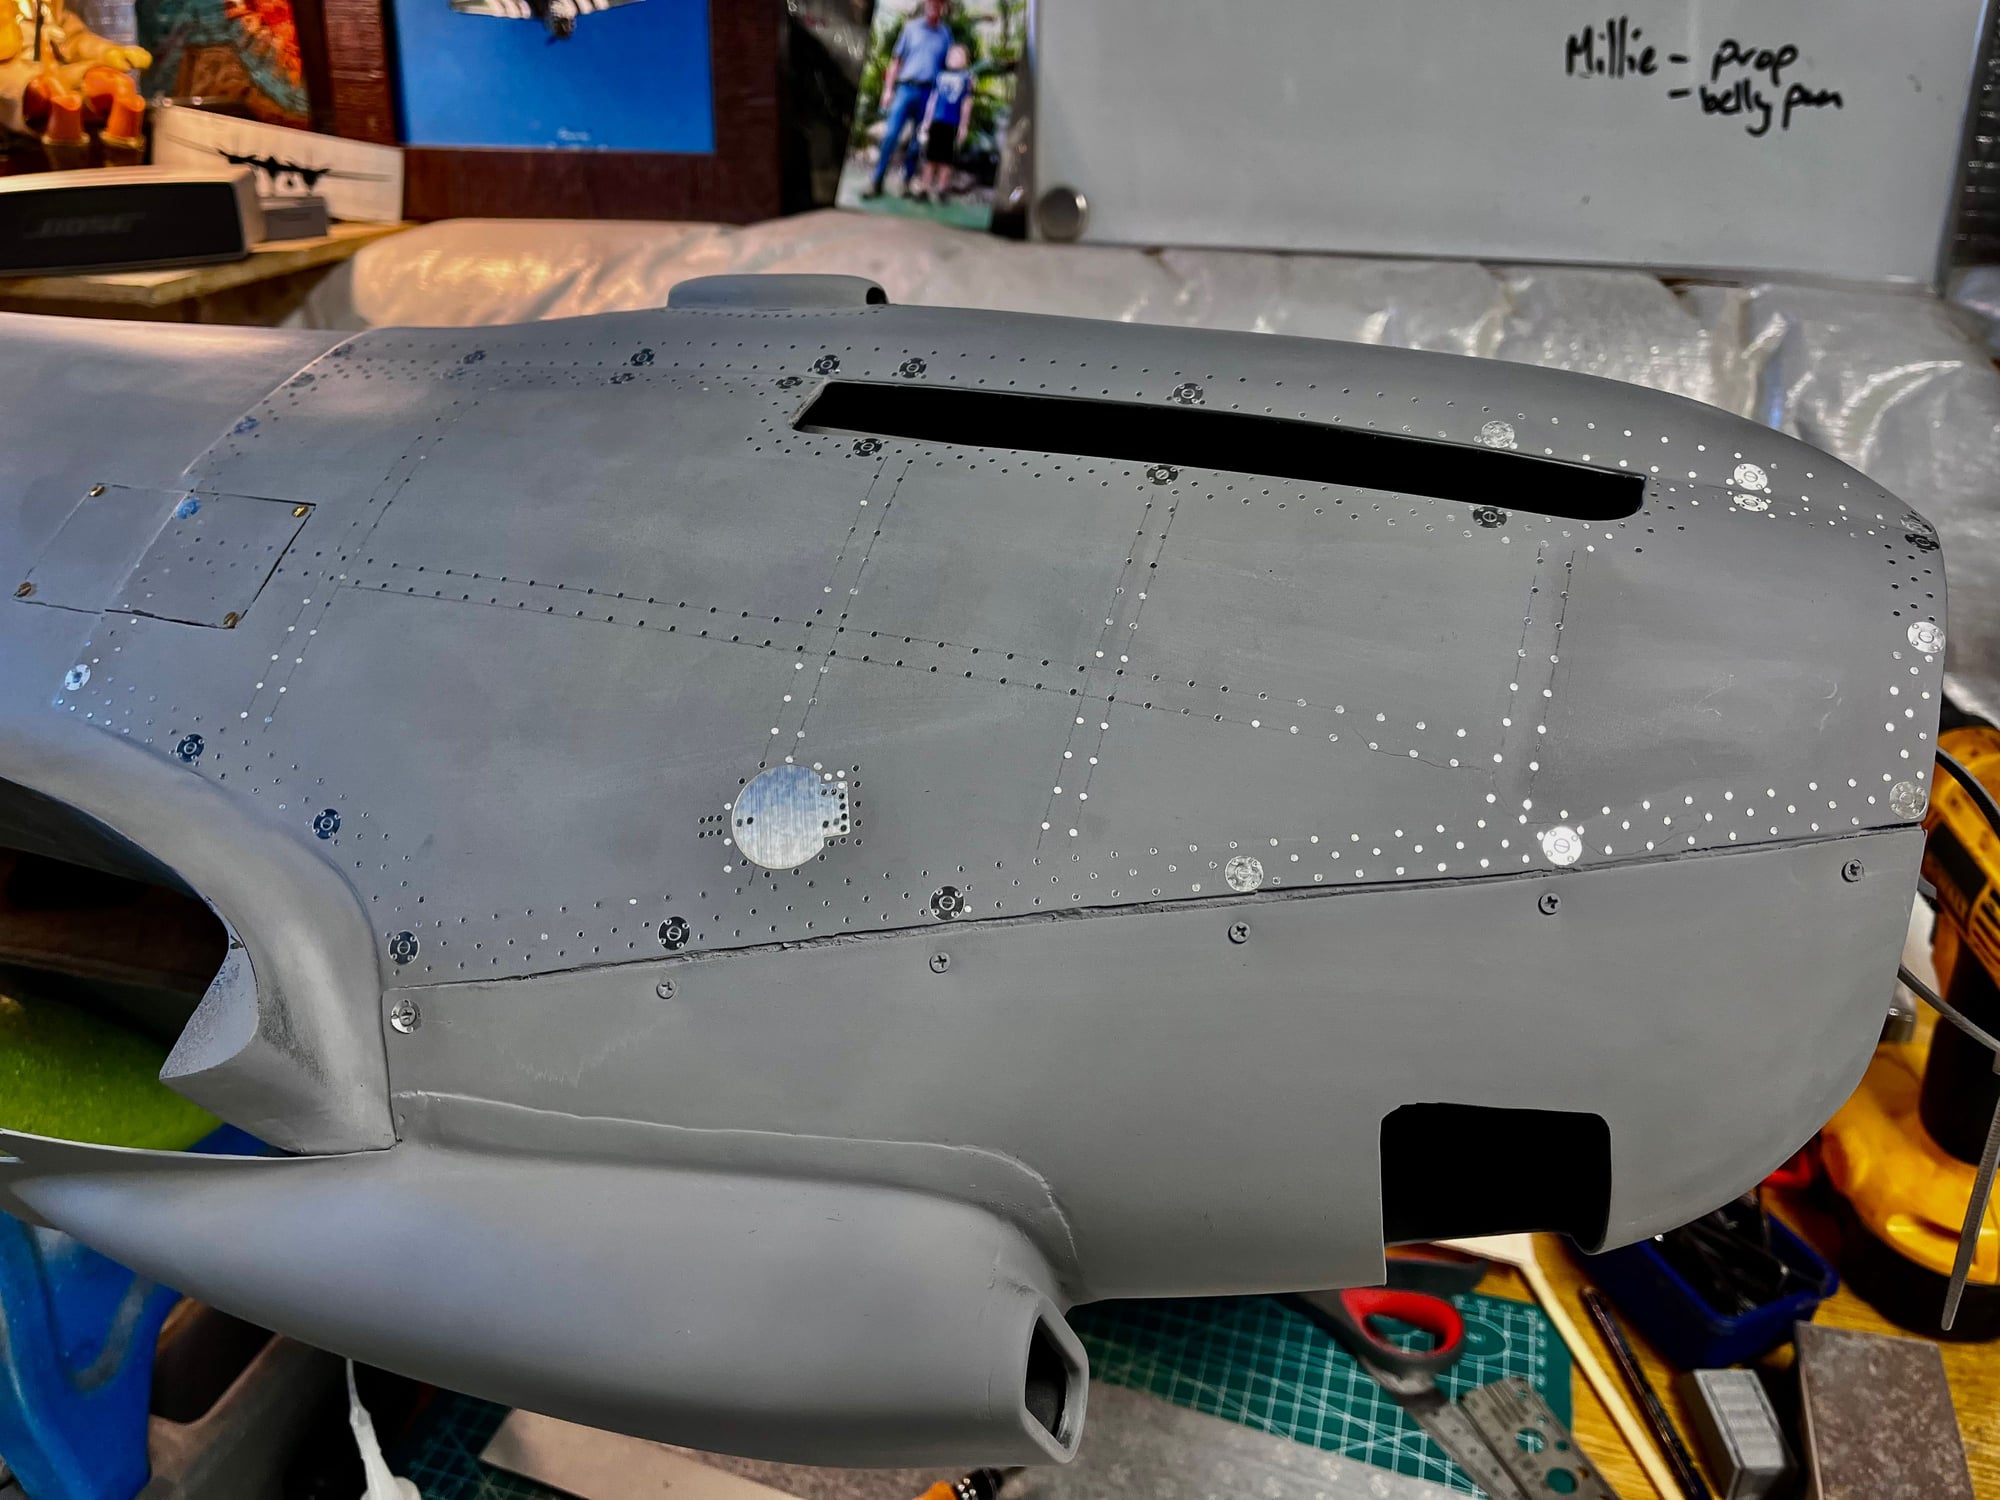
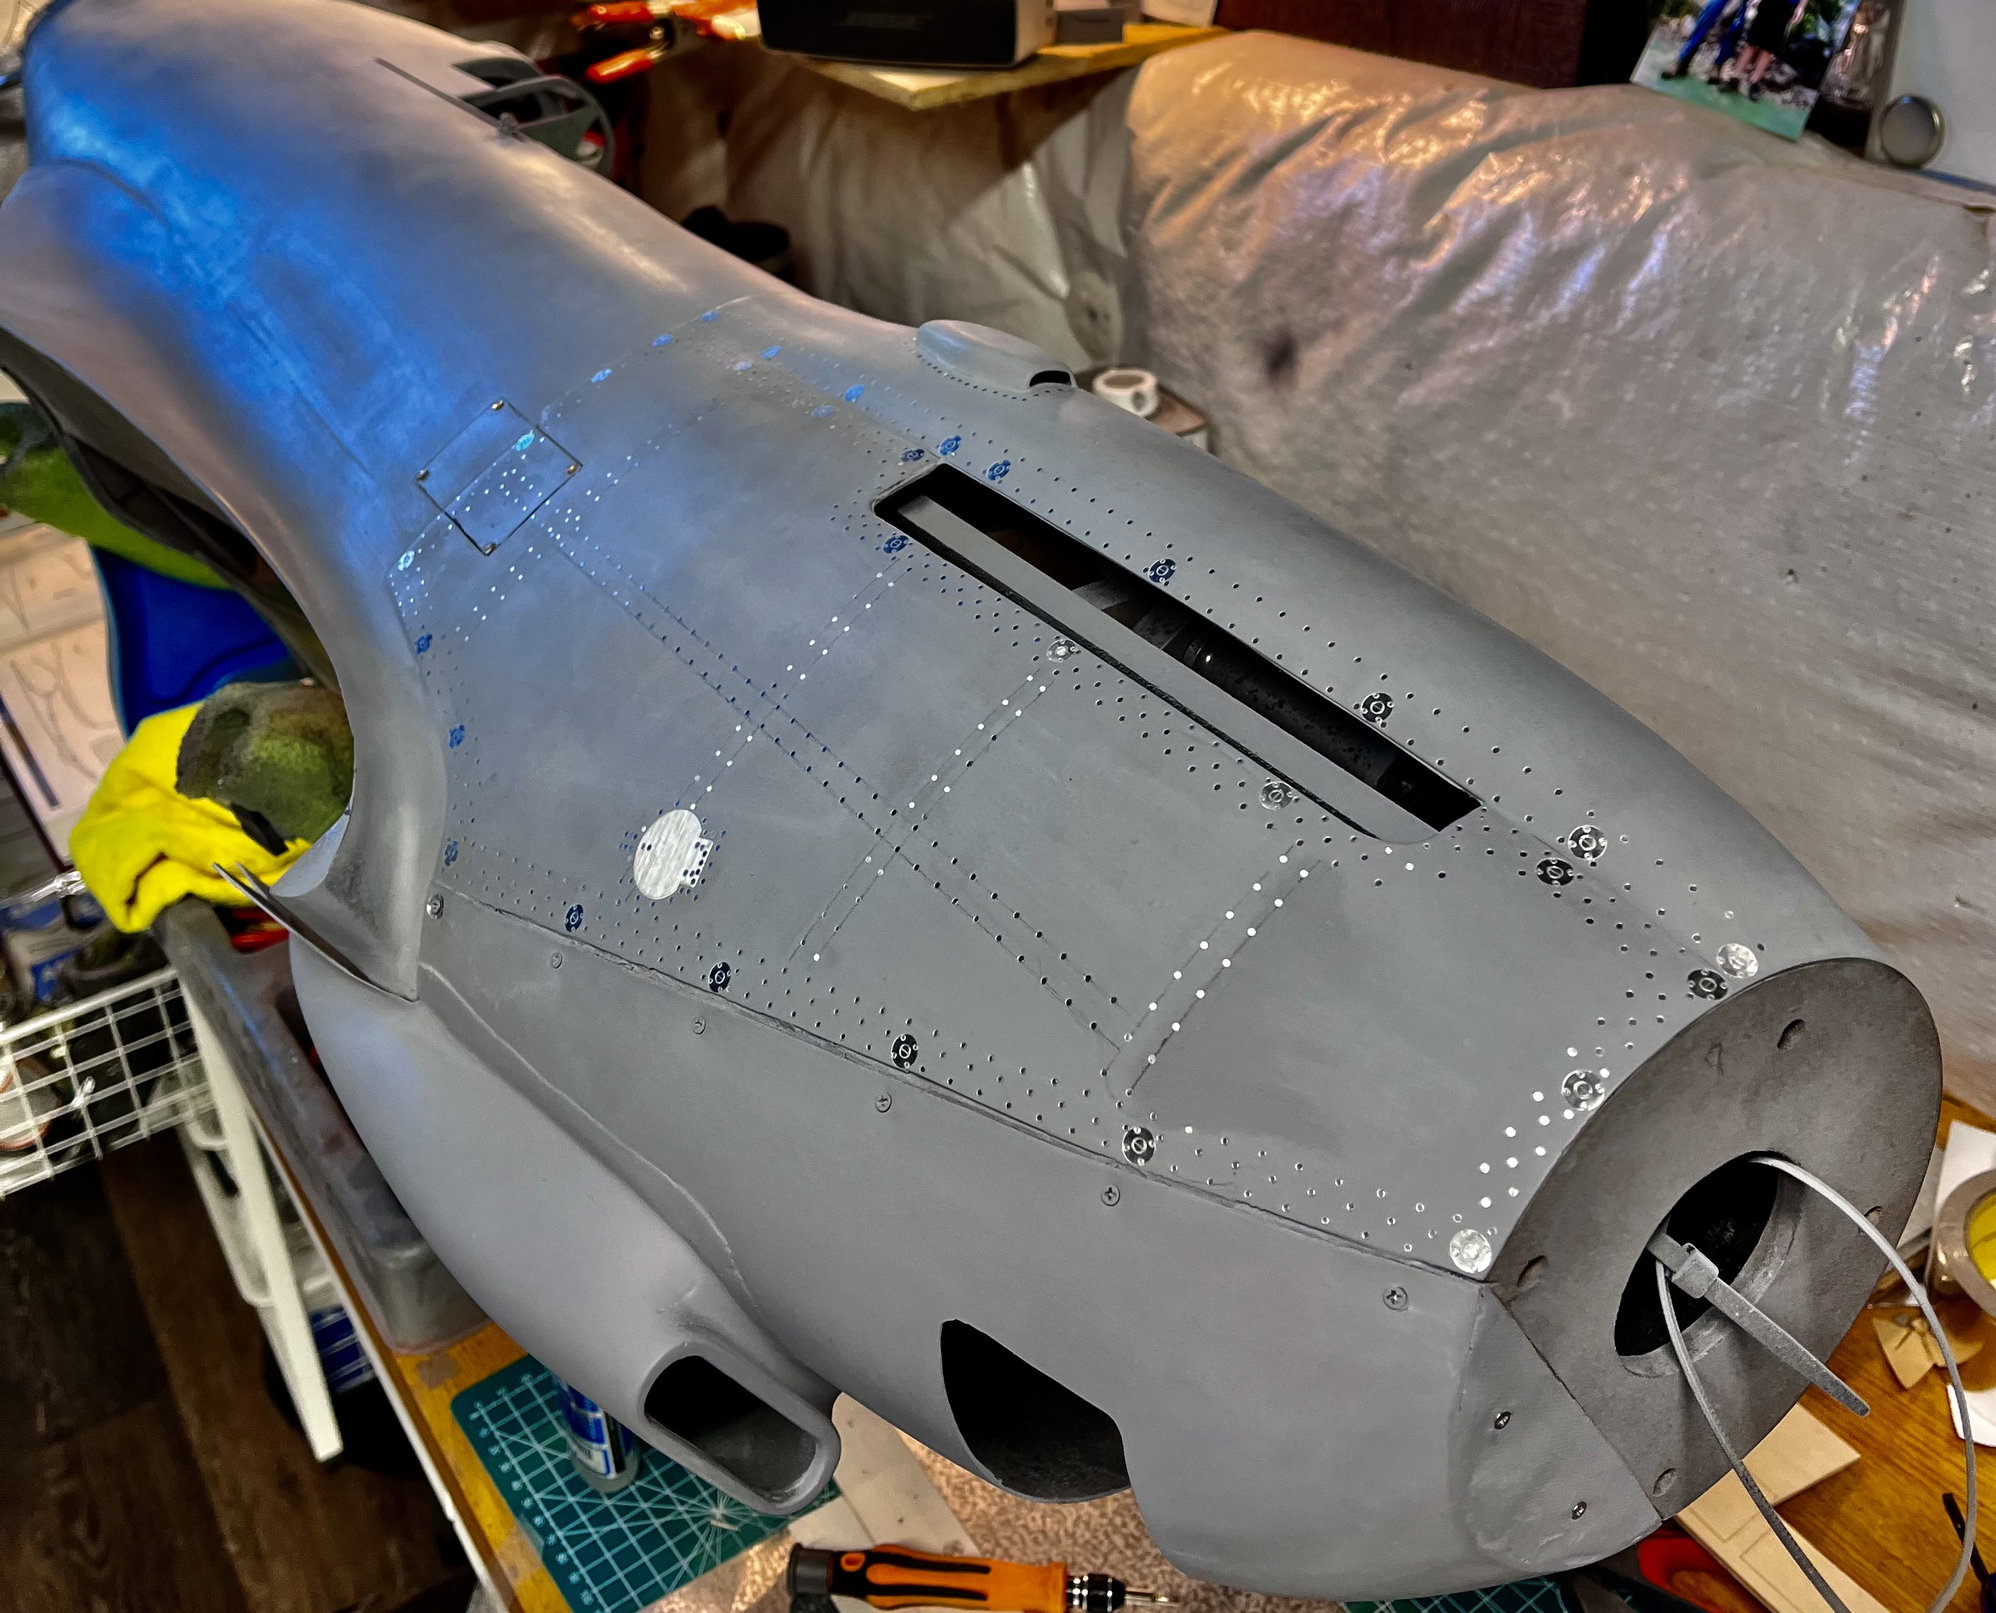
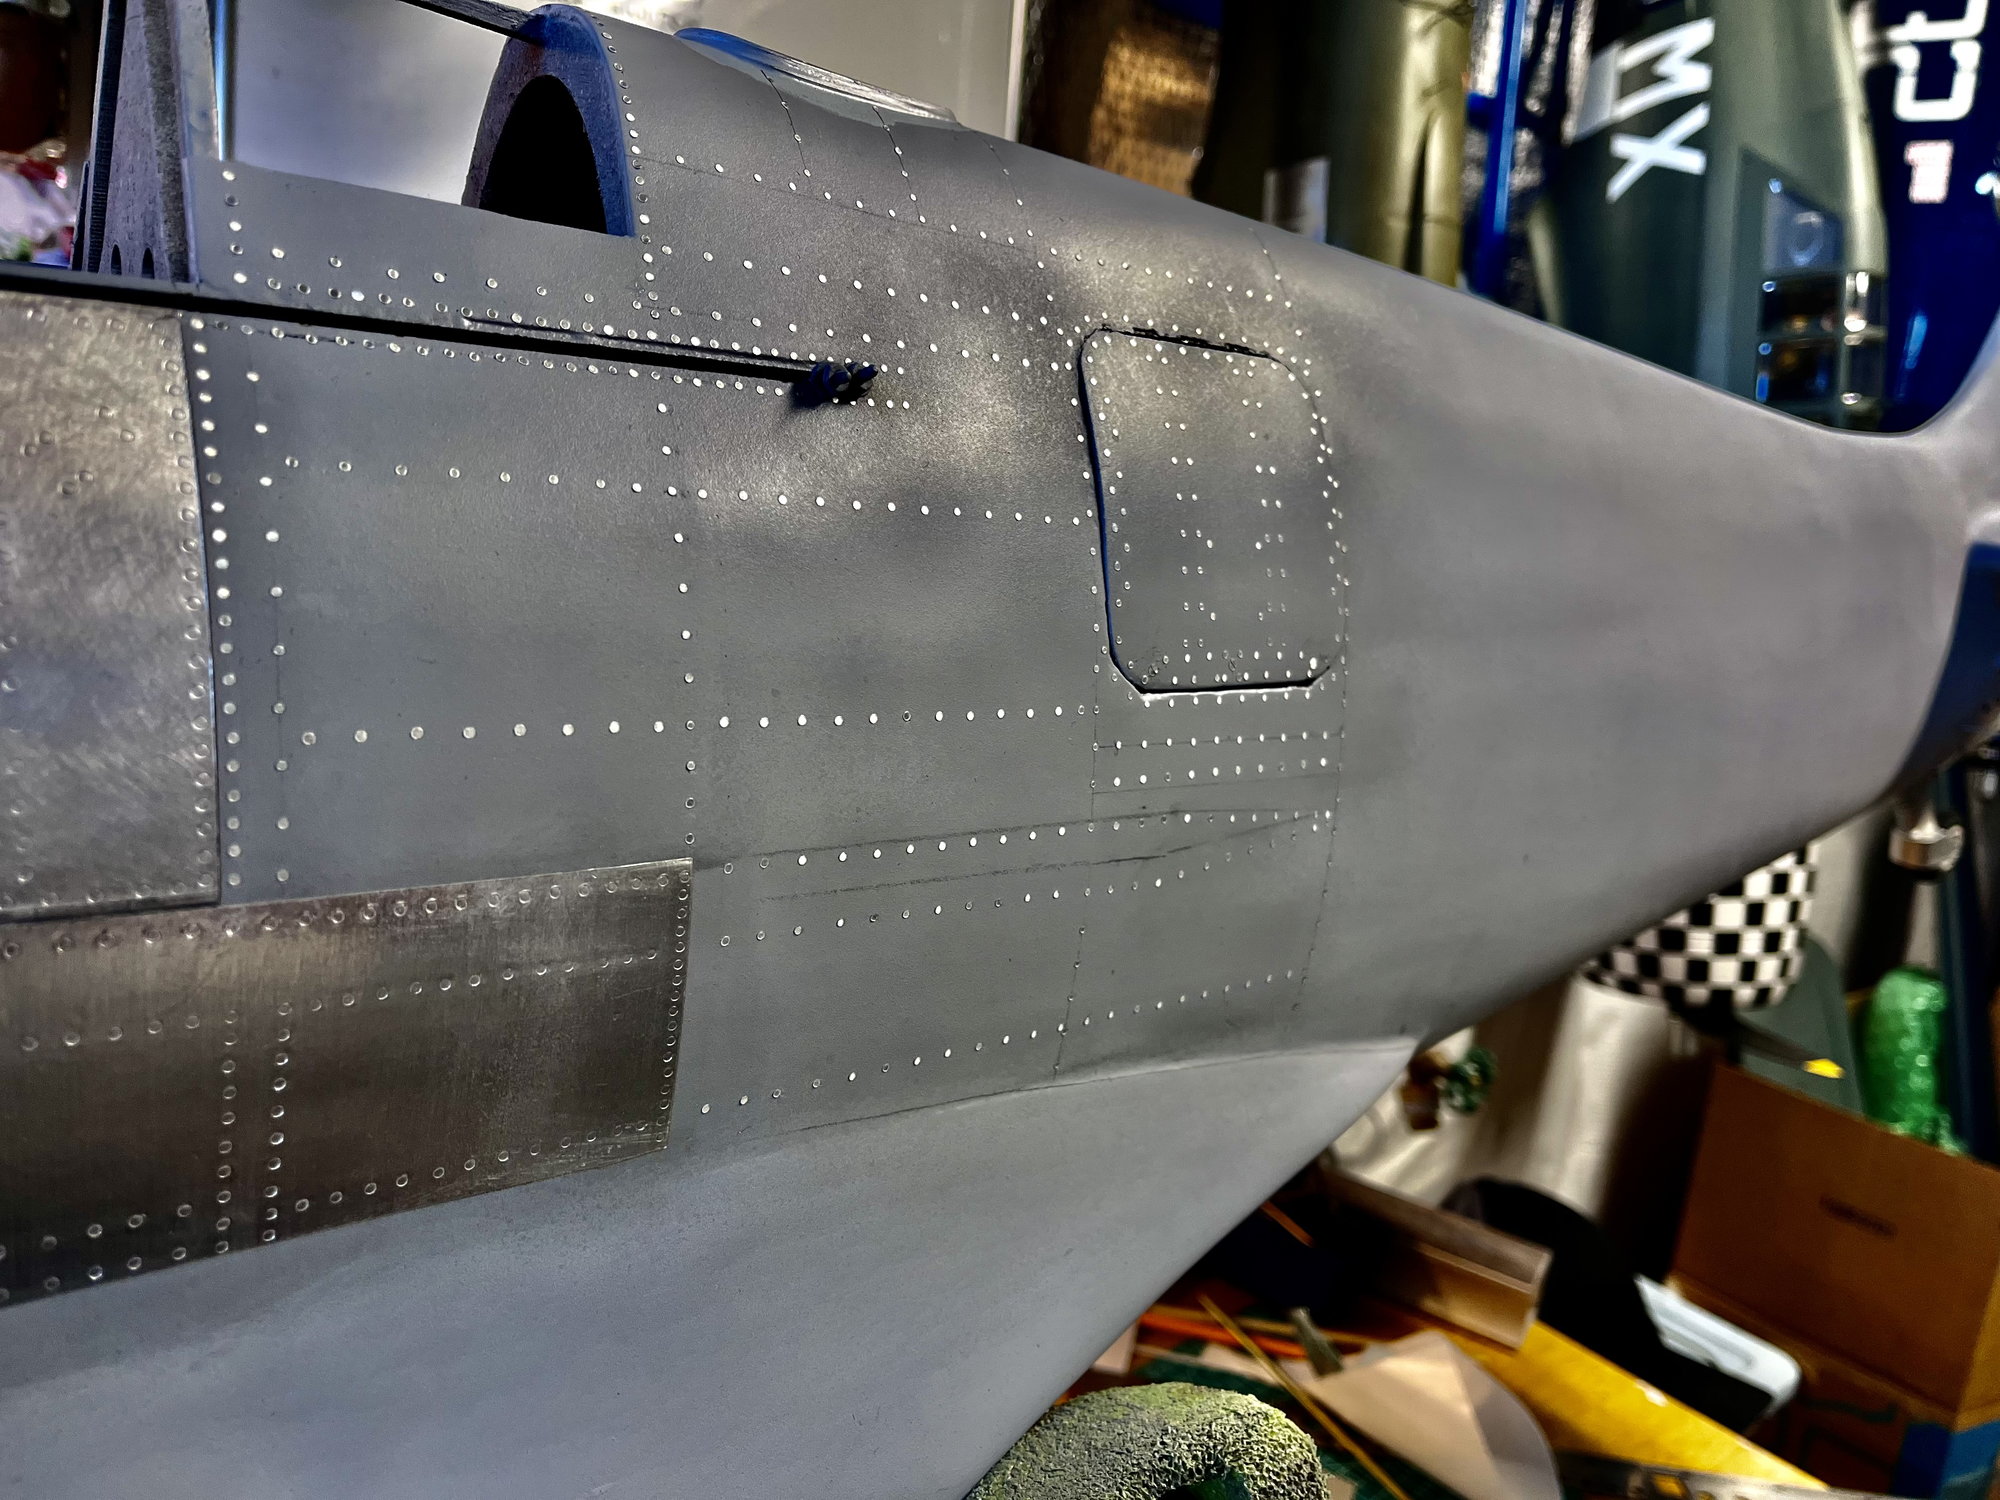
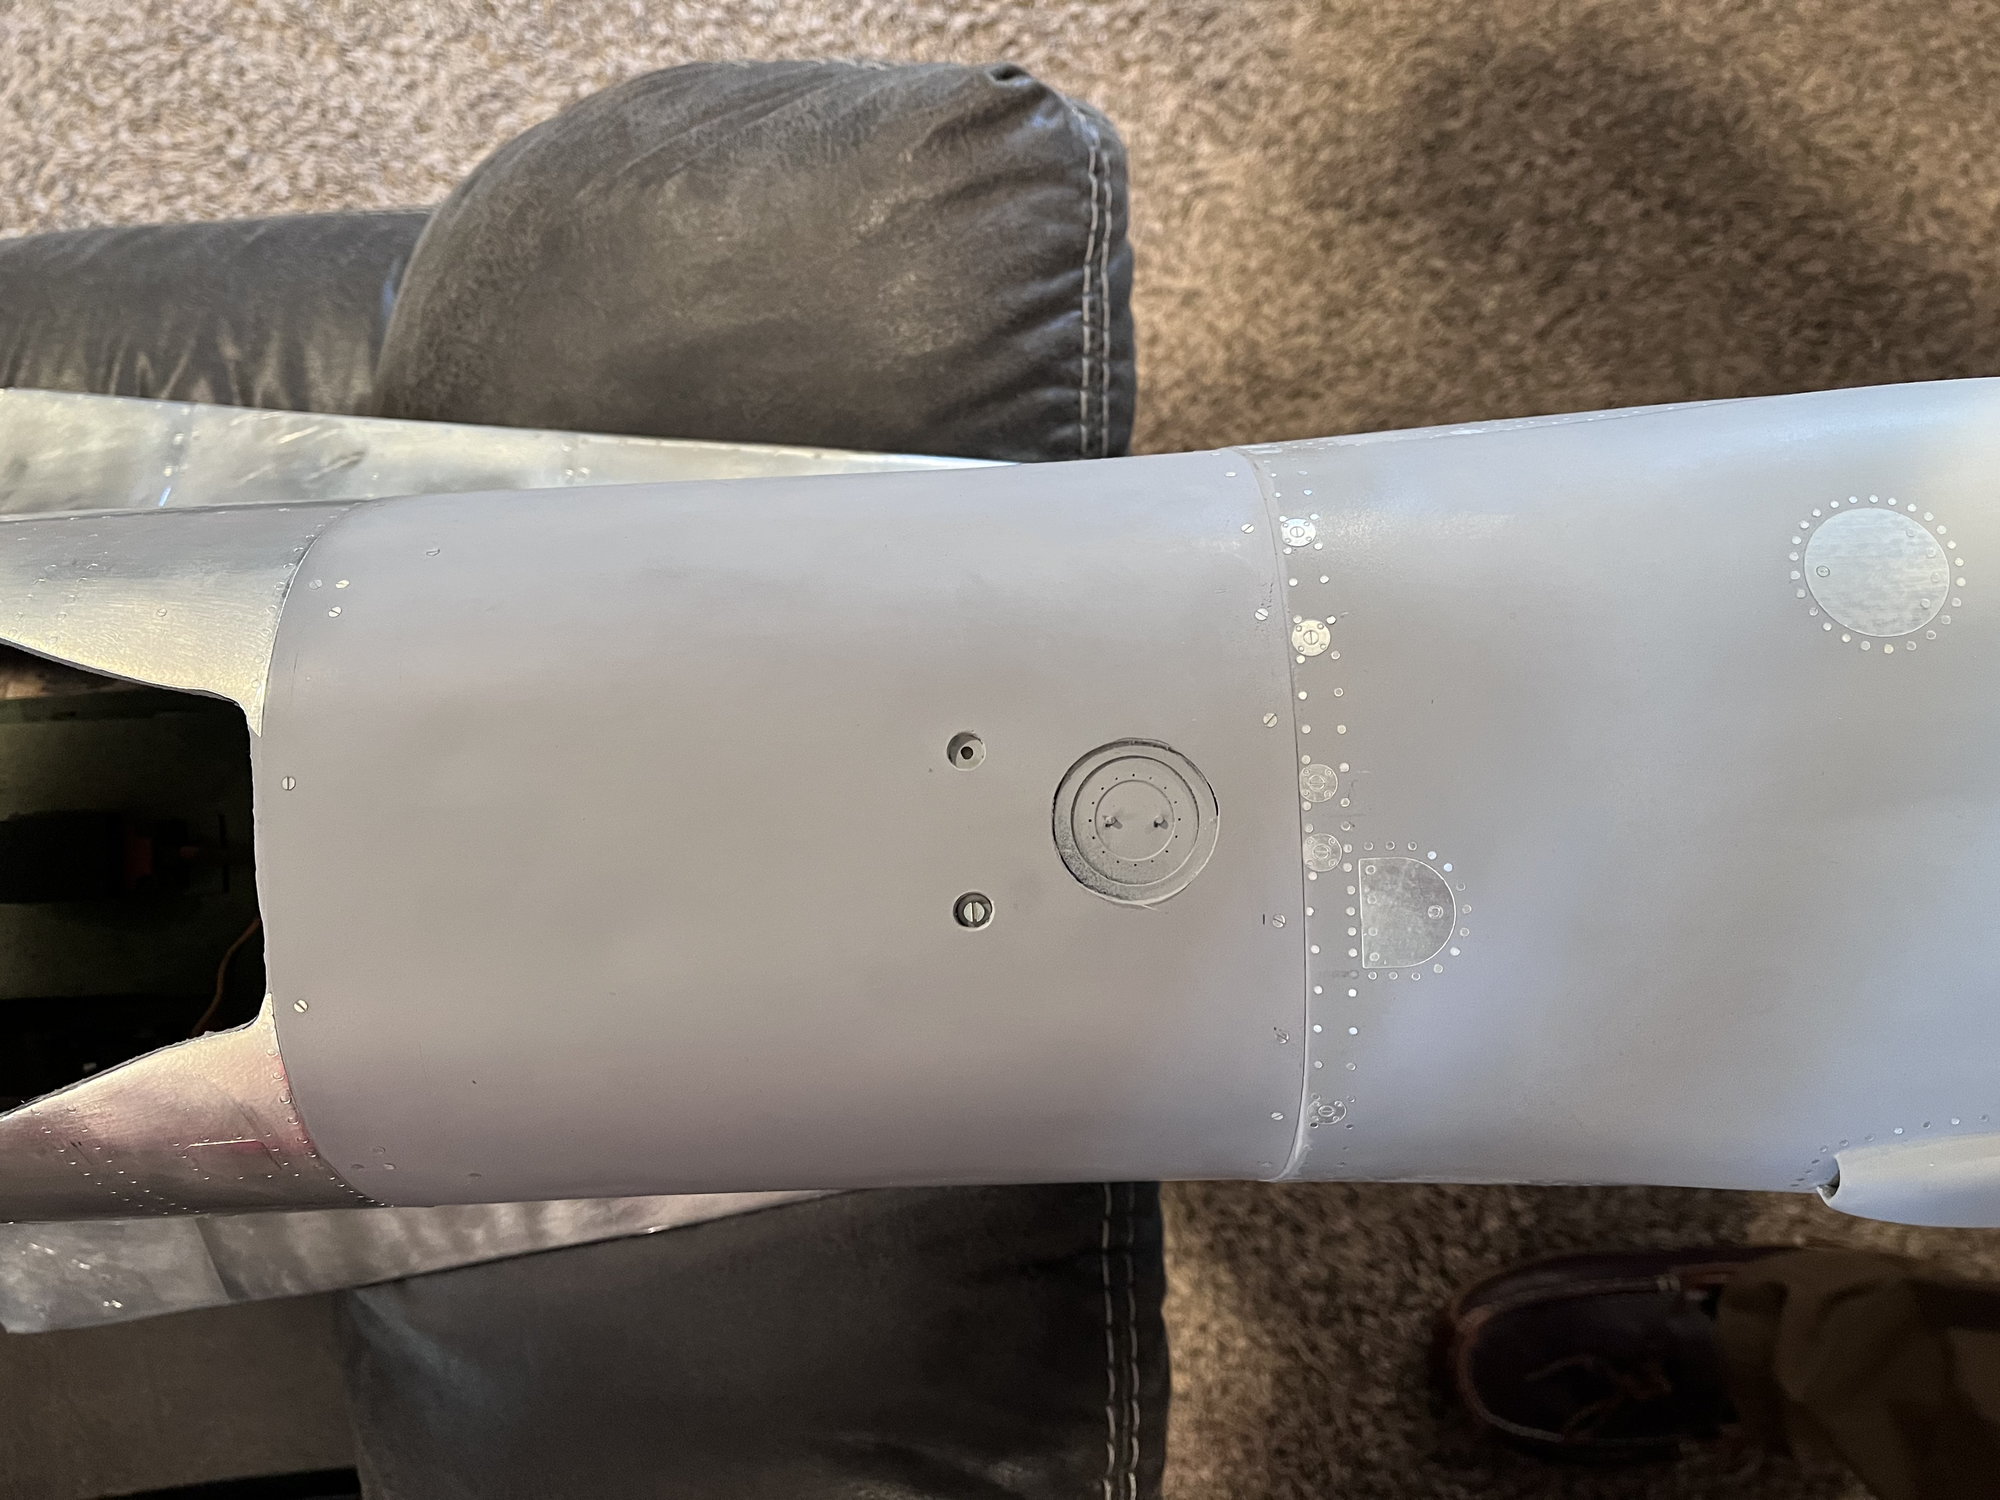
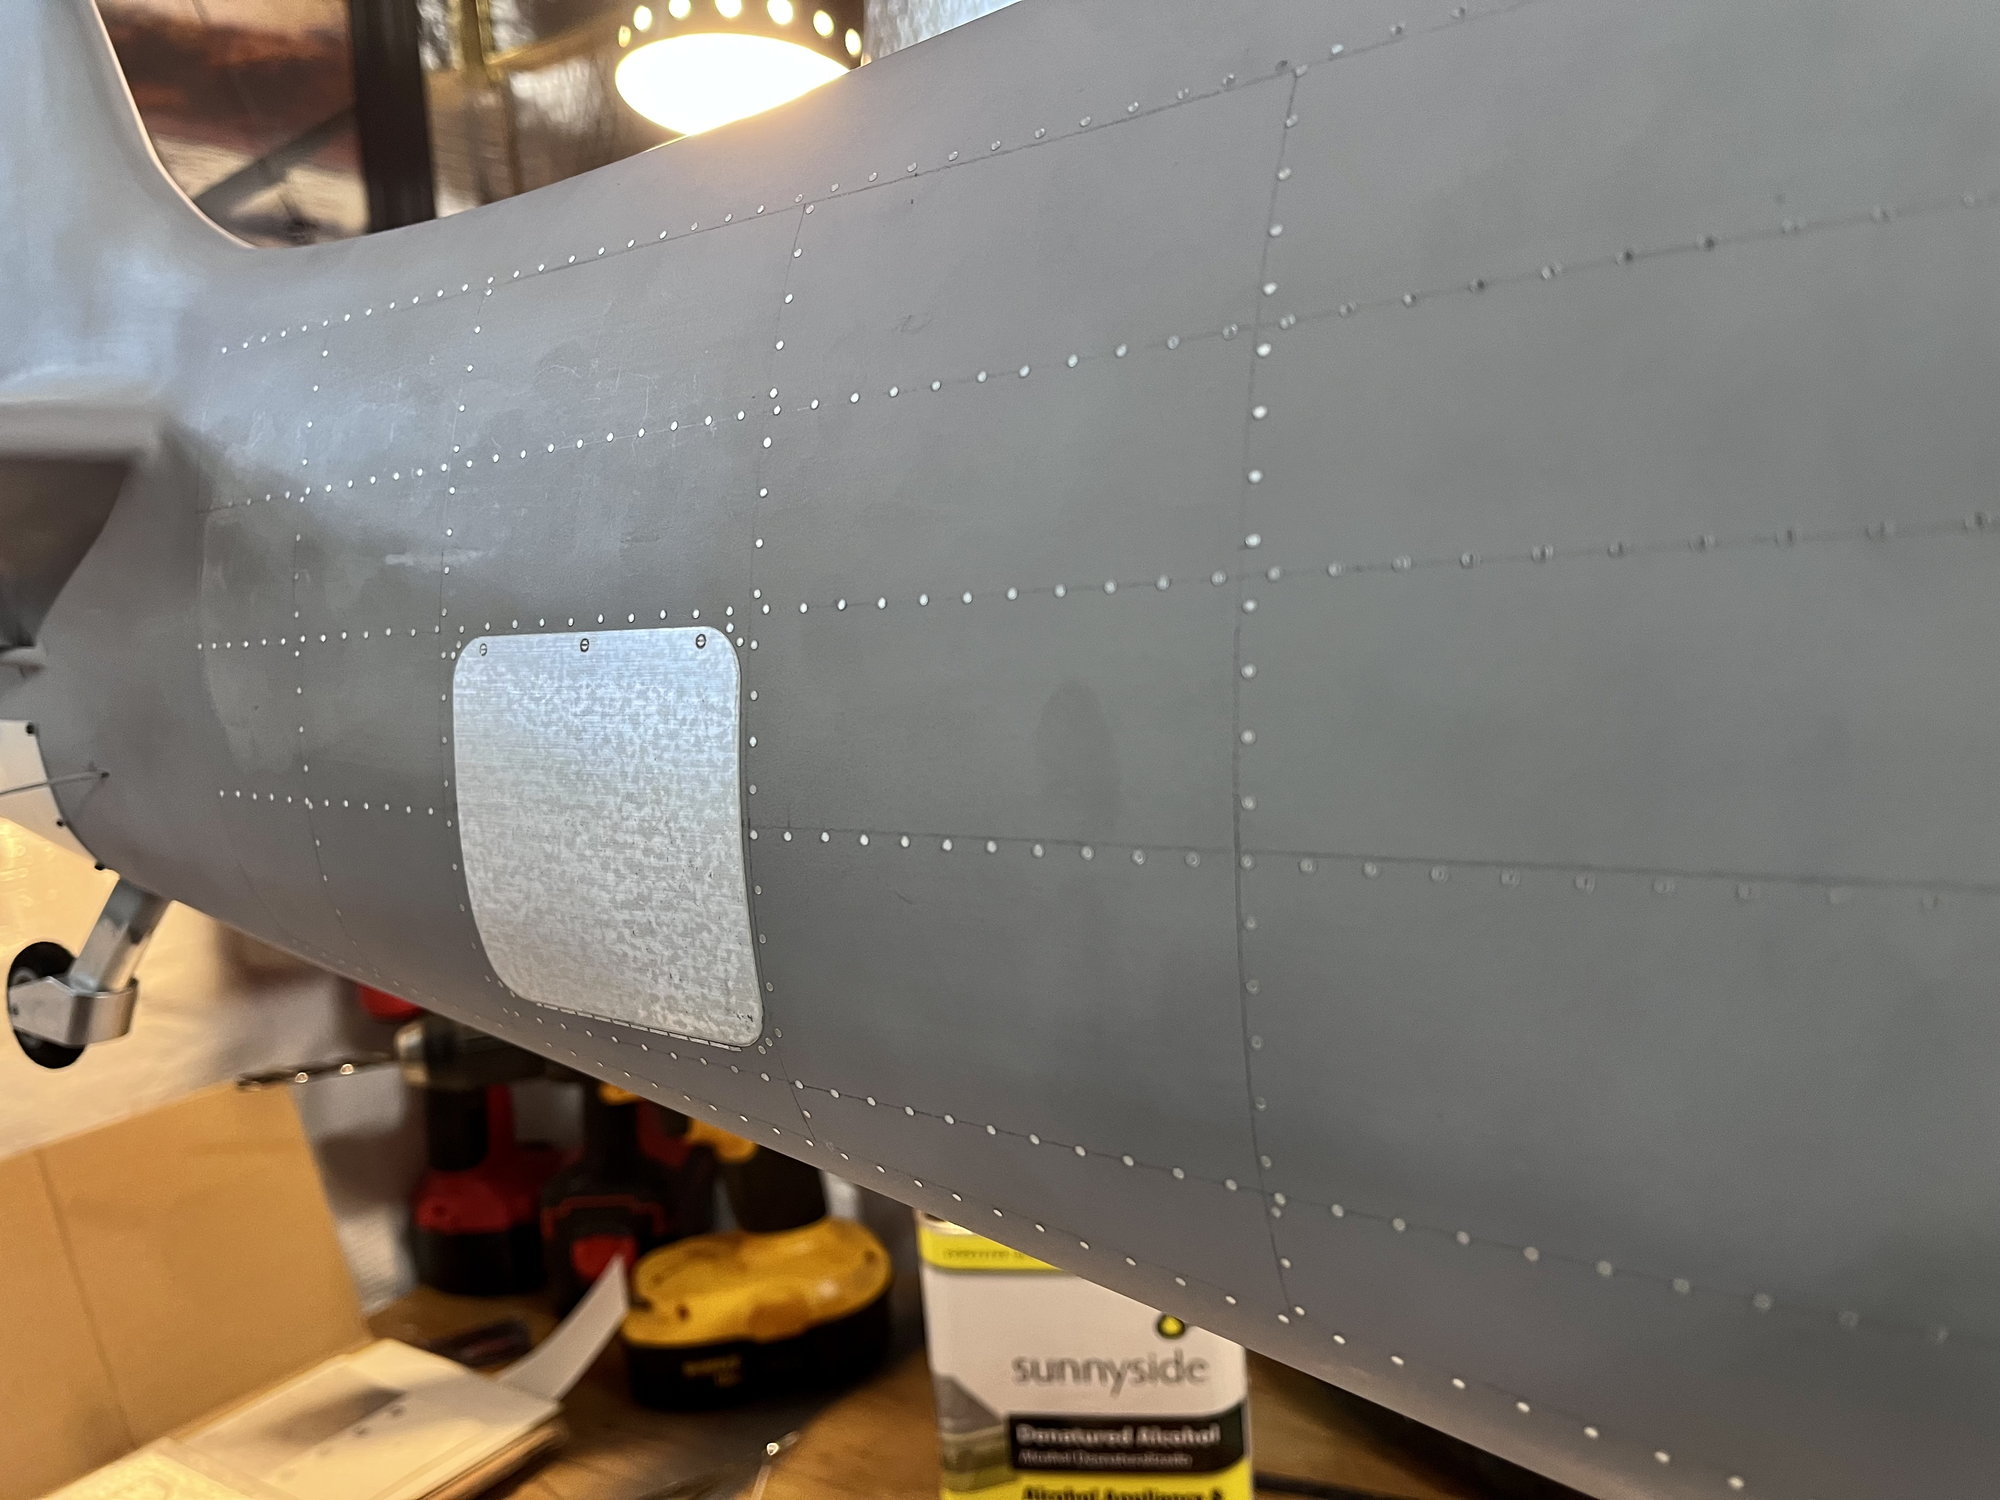
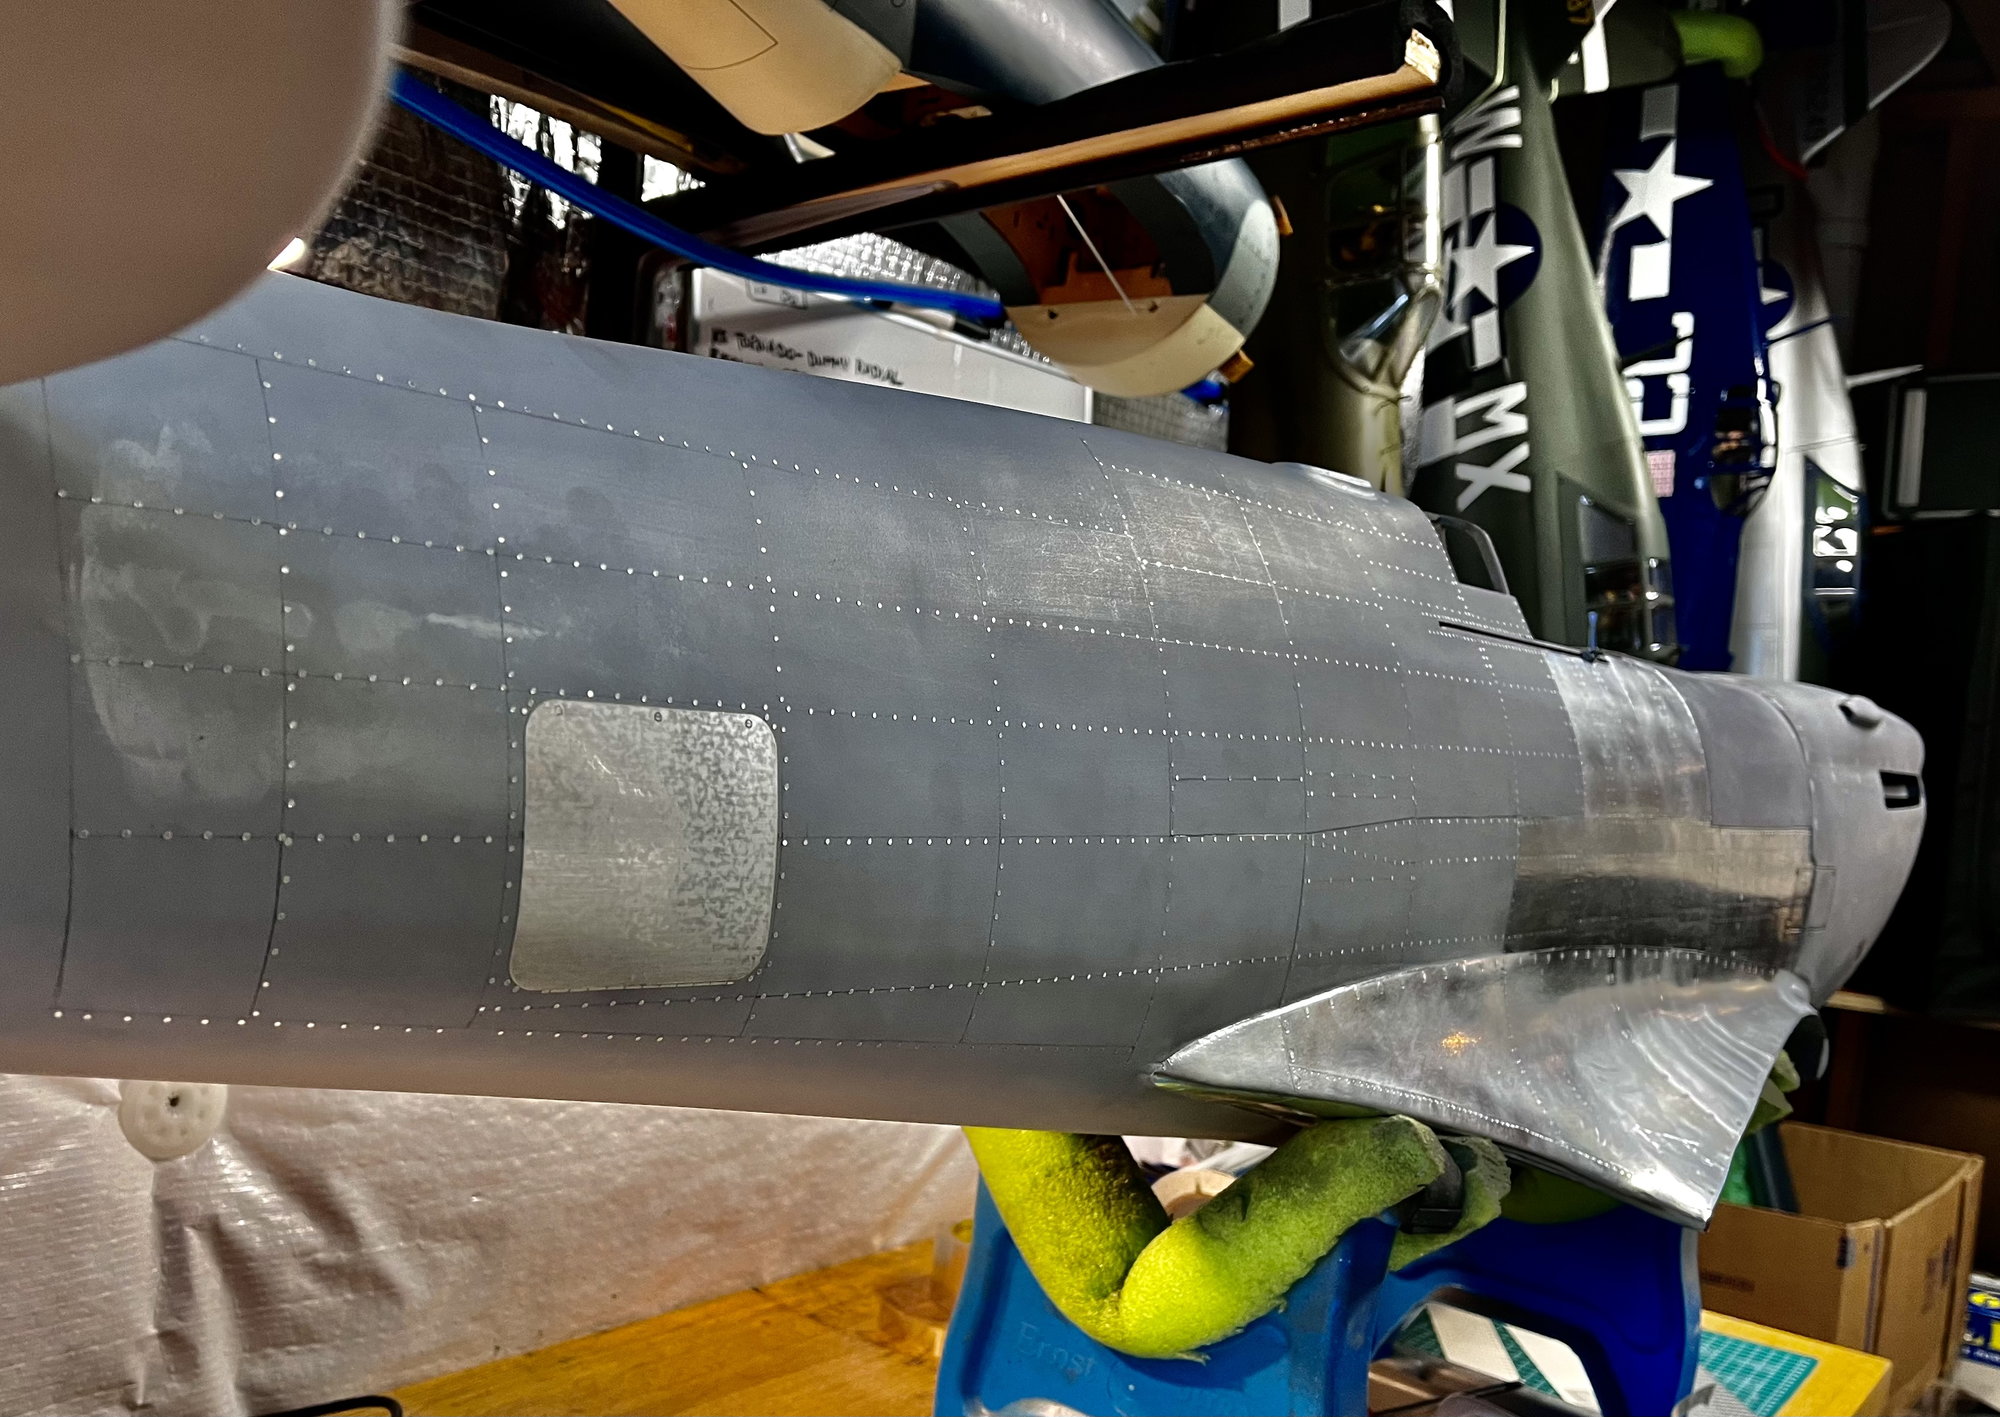
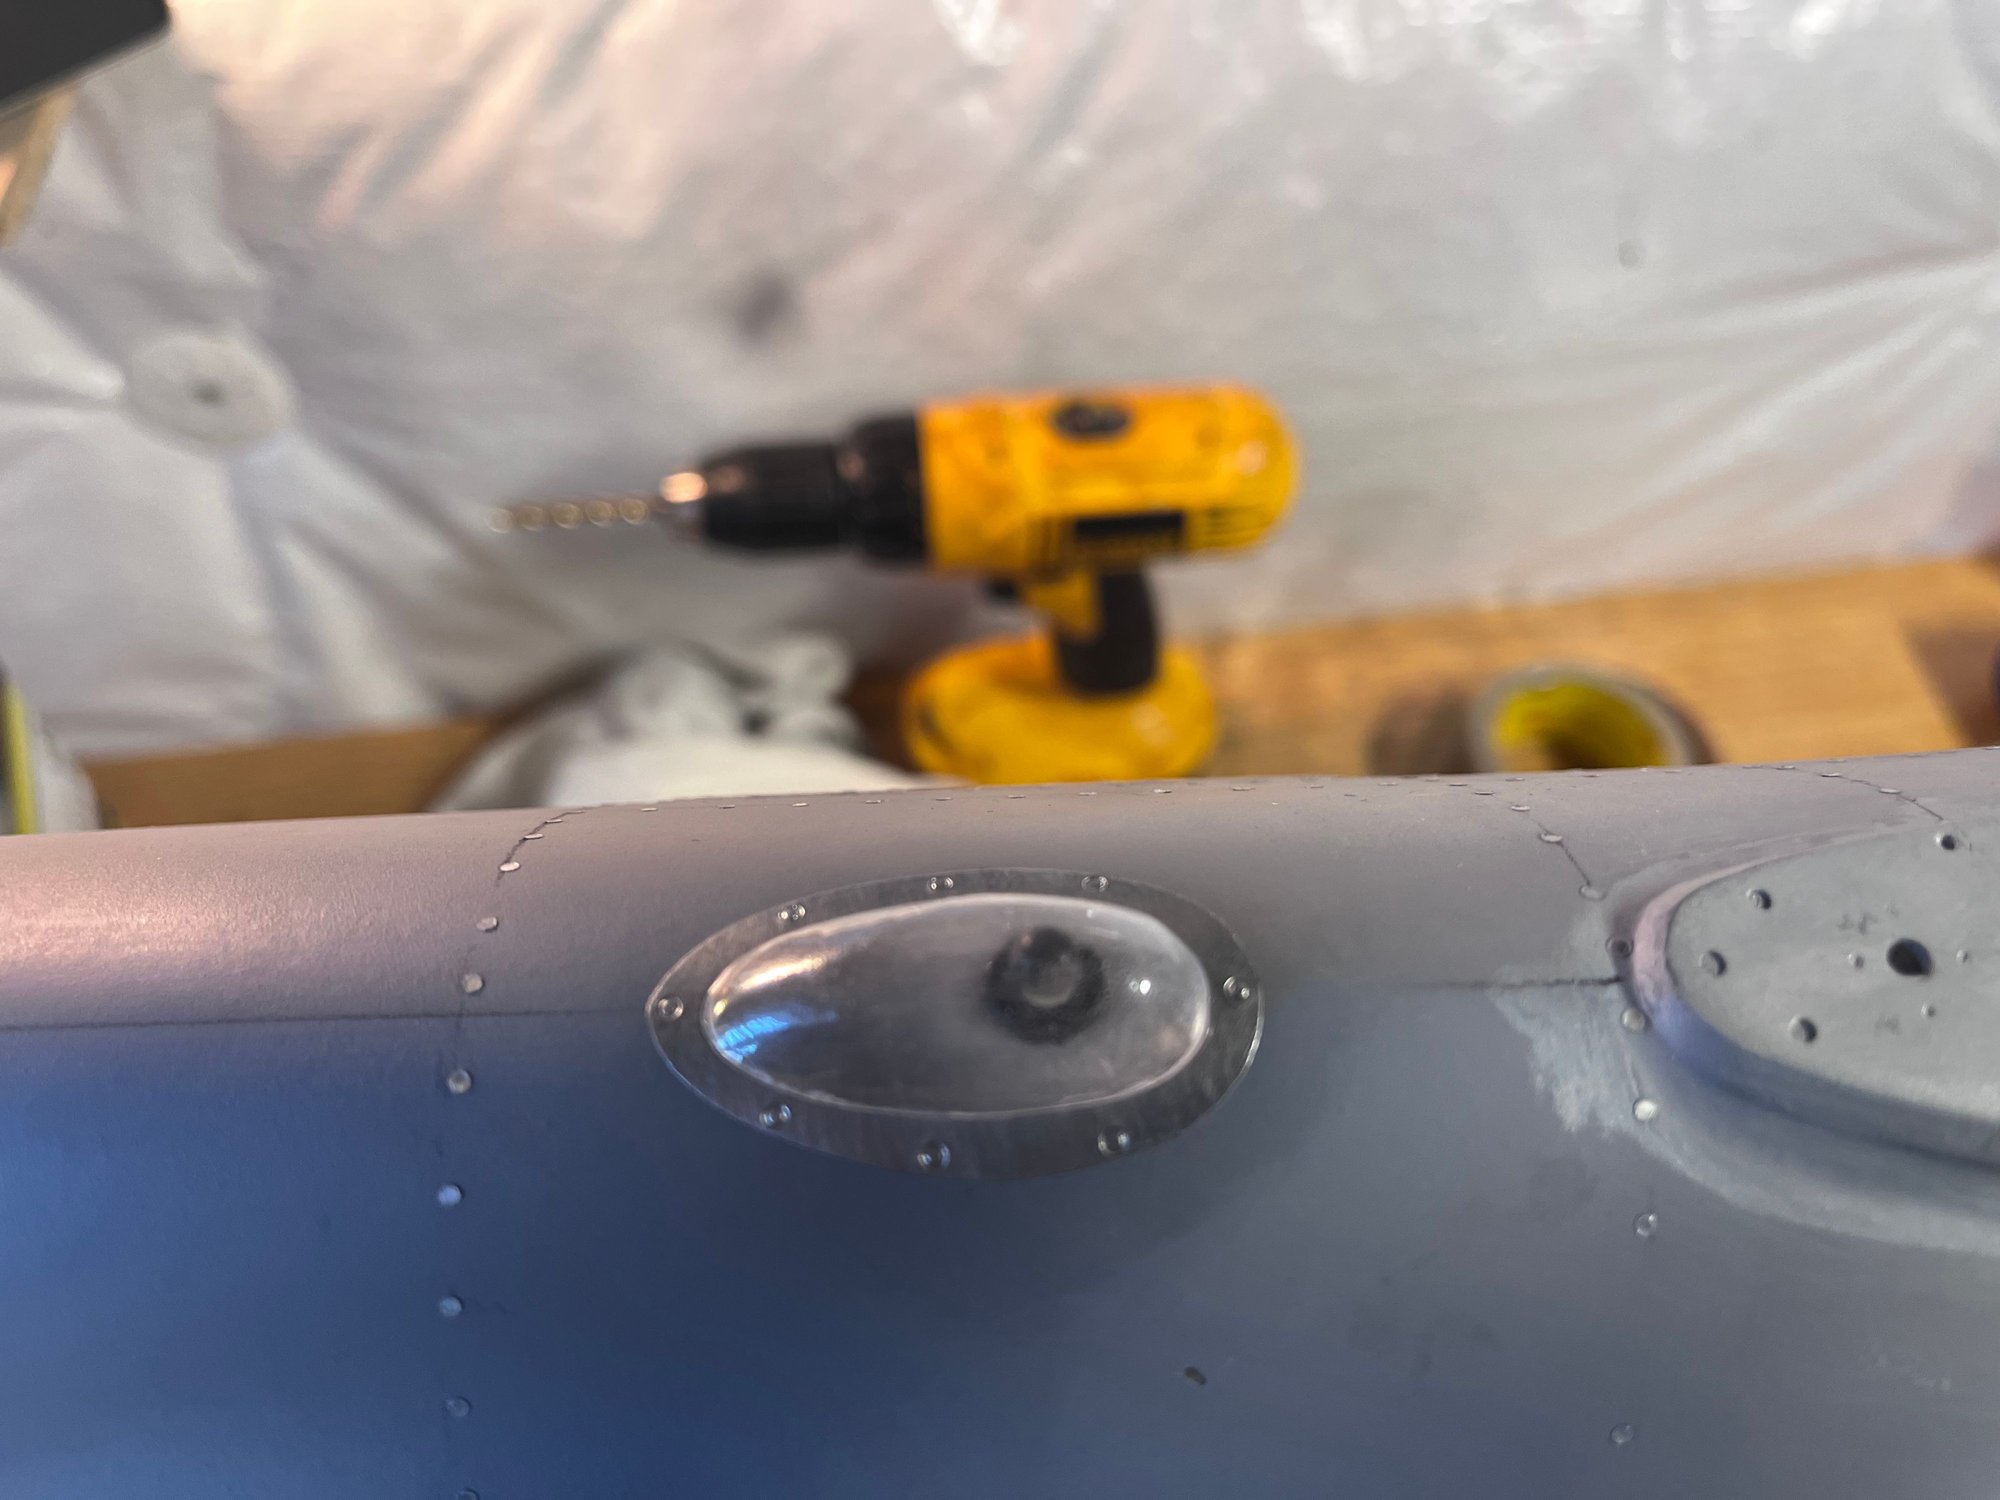
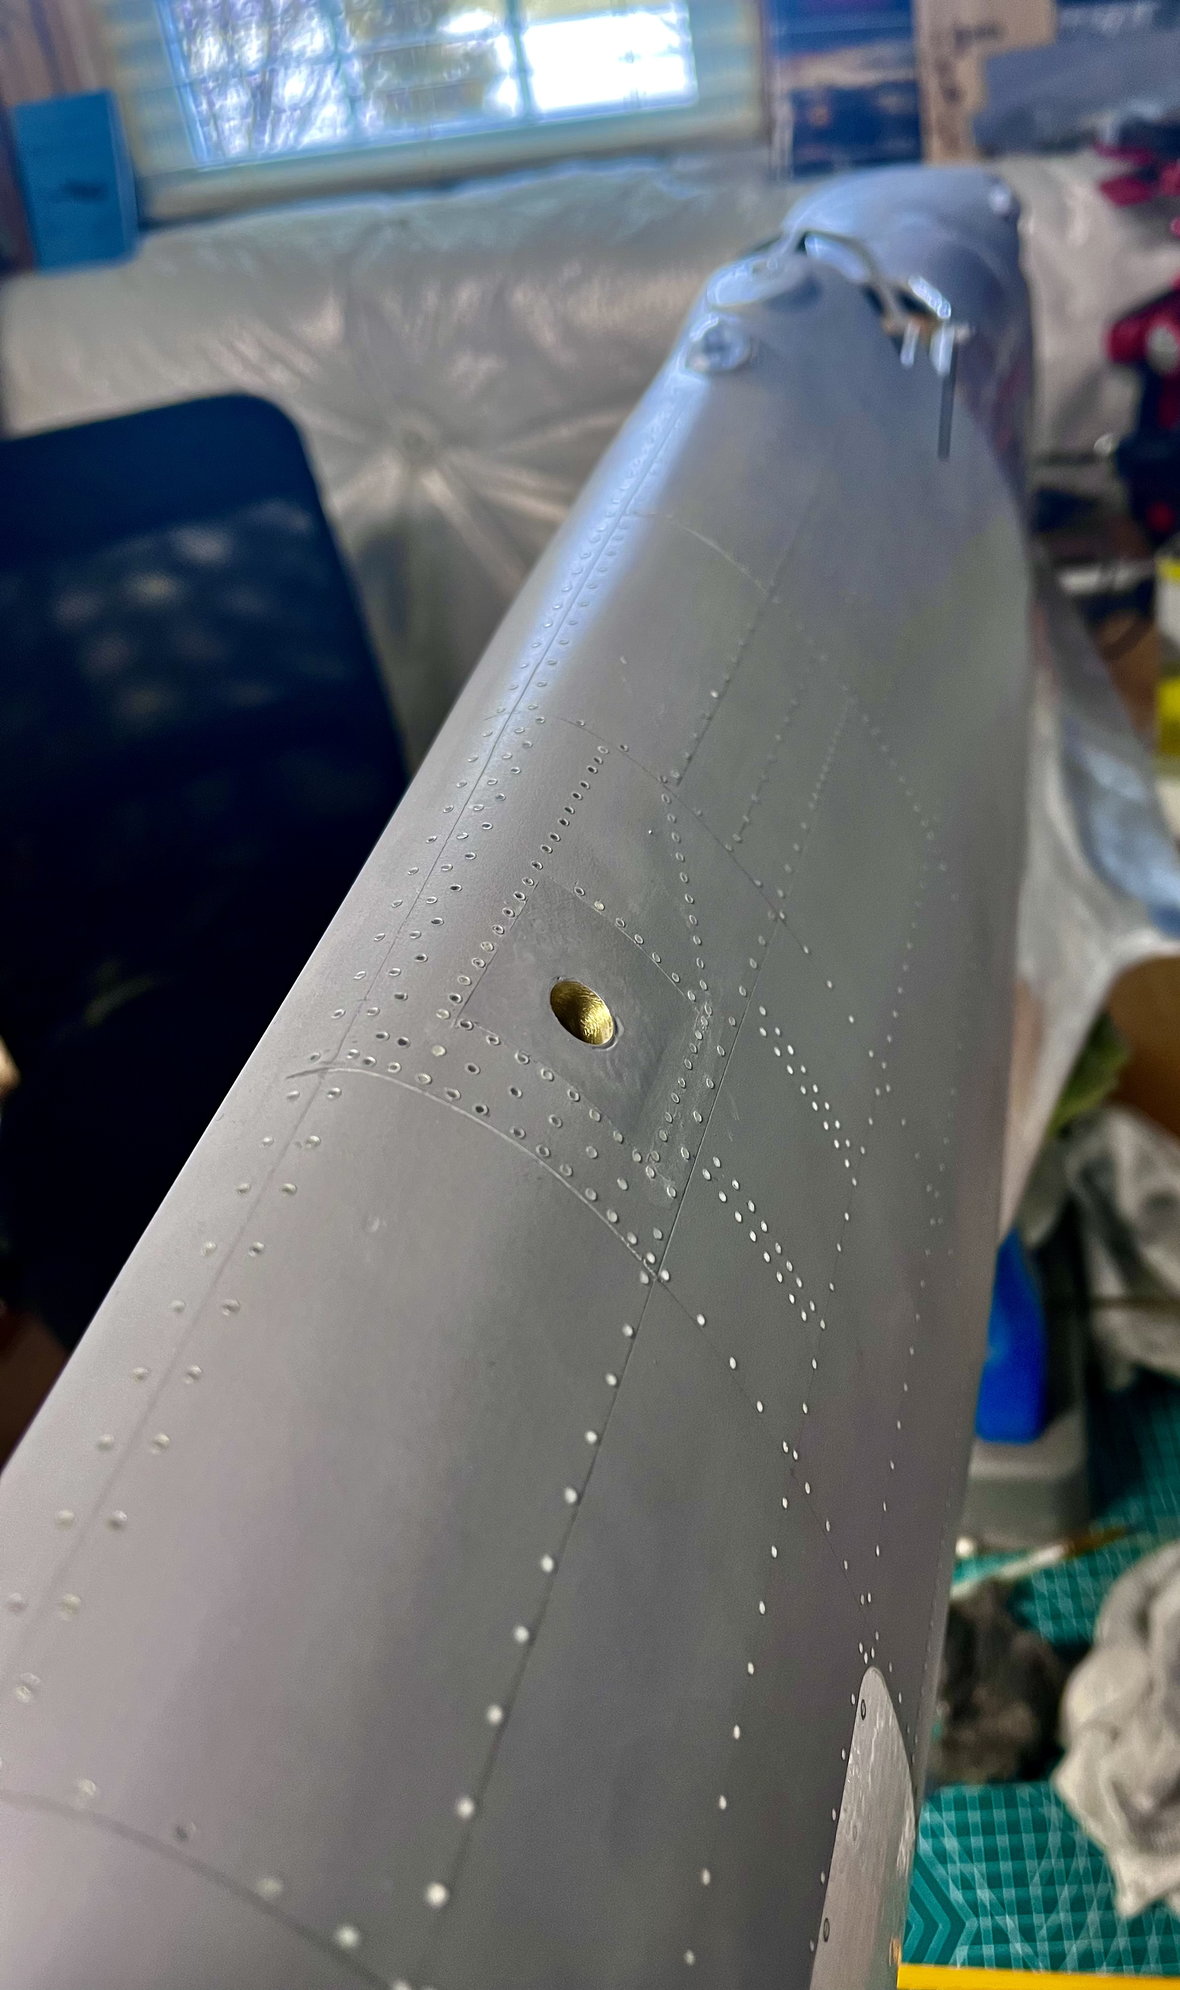
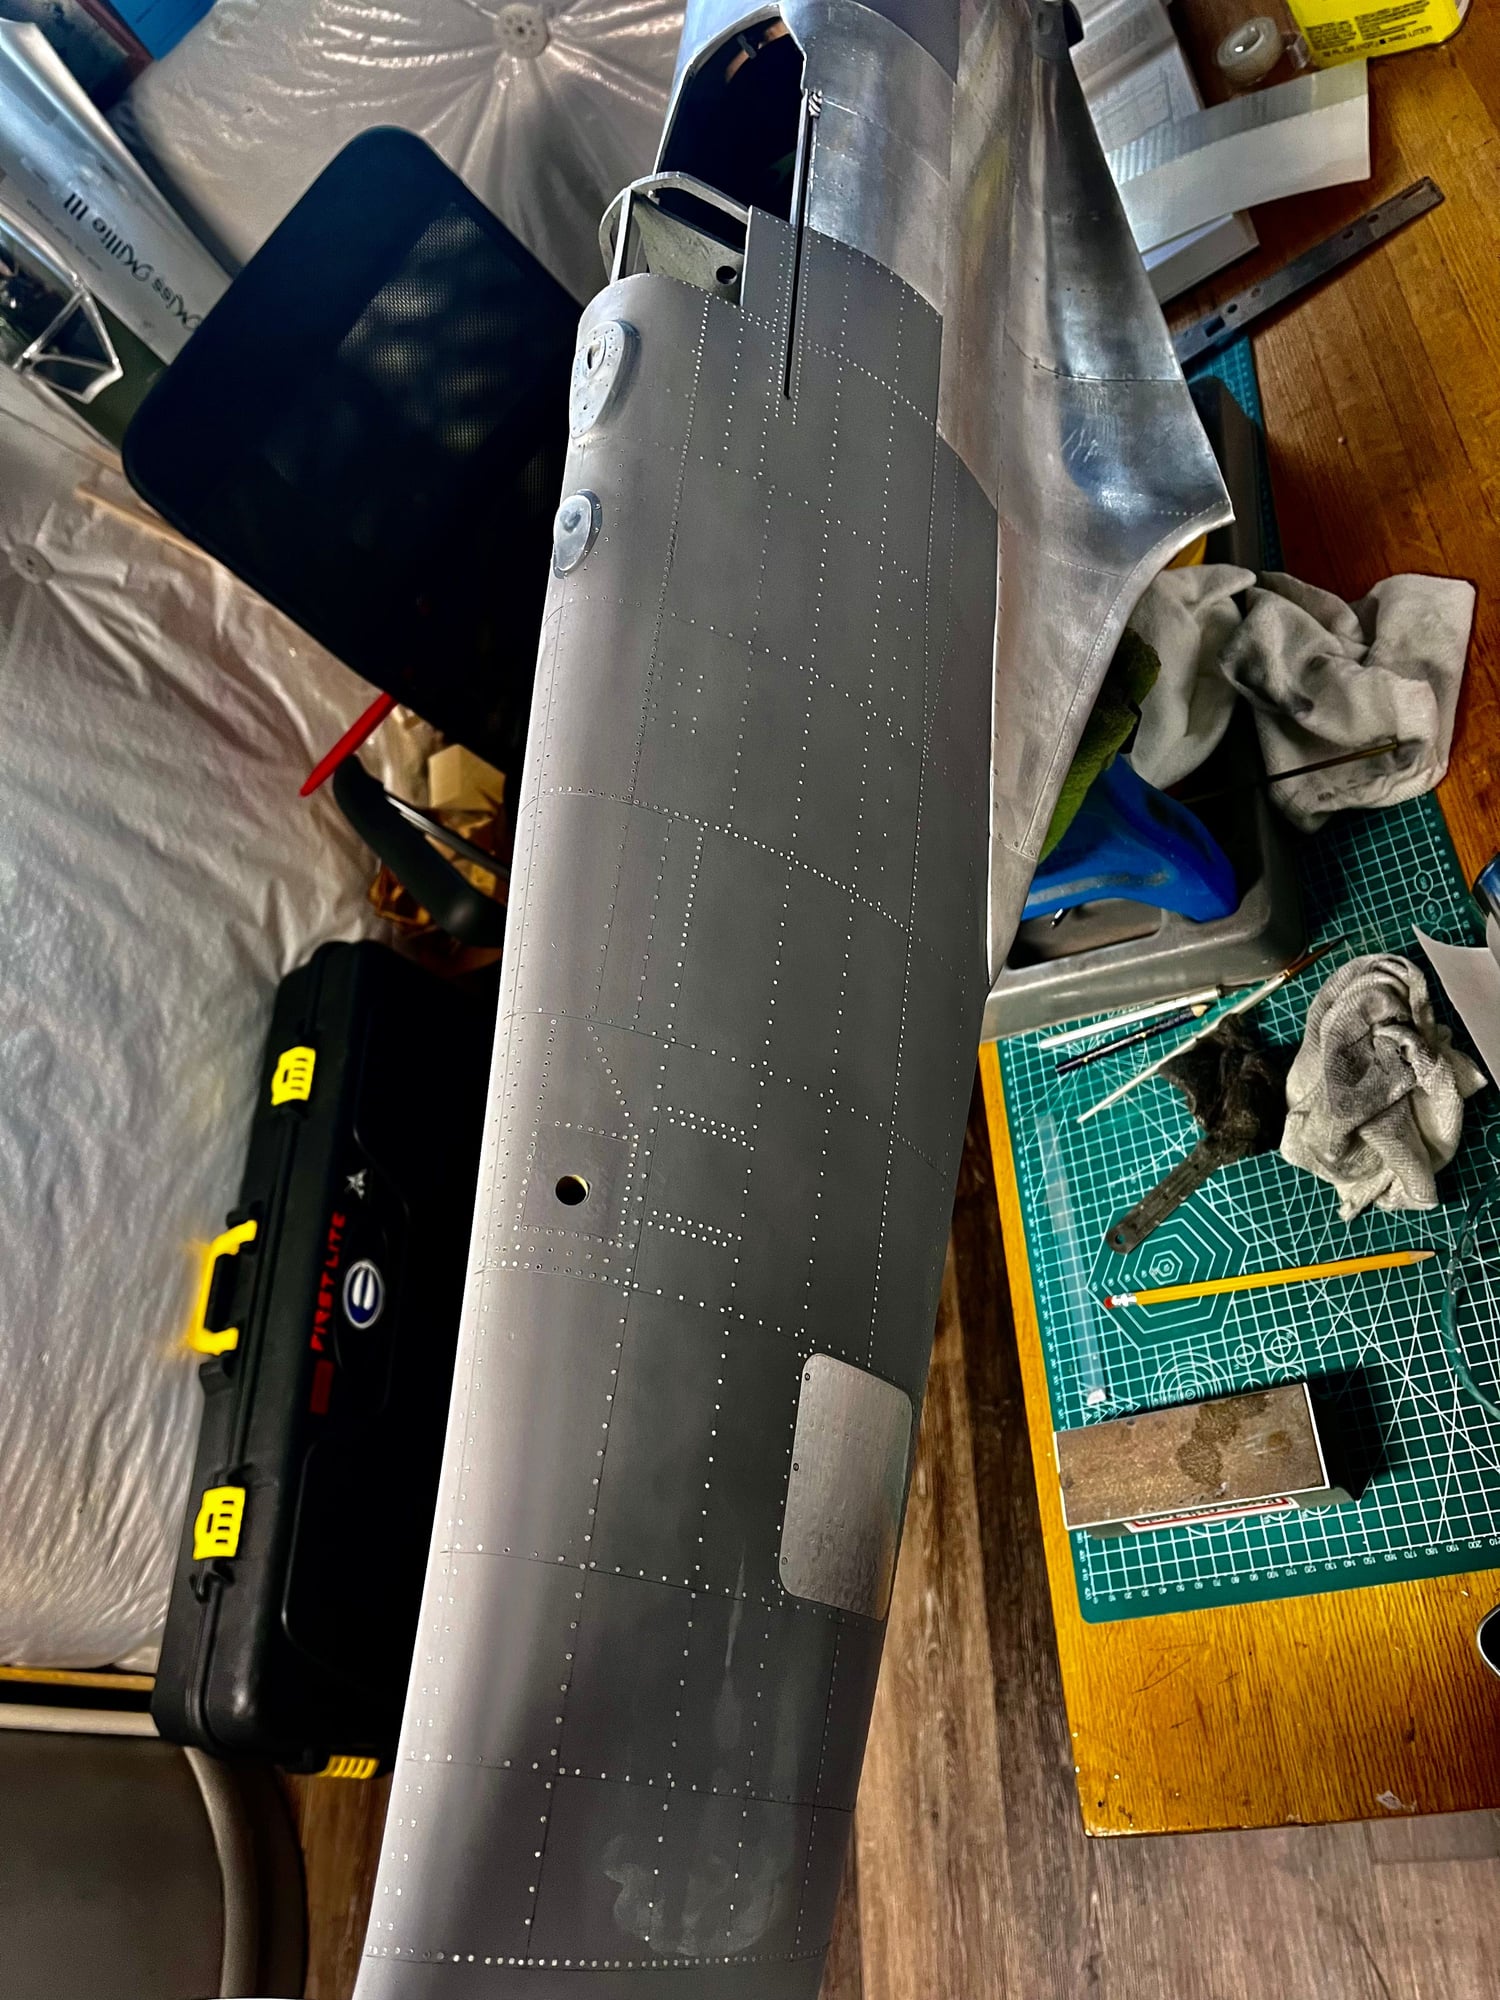
Finished up the cowling yesterday and started mapping panel lines on the fuselage today. These will be scribed in. I also began running raised rivets aft of the cockpit. From the cockpit bulkhead forward to cowling look to be flush rivets, so I began running aero foil and using a brass pipe. Also installed the raised panel on the forward upper fuselage and dropped in the recessed fuel tank cap.

 02-09-2023, 07:41 PM
#312
Hi Wyoturbine,
Making good use of your photos! In your rudder photo. Q. What material did you use to cover the rudder, and did you make the faux control horn or sourced from?
Anytime you’re in the shop with a few mins to spare, I’d love some photos of your servo positions (other than those set out on the plan - unless you needed to reposition or build different support) and control linkage paths, push/pull or pull/pull, and do you have a control horn recommendation?
How many rivets left to go?
Thanks!
02-10-2023, 03:47 AM
#313
Thread Starter
Hi Wyoturbine,
Making good use of your photos! In your rudder photo. Q. What material did you use to cover the rudder, and did you make the faux control horn or sourced from?
Anytime you’re in the shop with a few mins to spare, I’d love some photos of your servo positions (other than those set out on the plan - unless you needed to reposition or build different support) and control linkage paths, push/pull or pull/pull, and do you have a control horn recommendation?
How many rivets left to go?
Thanks!
Making good use of your photos! In your rudder photo. Q. What material did you use to cover the rudder, and did you make the faux control horn or sourced from?
Anytime you’re in the shop with a few mins to spare, I’d love some photos of your servo positions (other than those set out on the plan - unless you needed to reposition or build different support) and control linkage paths, push/pull or pull/pull, and do you have a control horn recommendation?
How many rivets left to go?
Thanks!
The fabric is sig koverall, which was sealed for paint, the tapes are “pink-it strips” that are from dynamic balsa. Most of the scale details such as trim actuators are from Jiri at JPWarbirds. For actual control horns I’m using HD dubro horns if I remember correctly. I’m out of town for some training this week but when I get home I’ll post some photos of my servo locations and pull/pull setup. On rivets I’ve lost count…quick answer, there is a lot left, but slow progress is better than zero progress!
The following users liked this post:
Findgareth (02-10-2023)
02-17-2023, 05:55 AM
#317
Thread Starter
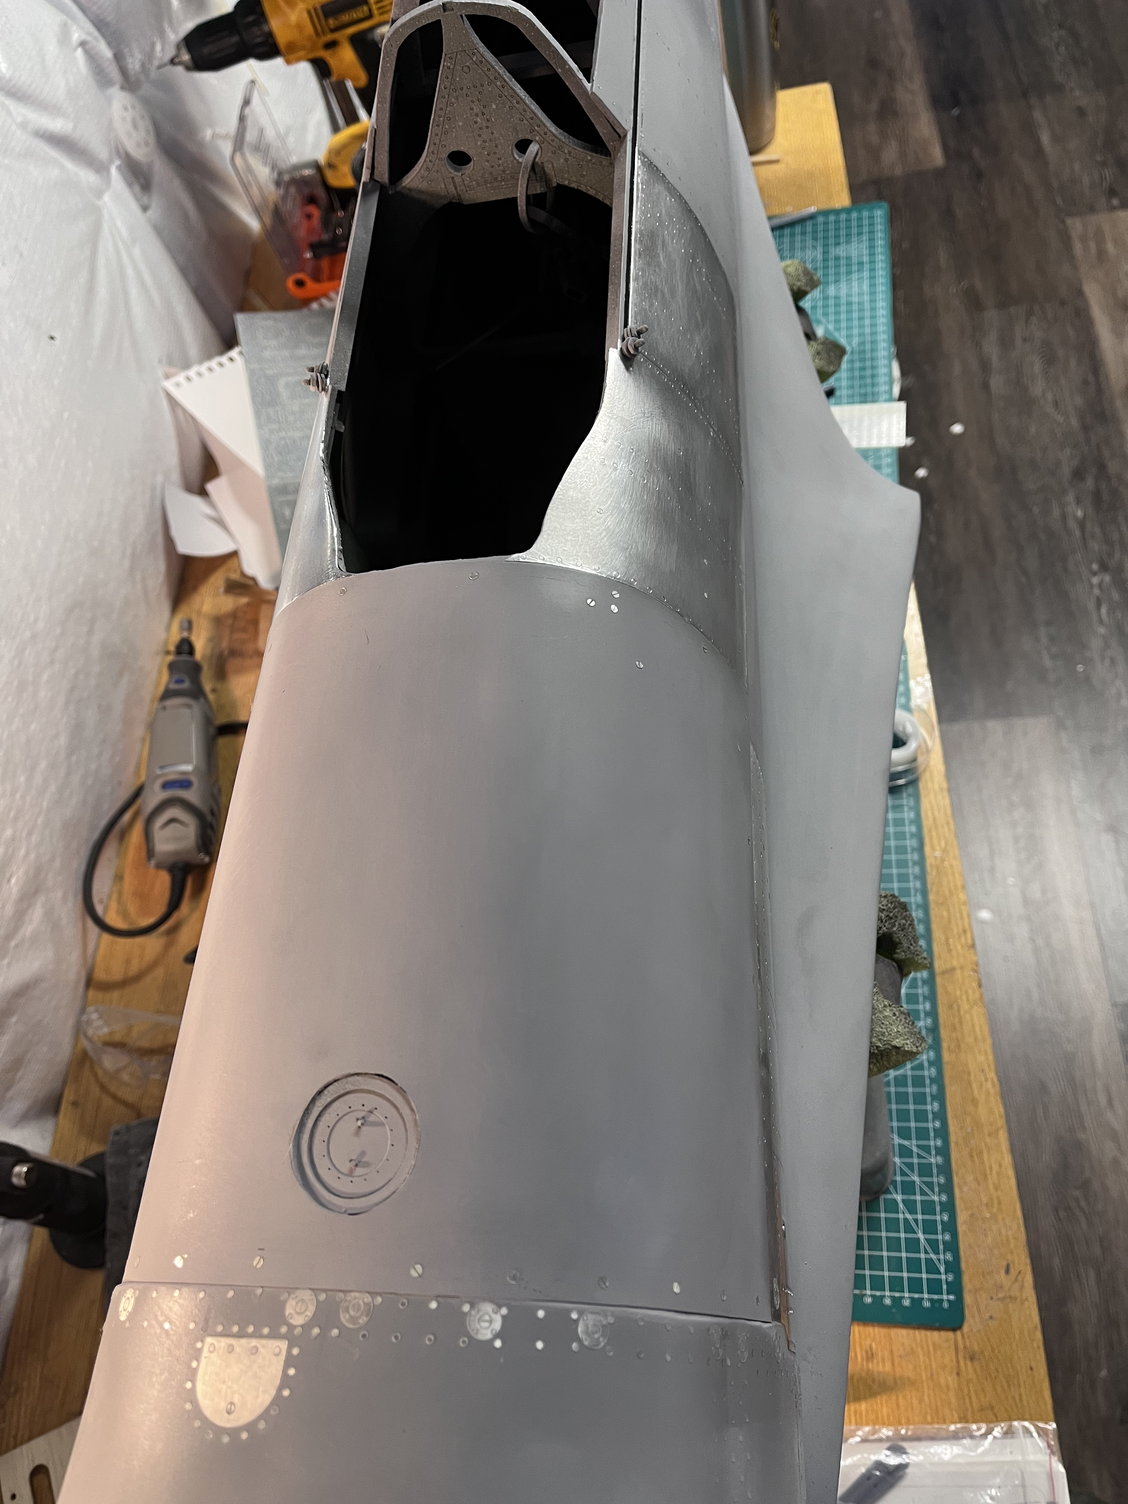
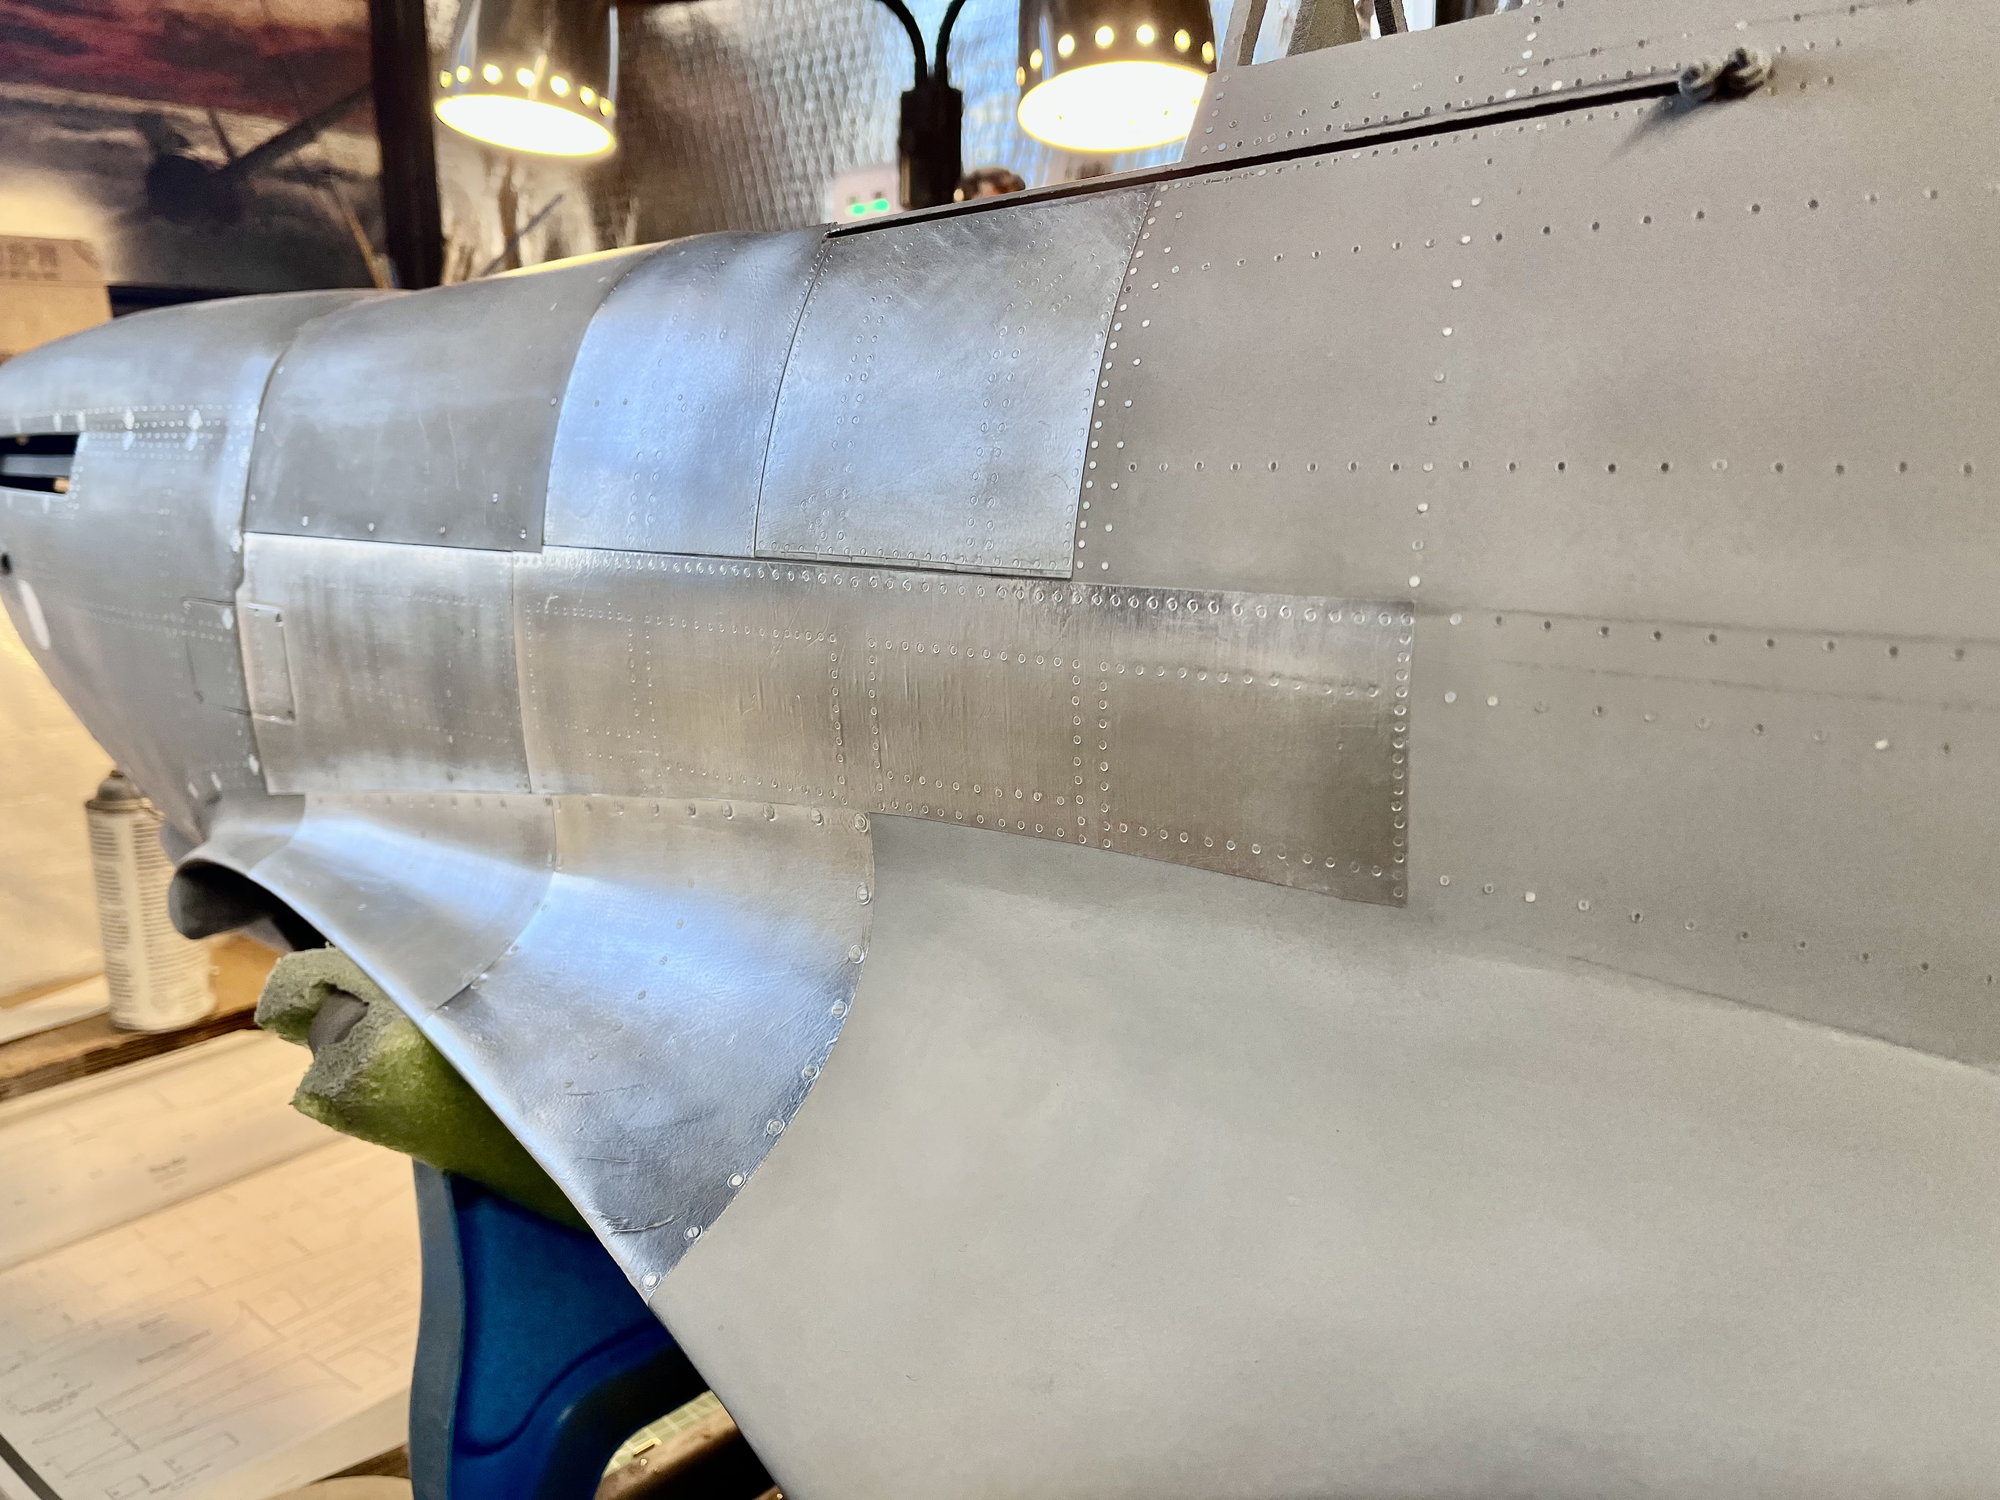
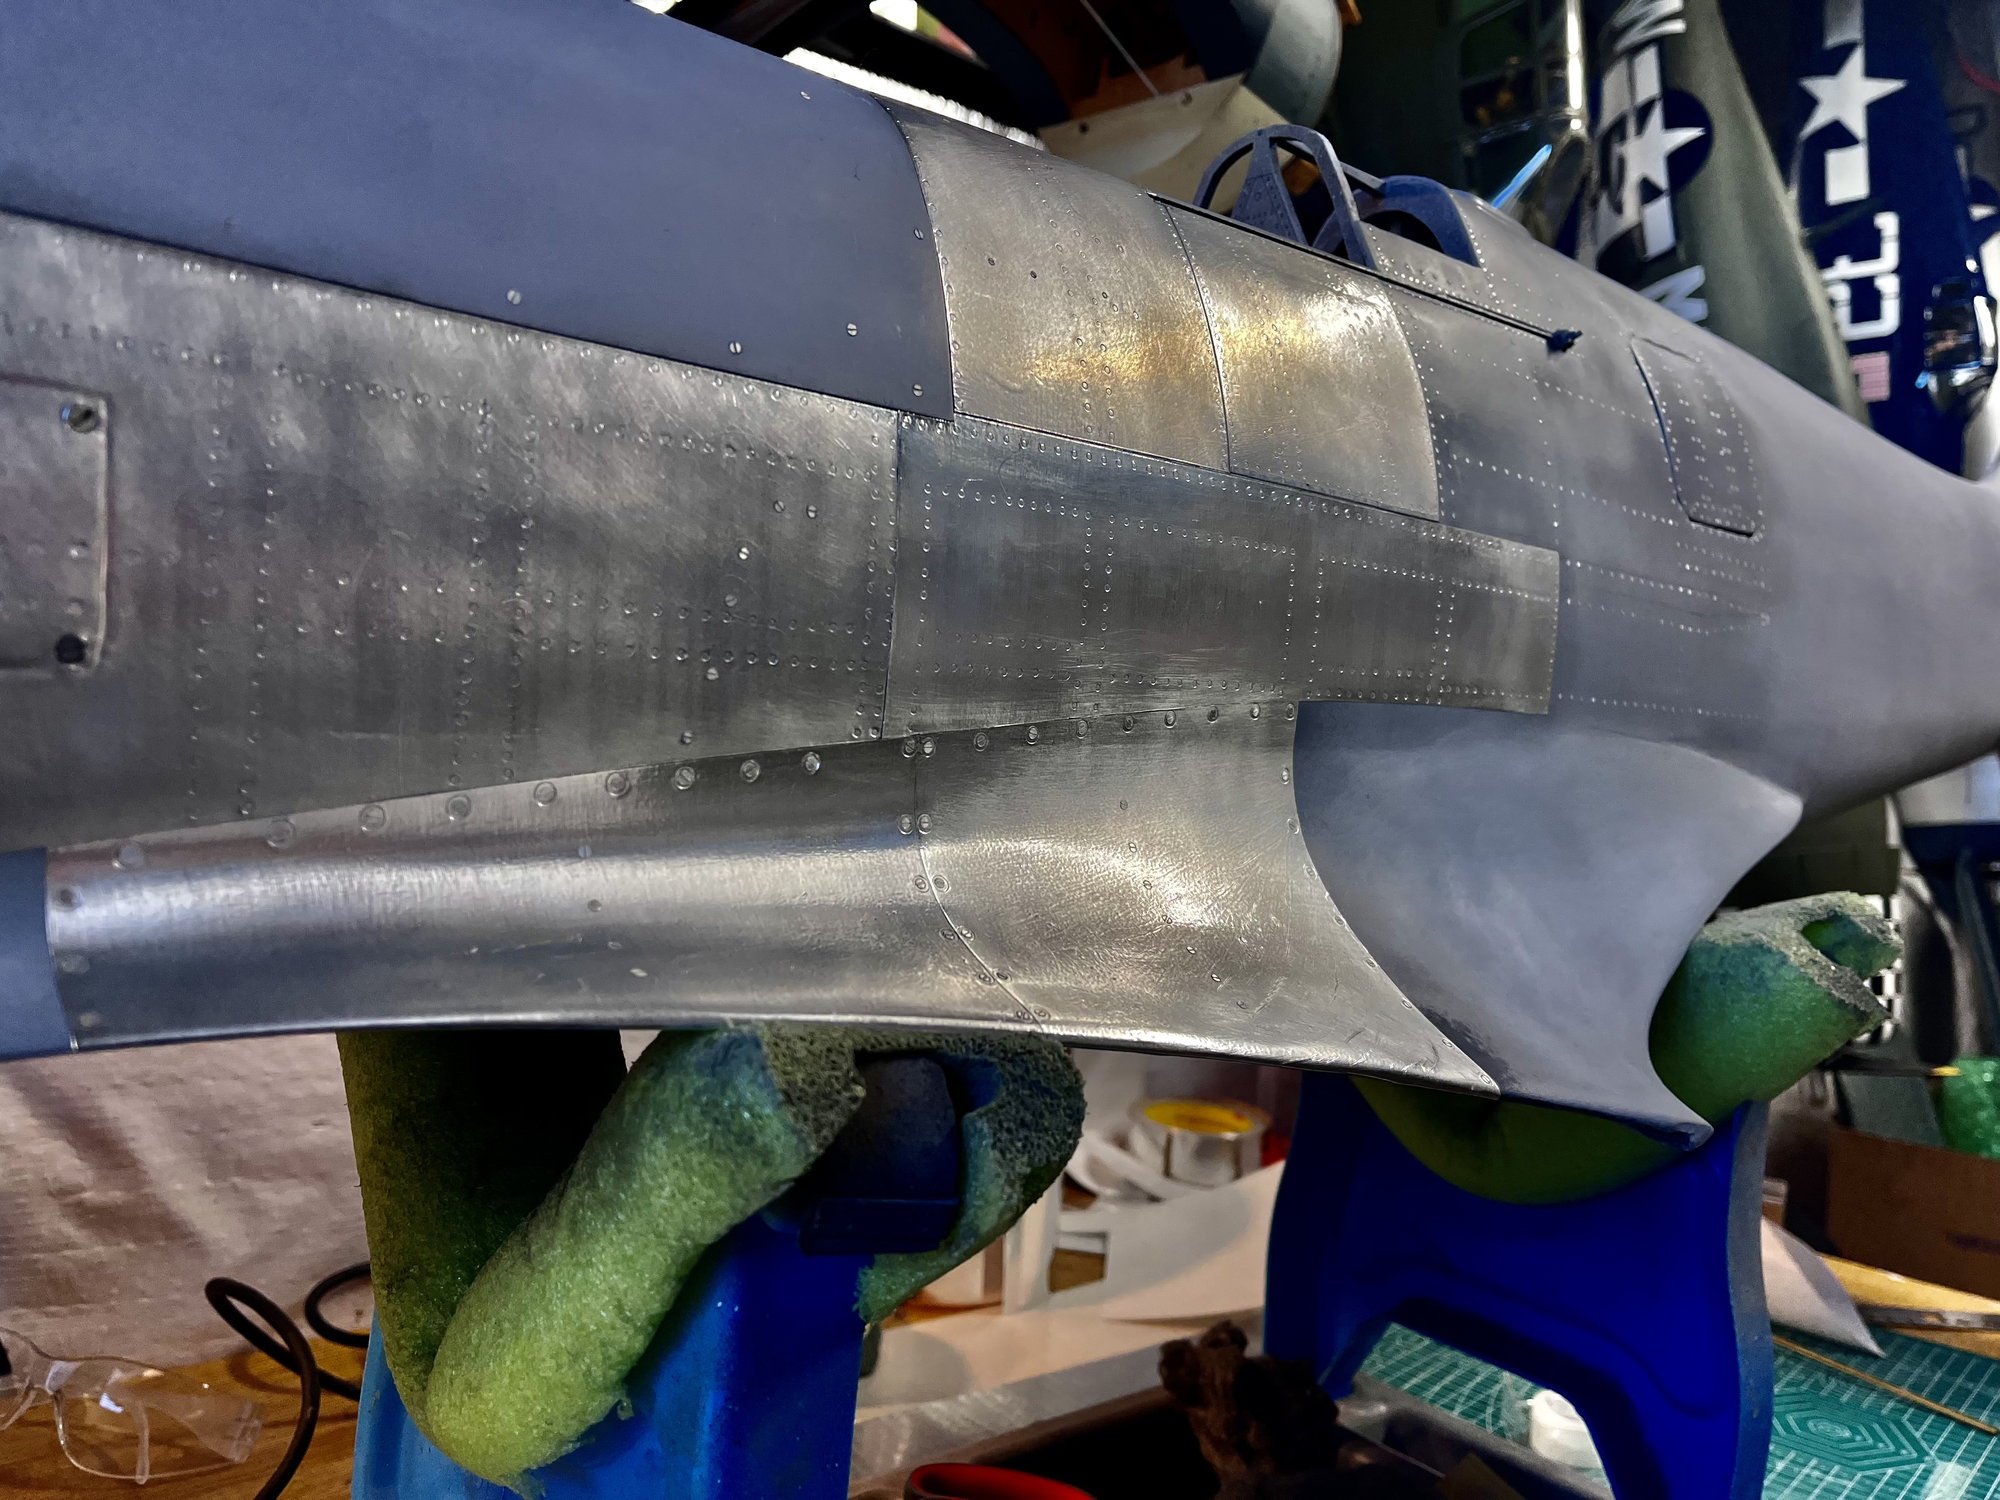
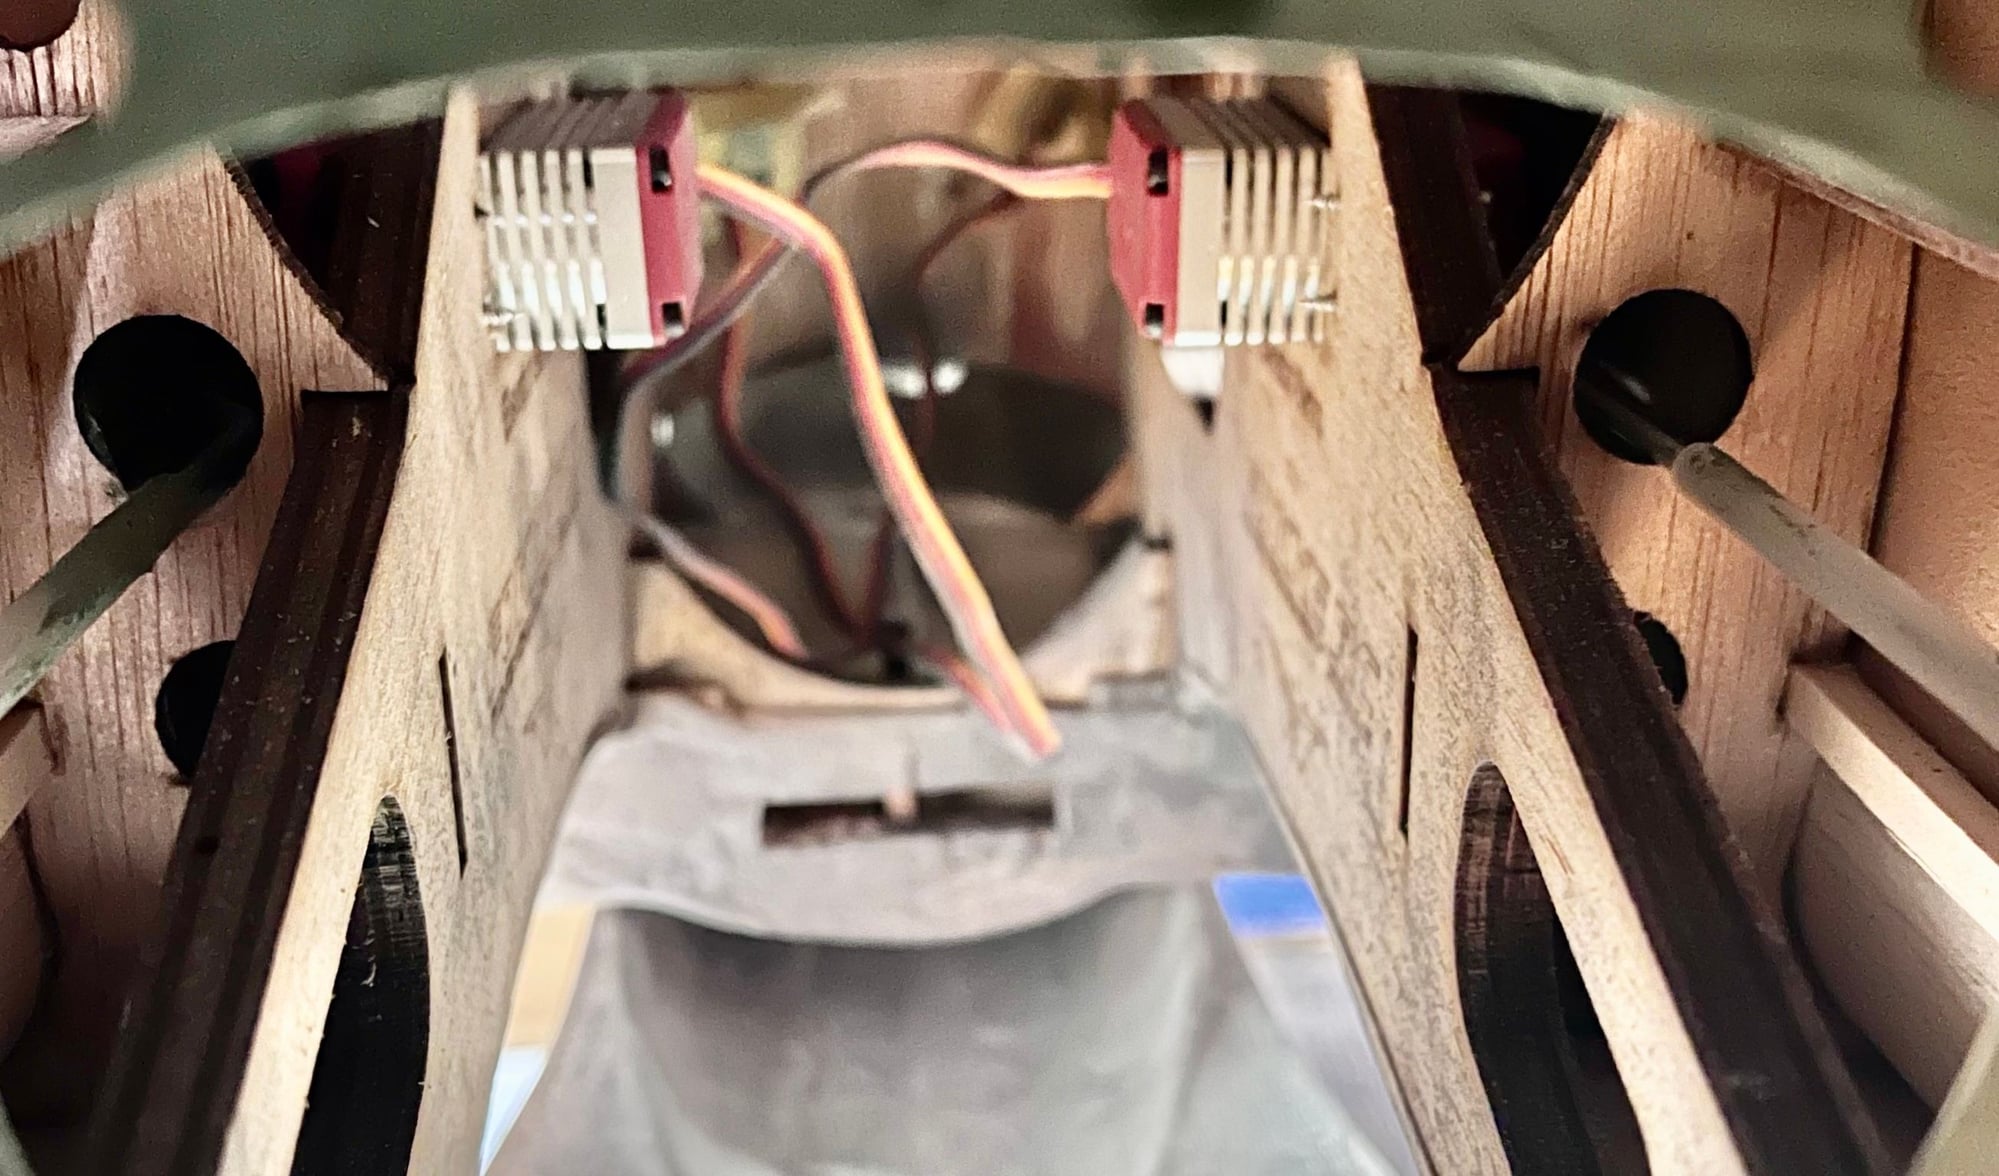
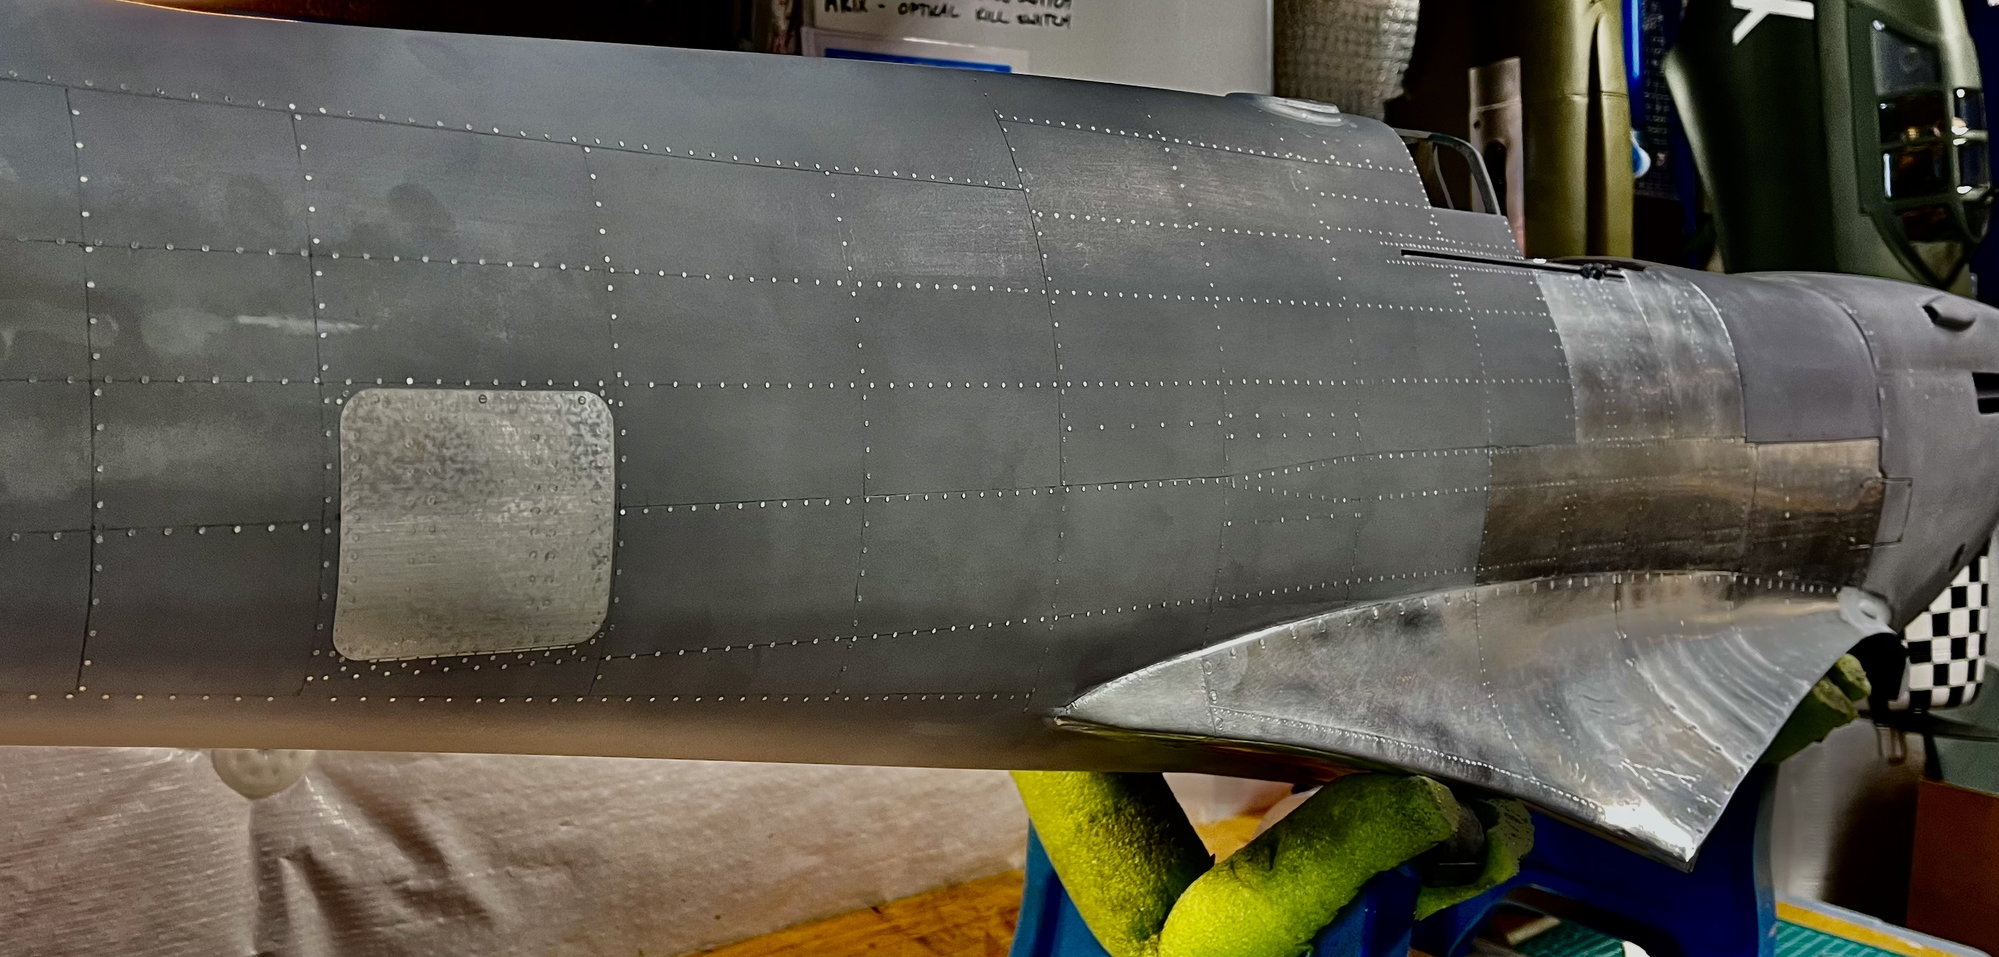
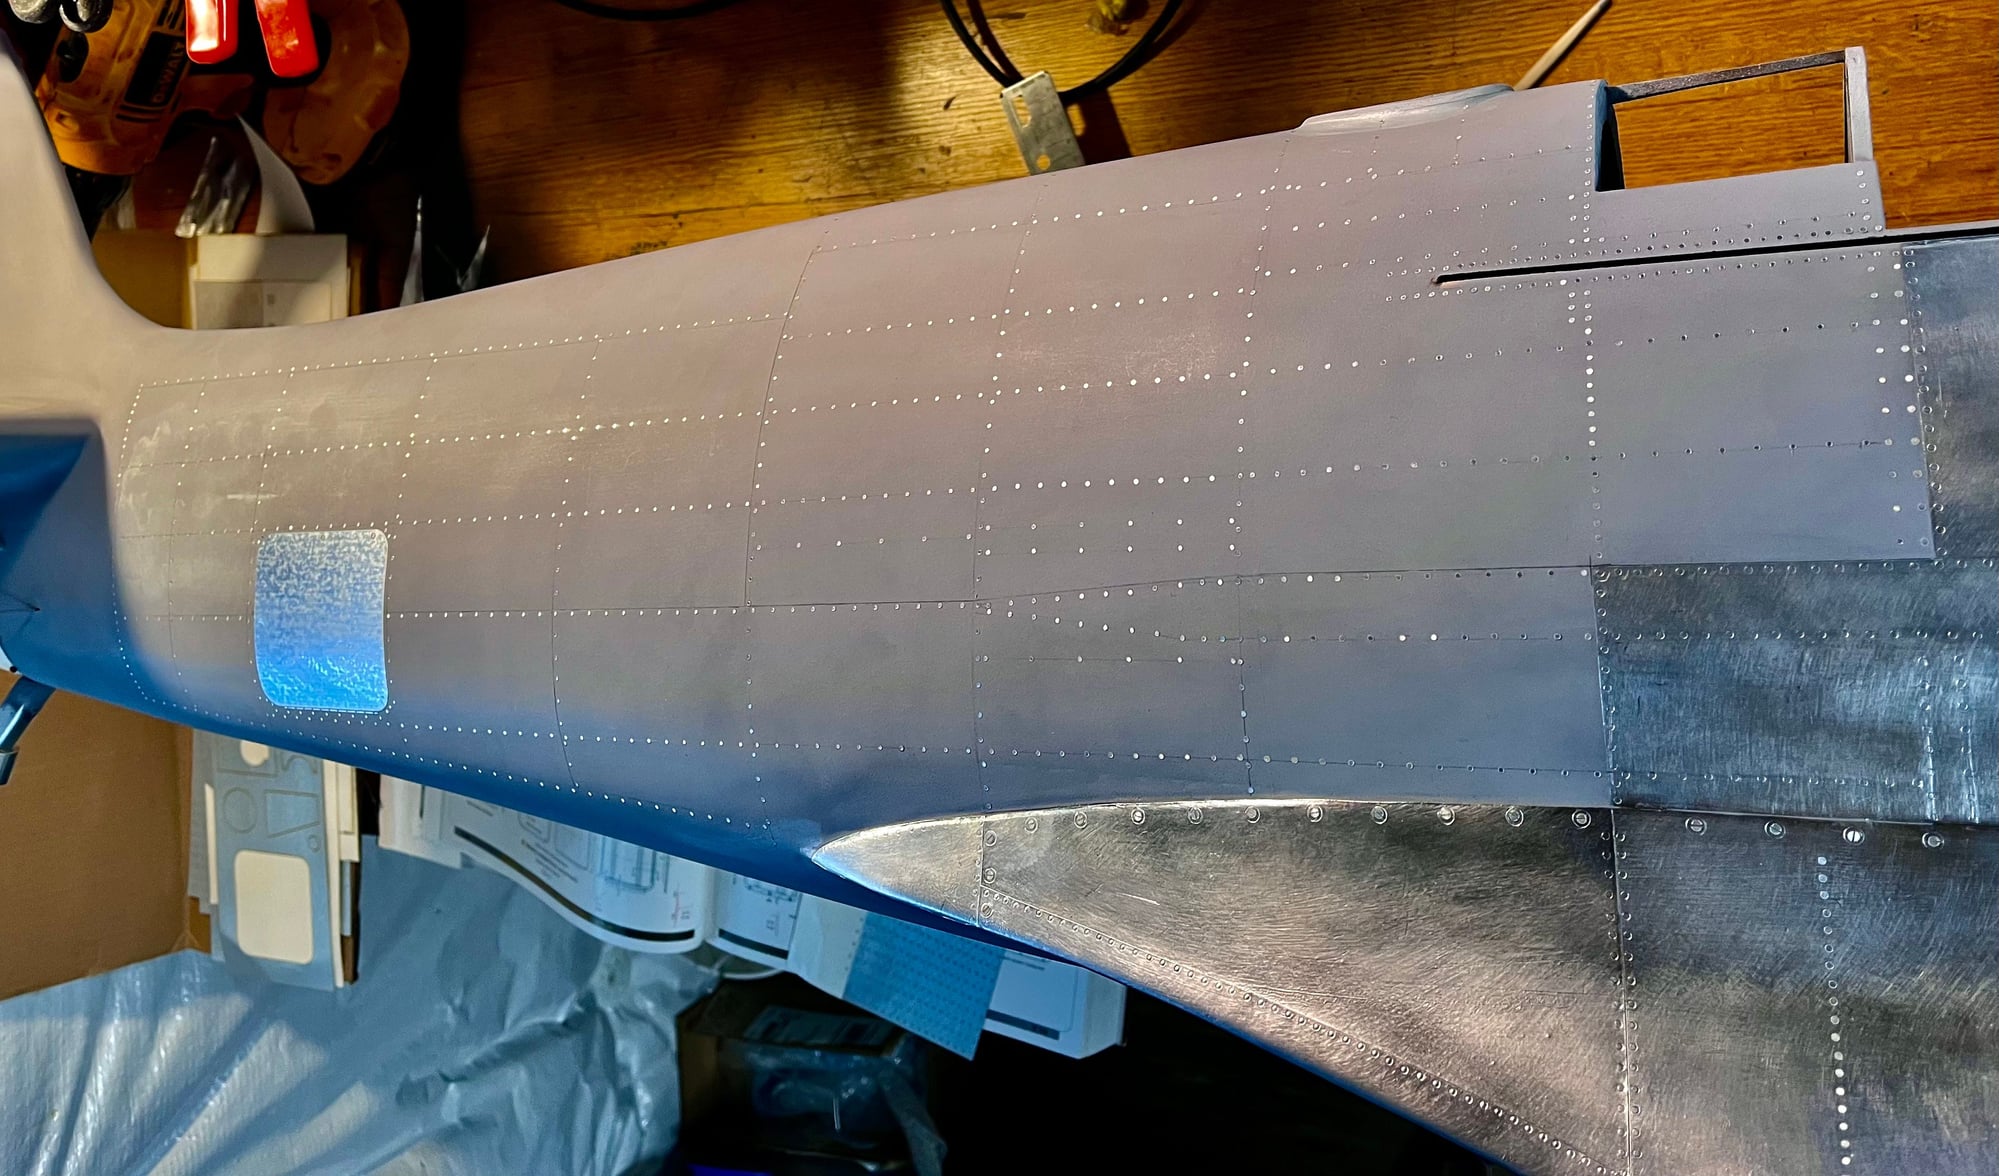
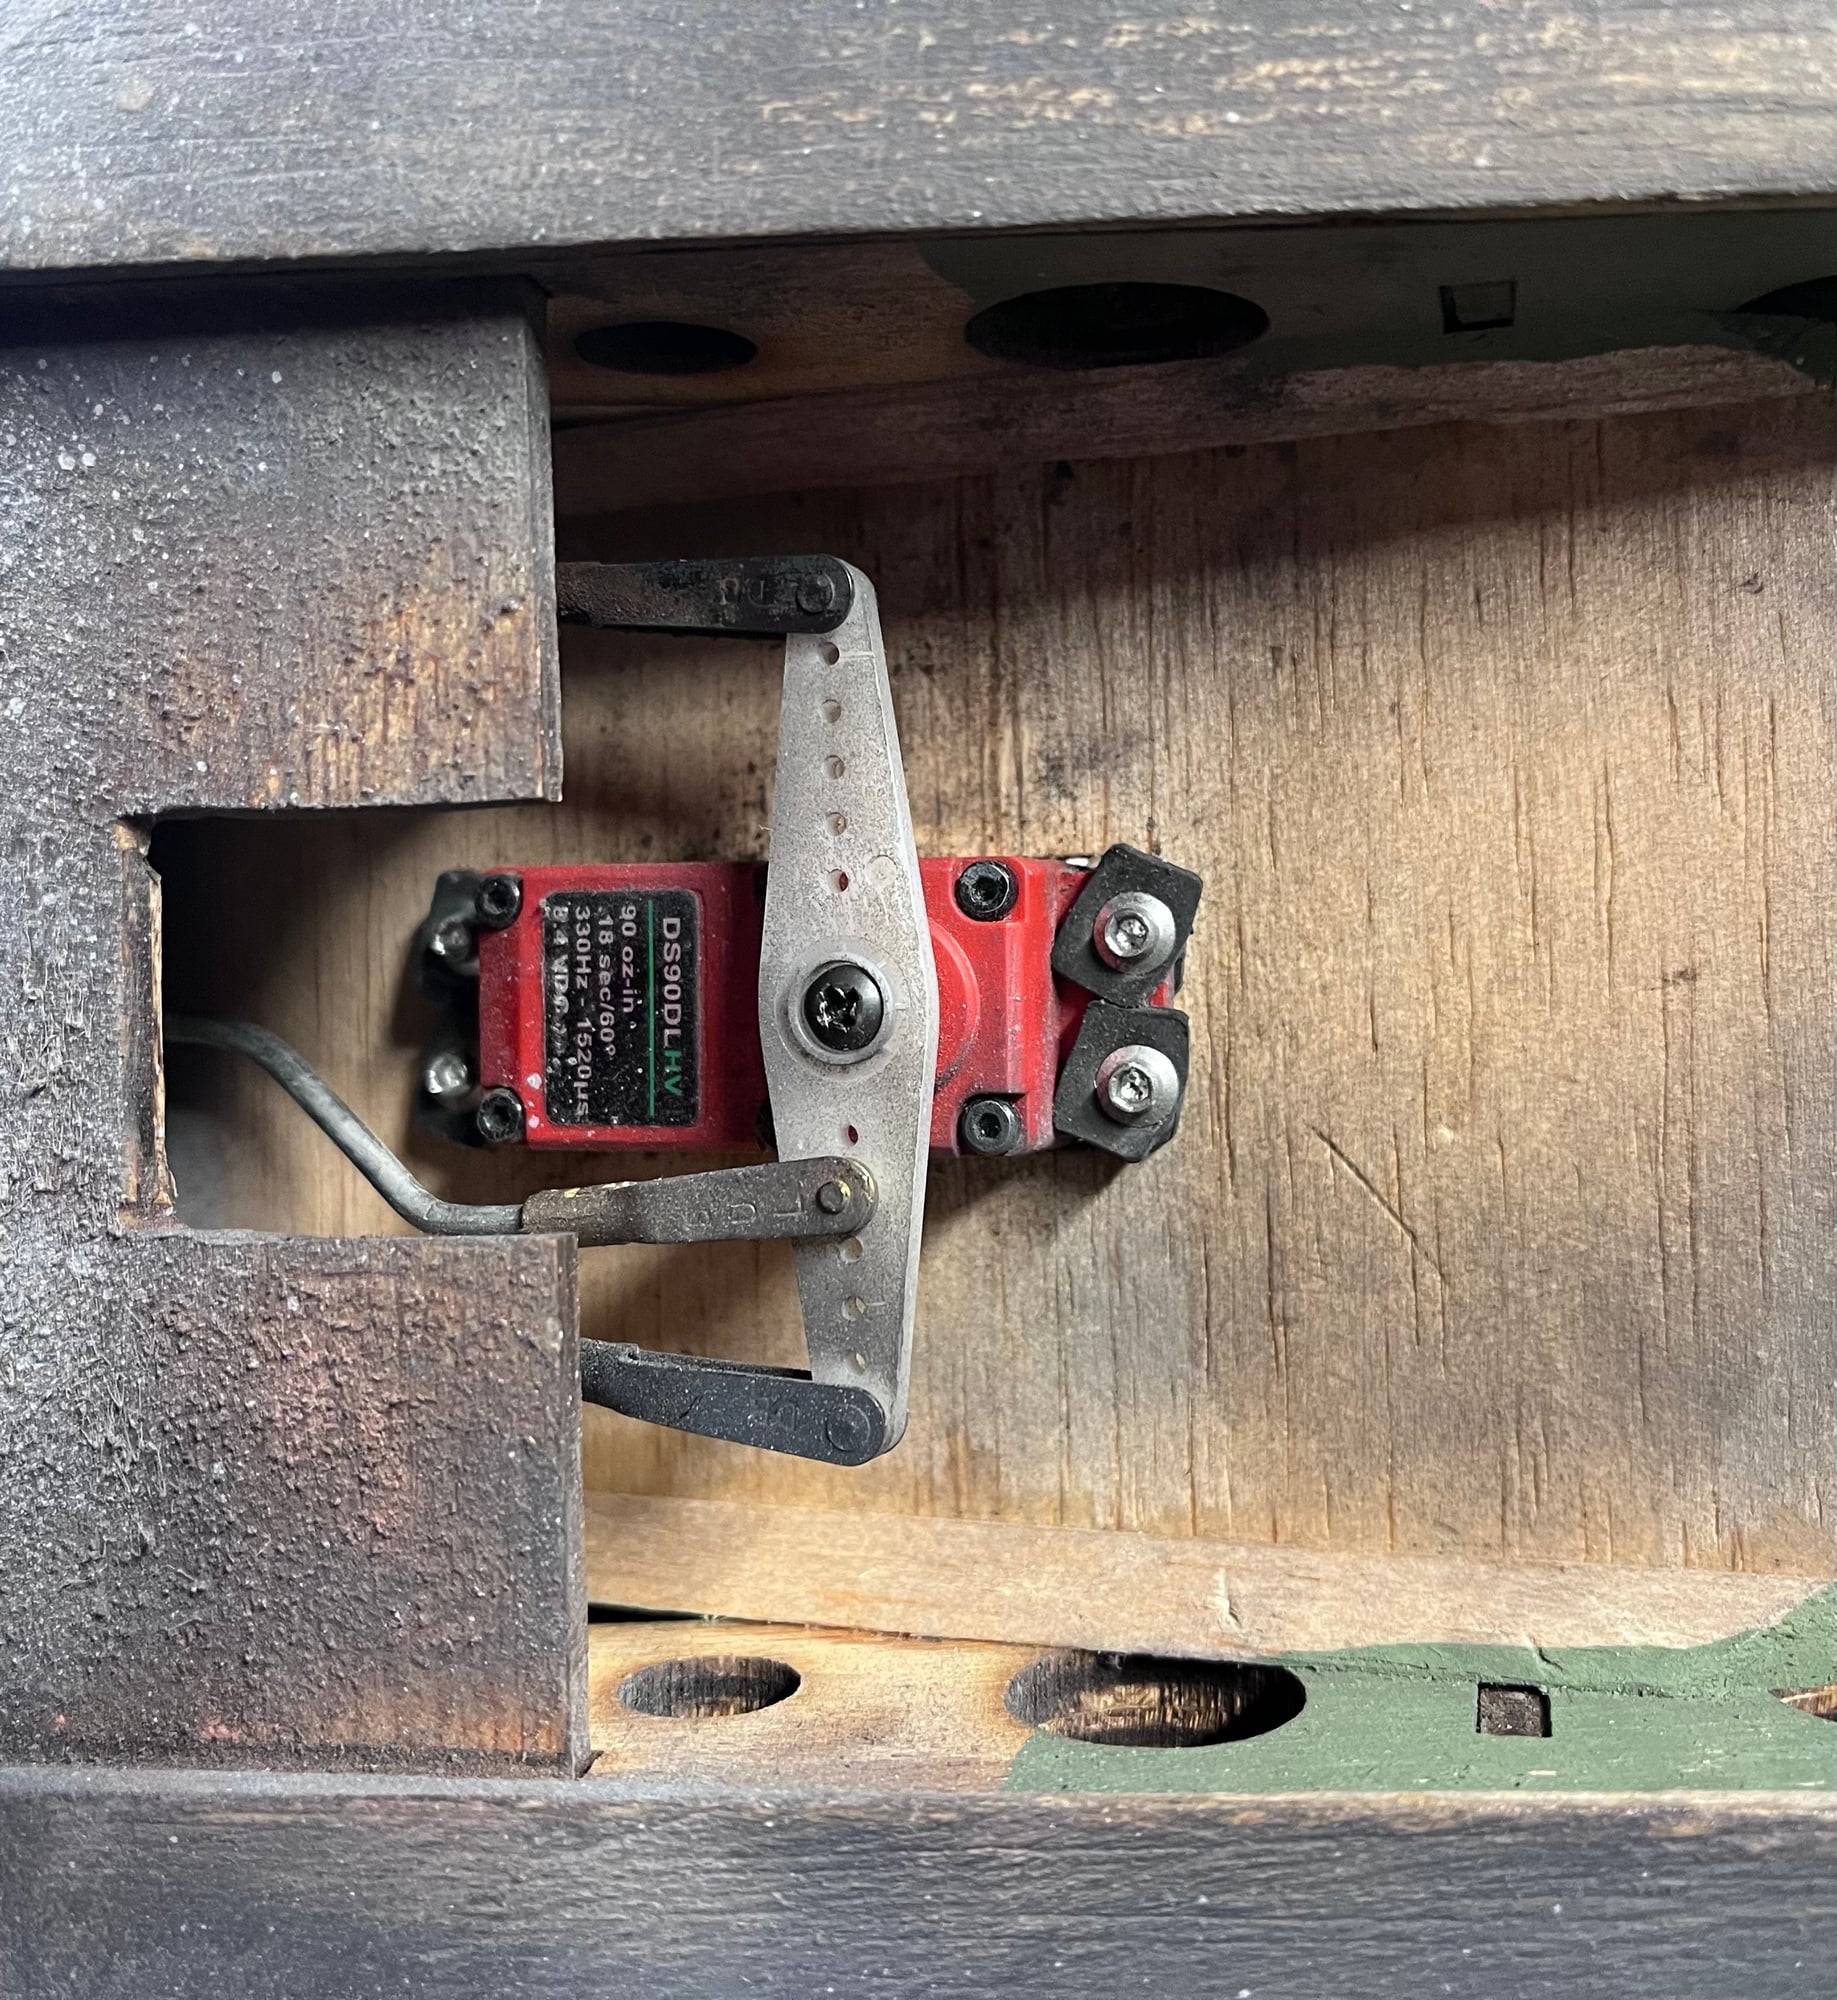
Finished up my fillets and began riveting the aft fuselage. Gareth, I attached a couple photos of the interior elevator servo and rudder/tailwheel location which is pull/pull for rudder and paired with a pushrod for tailwheel. Its location is under the cockpit seat, still needs some finishing work on the box area but you get the idea hopefully. After I finish the rivets and hatchwork on the fuselage I’ll re-install my engine, fuel tank, throttle and choke servos. I’ll build a servo plate either from g-10 or ply. Then paint and finish the cockpit area.
02-17-2023, 07:26 AM
#318
Thanks tor the servo photos John. Progress slowed here (dog sitting thru’ grandkids). That plus I, err, have a tail to rebuild (I should have built it off the plan not on the fuselage. Horiz stab ready to cover, as is the rudder, elevators have a little more sanding before koverall. I wasn’t happy with the vertical on the tail plus it was not as rigid as I wanted, so going to add a couple CF 4mm rods. Adds a little weight but worth it I think.
Fuselage is nice, straight and level (laser levels are cool!). Still impressed with Rumen’s FokkeRC short kit, and Jiri (JP Warbirds) is brilliant!
In the absence of kit instructions, your photos are really useful. My progress suggests I may finish by the next ice age!
BTW, how did your flap servo linkage/horn cover revision work out?
02-17-2023, 07:56 AM
#319
Thread Starter
Thanks tor the servo photos John. Progress slowed here (dog sitting thru’ grandkids). That plus I, err, have a tail to rebuild (I should have built it off the plan not on the fuselage. Horiz stab ready to cover, as is the rudder, elevators have a little more sanding before koverall. I wasn’t happy with the vertical on the tail plus it was not as rigid as I wanted, so going to add a couple CF 4mm rods. Adds a little weight but worth it I think.
Fuselage is nice, straight and level (laser levels are cool!). Still impressed with Rumen’s FokkeRC short kit, and Jiri (JP Warbirds) is brilliant!
In the absence of kit instructions, your photos are really useful. My progress suggests I may finish by the next ice age!
BTW, how did your flap servo linkage/horn cover revision work out?
Fuselage is nice, straight and level (laser levels are cool!). Still impressed with Rumen’s FokkeRC short kit, and Jiri (JP Warbirds) is brilliant!
In the absence of kit instructions, your photos are really useful. My progress suggests I may finish by the next ice age!
BTW, how did your flap servo linkage/horn cover revision work out?
And yes the laser comes in handy, a lot!
02-17-2023, 08:12 AM
#320
Thread Starter
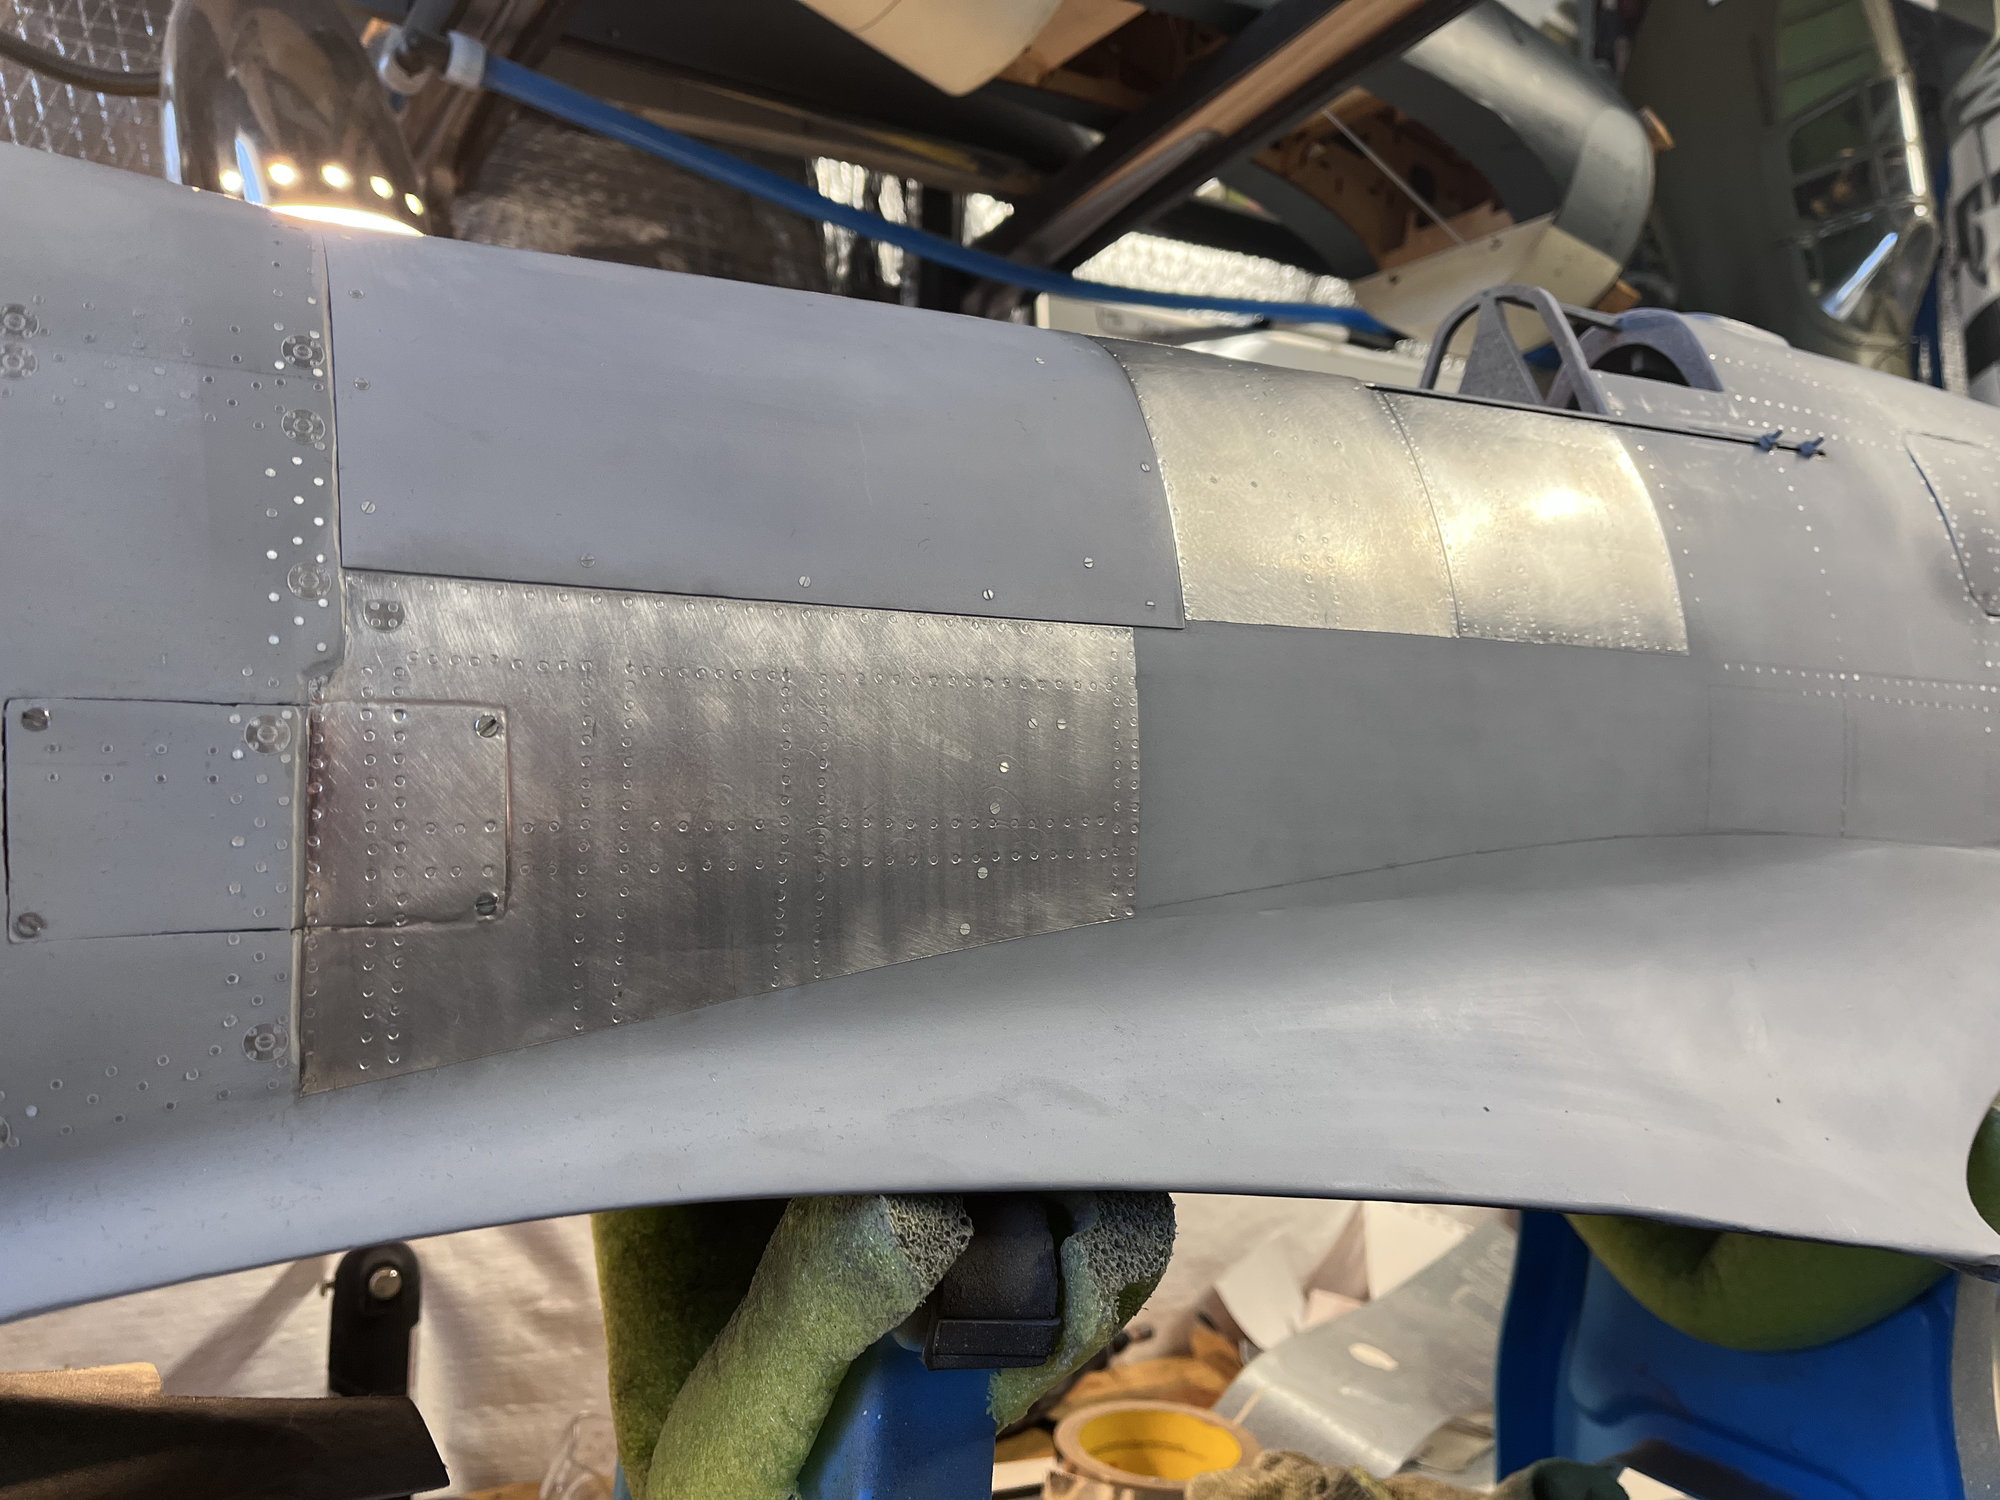
Here’s flap and servo access hatches, flaps are internal linkages, ailerons are external linkages(servo box built onto door).

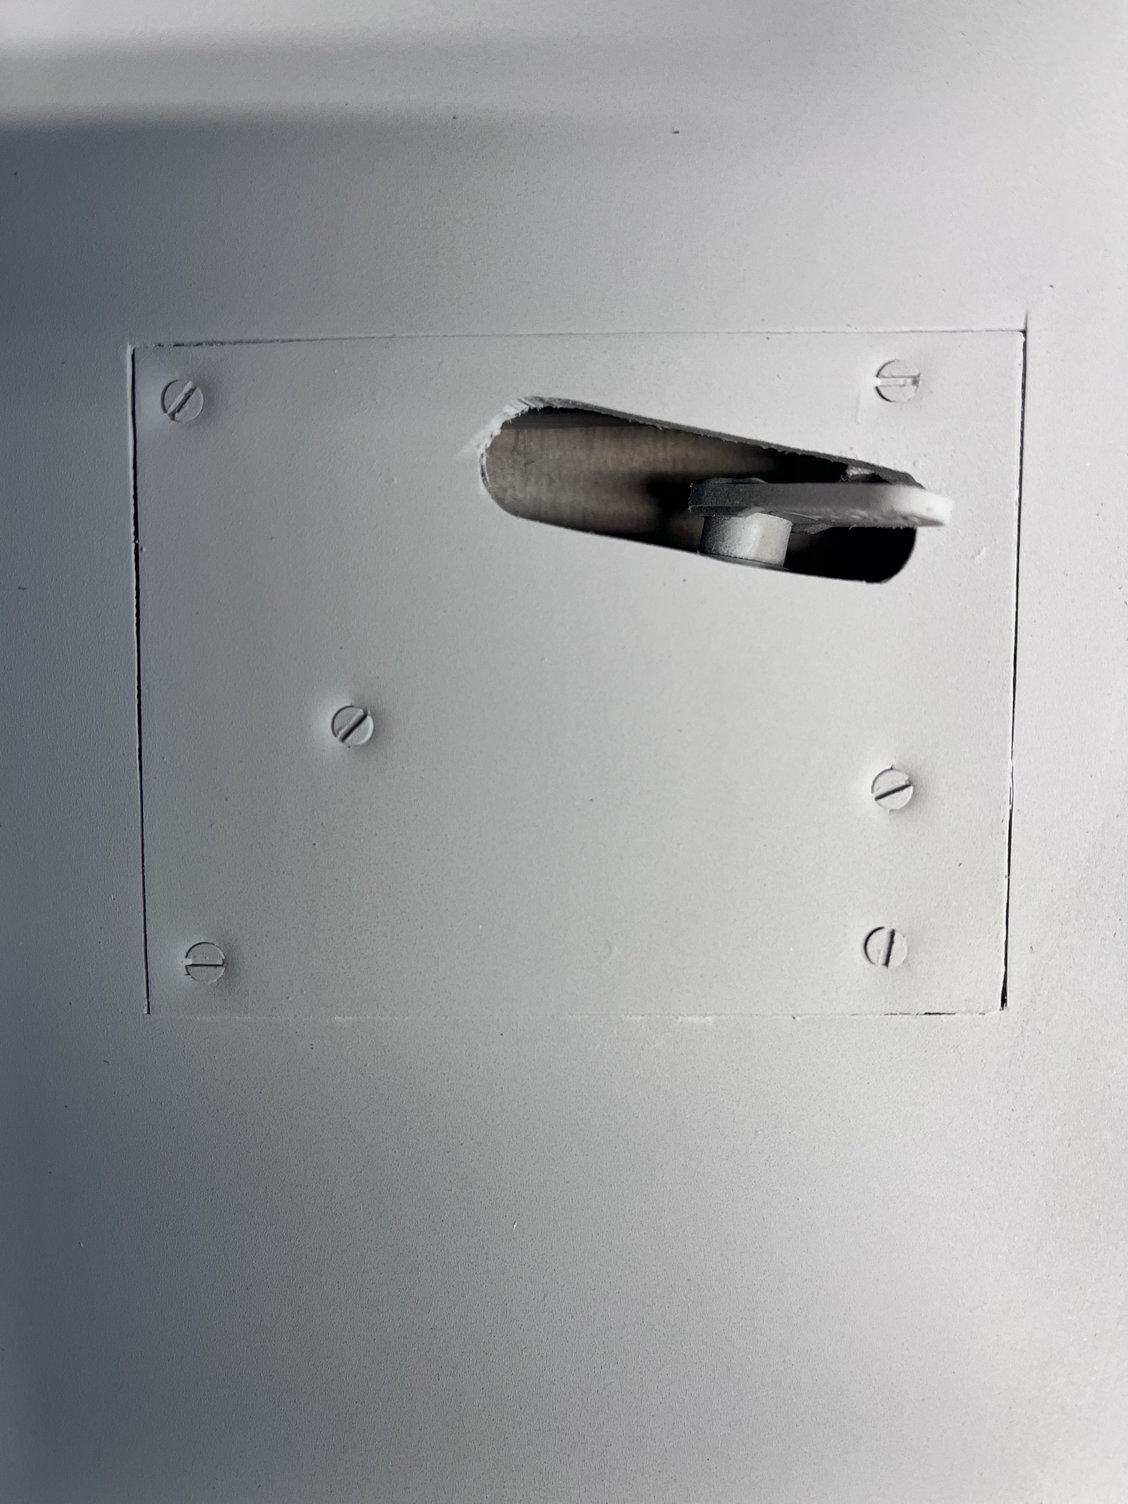
Aileron hatch

Flap servo access
Aileron hatch
Flap servo access

 02-19-2023, 07:07 PM
#324
Thread Starter
Thanks! Taking it panel at a time seems to lesson the headaches and getting cross eyed. The spinner was a hard one, I think I looked into 4 various models until I found this one from Fliteskin Aeroscale.
02-21-2023, 07:18 AM
#325
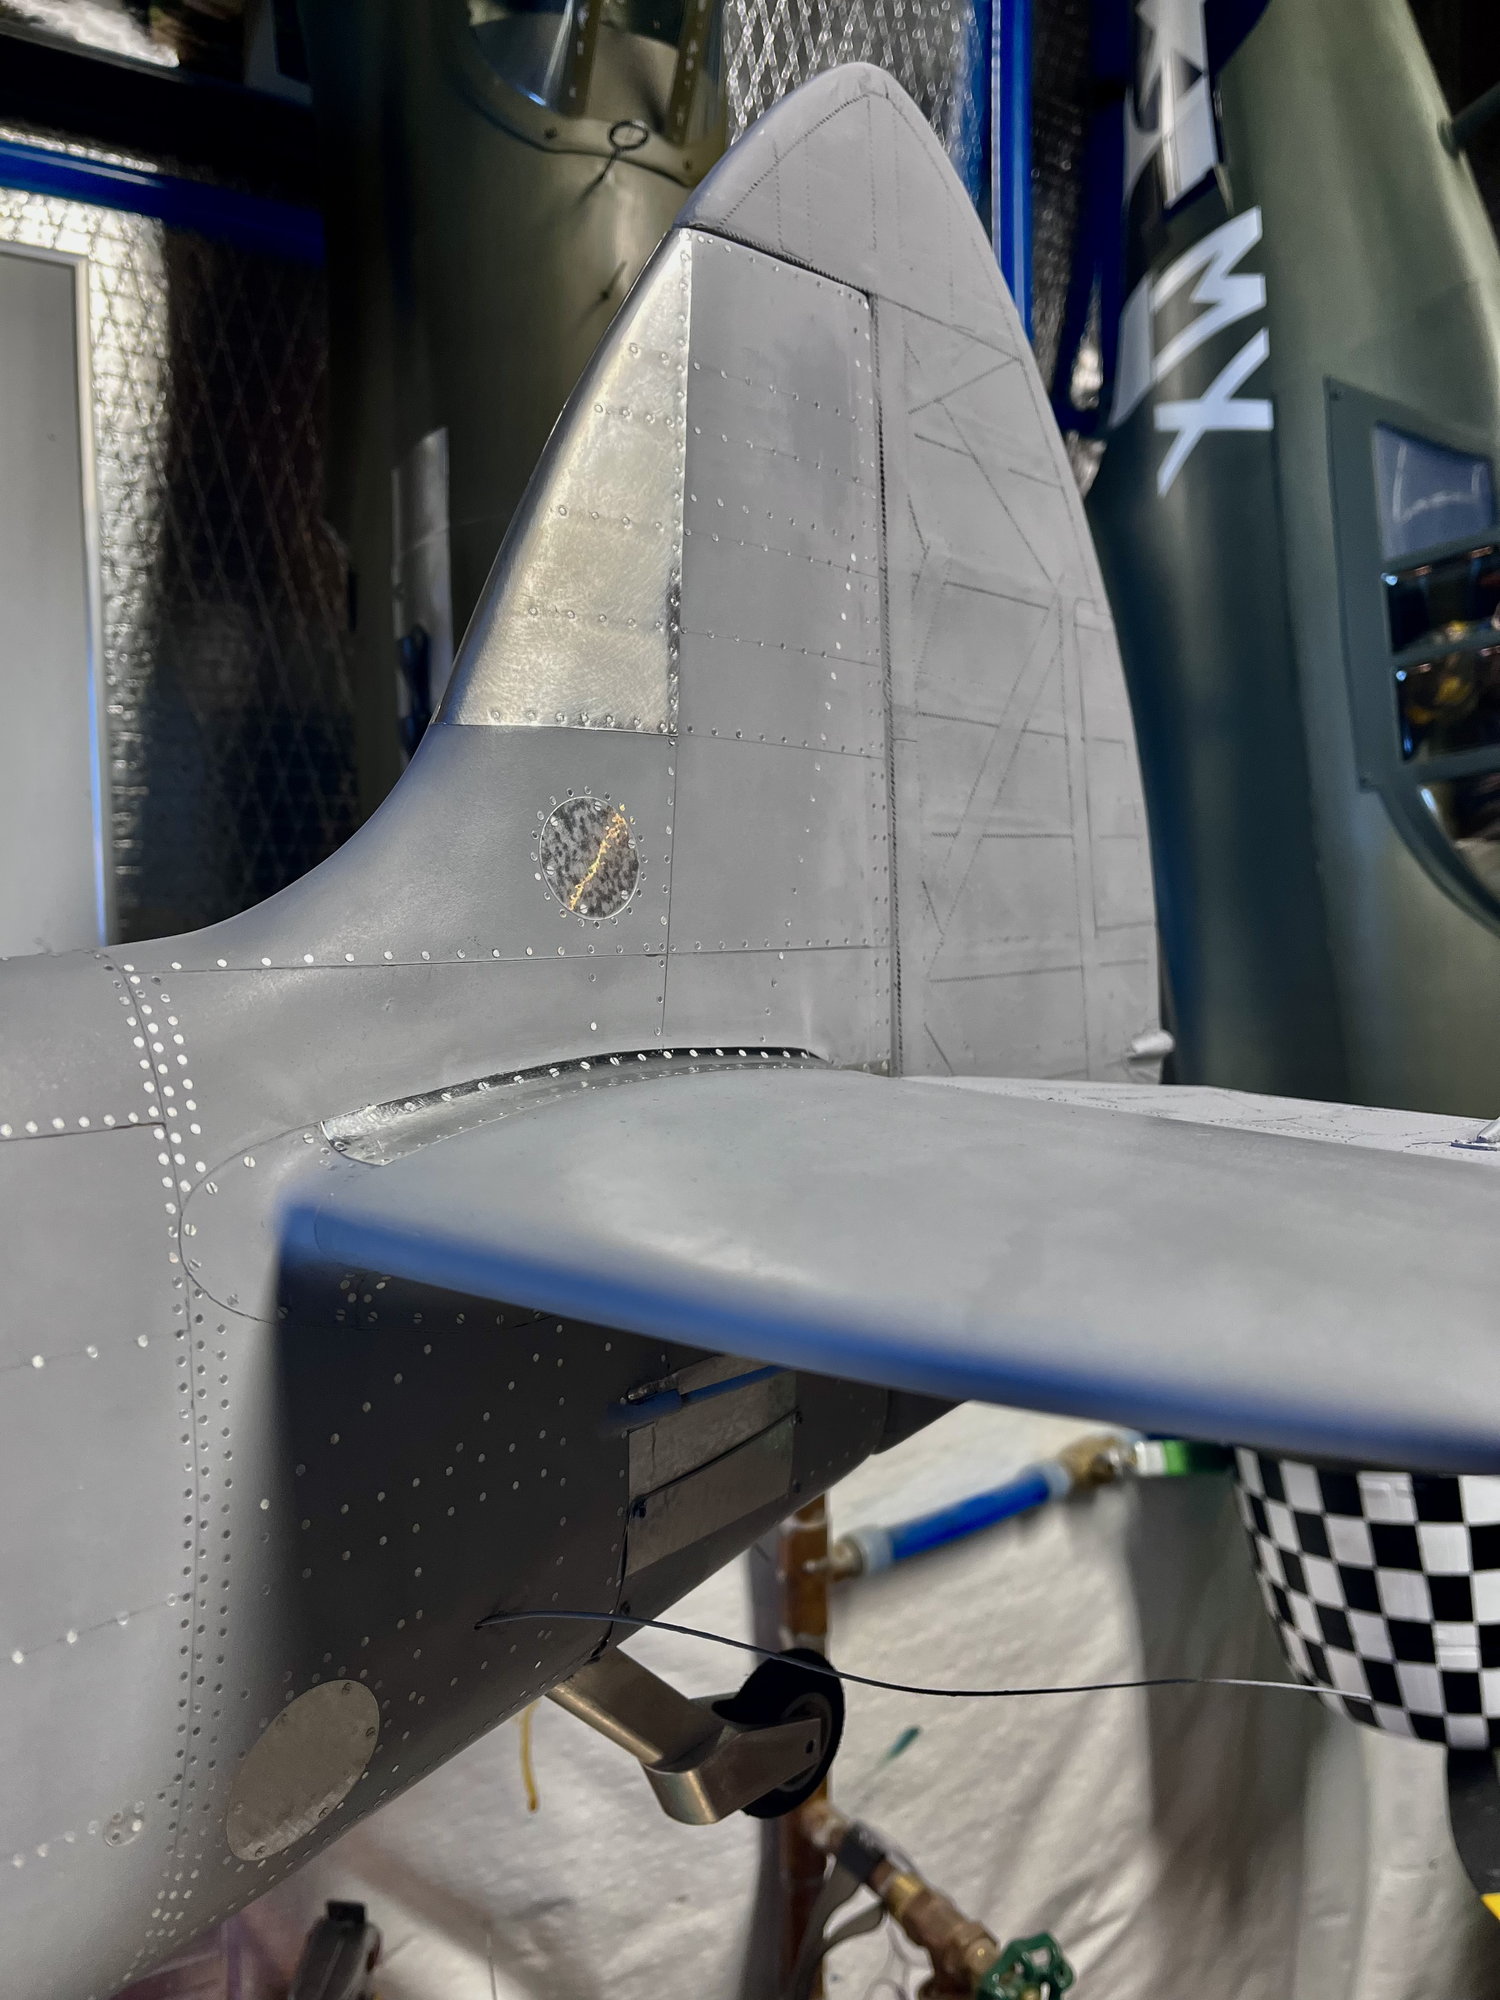
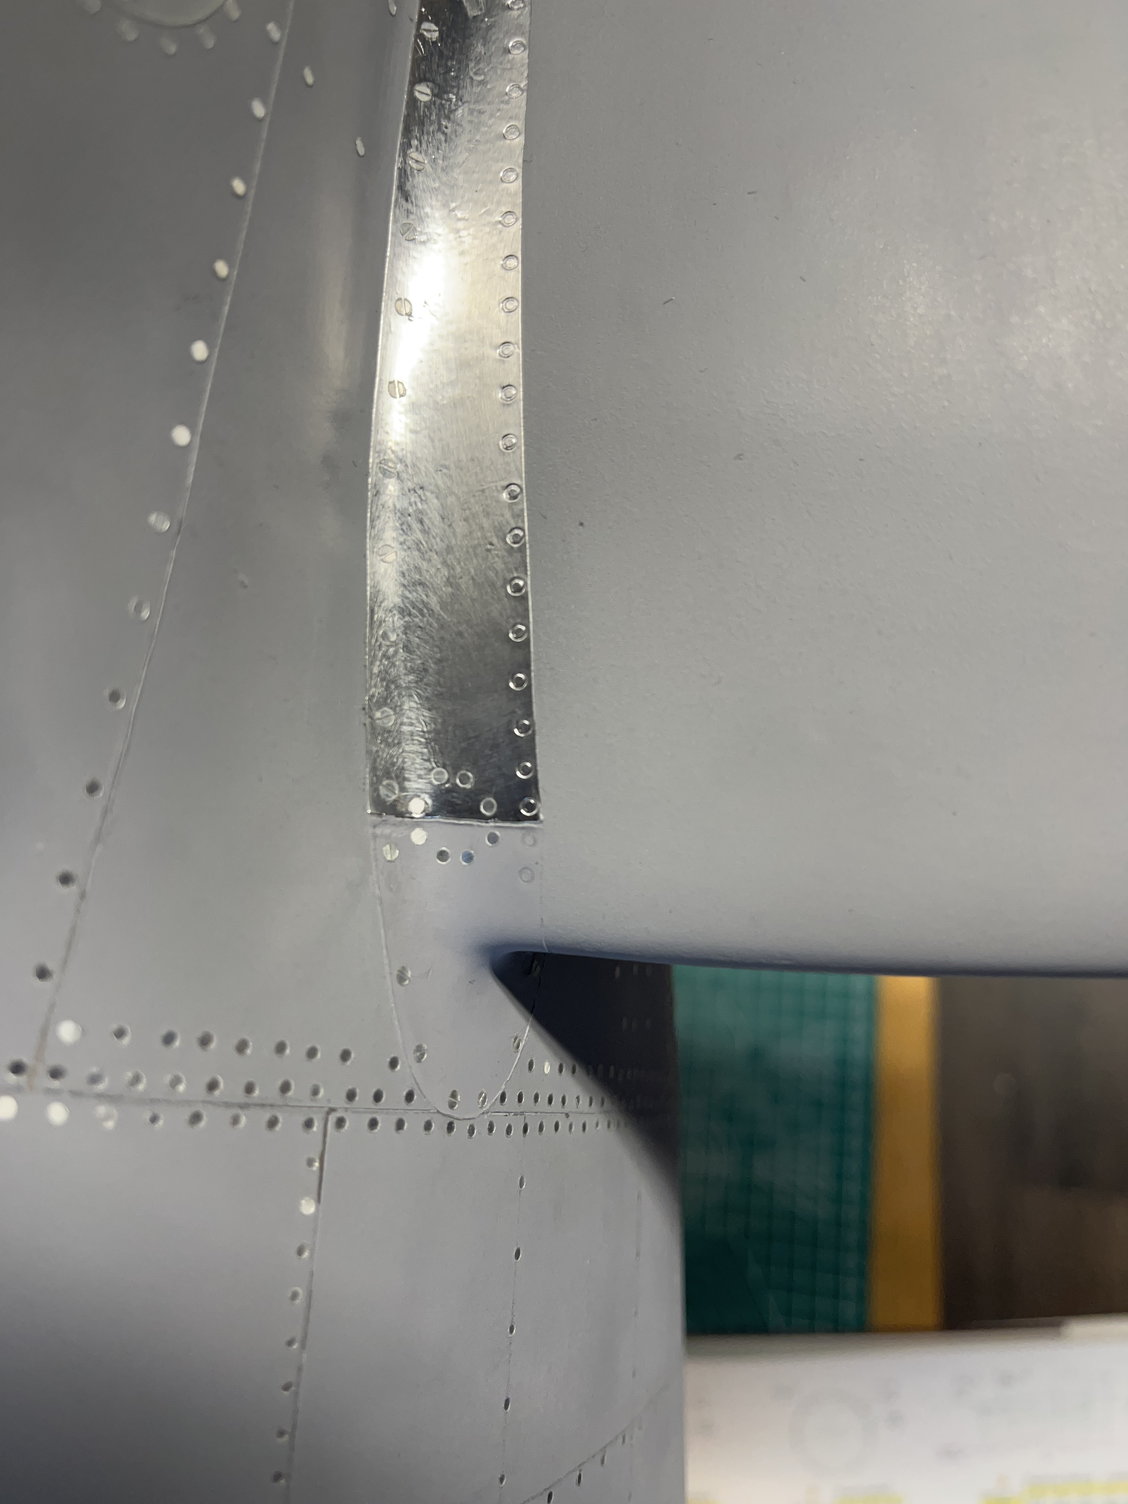
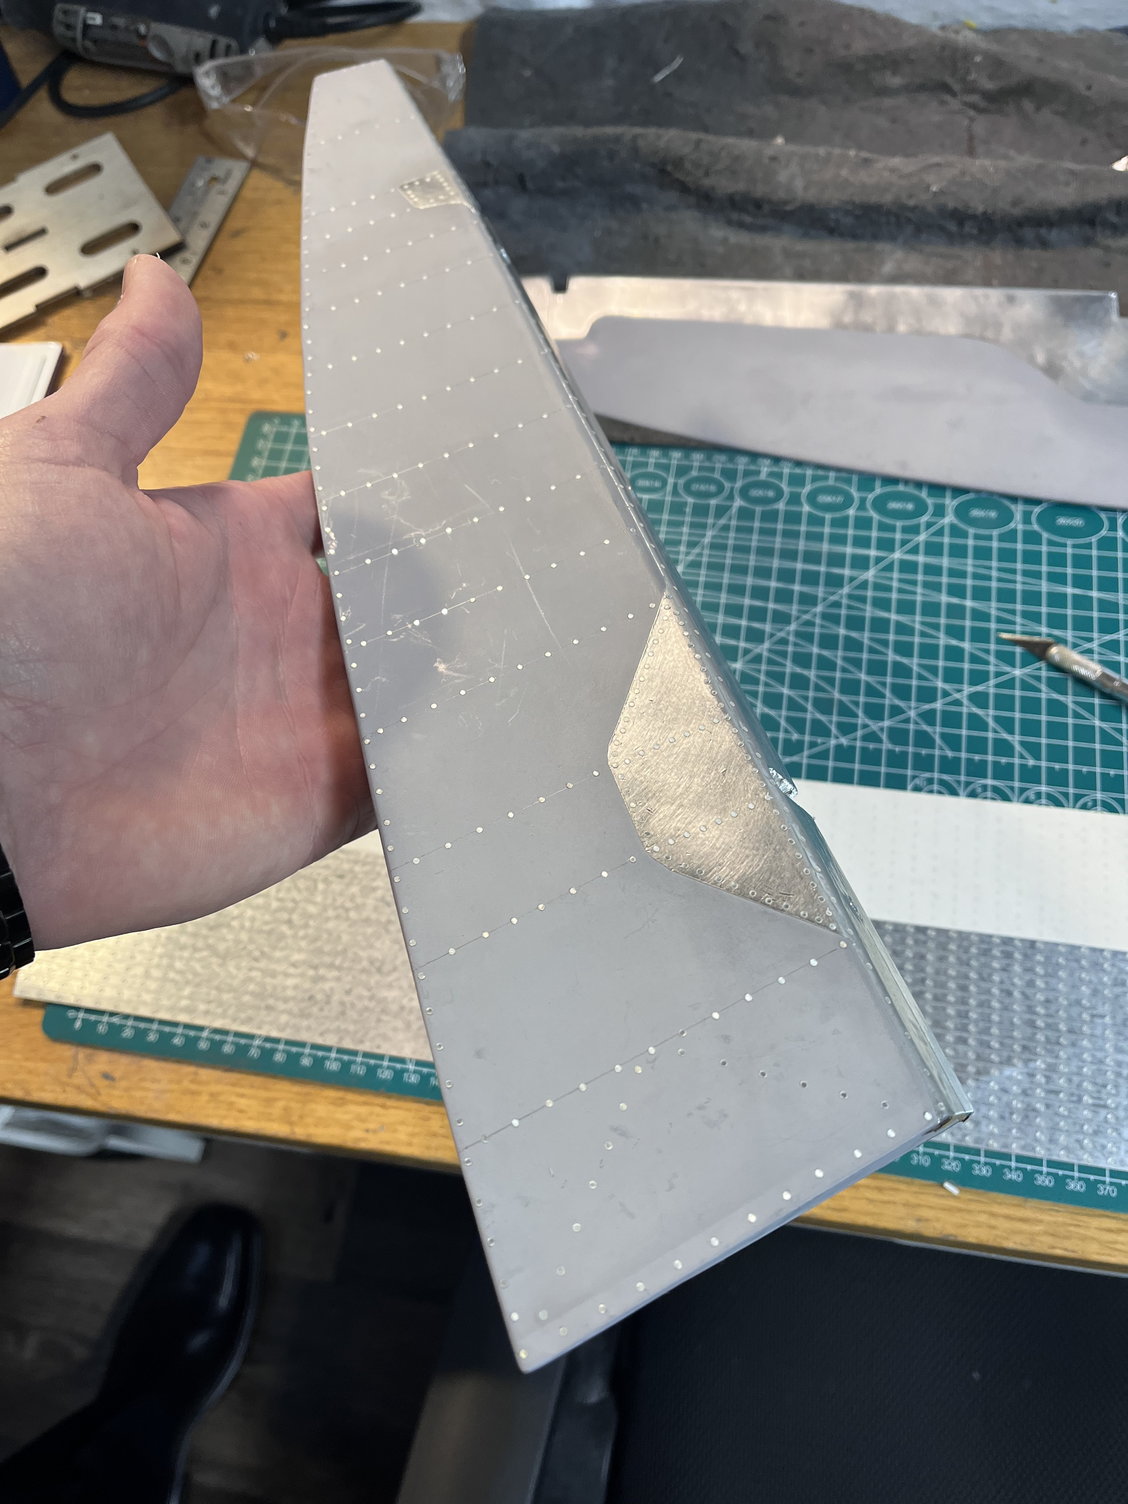
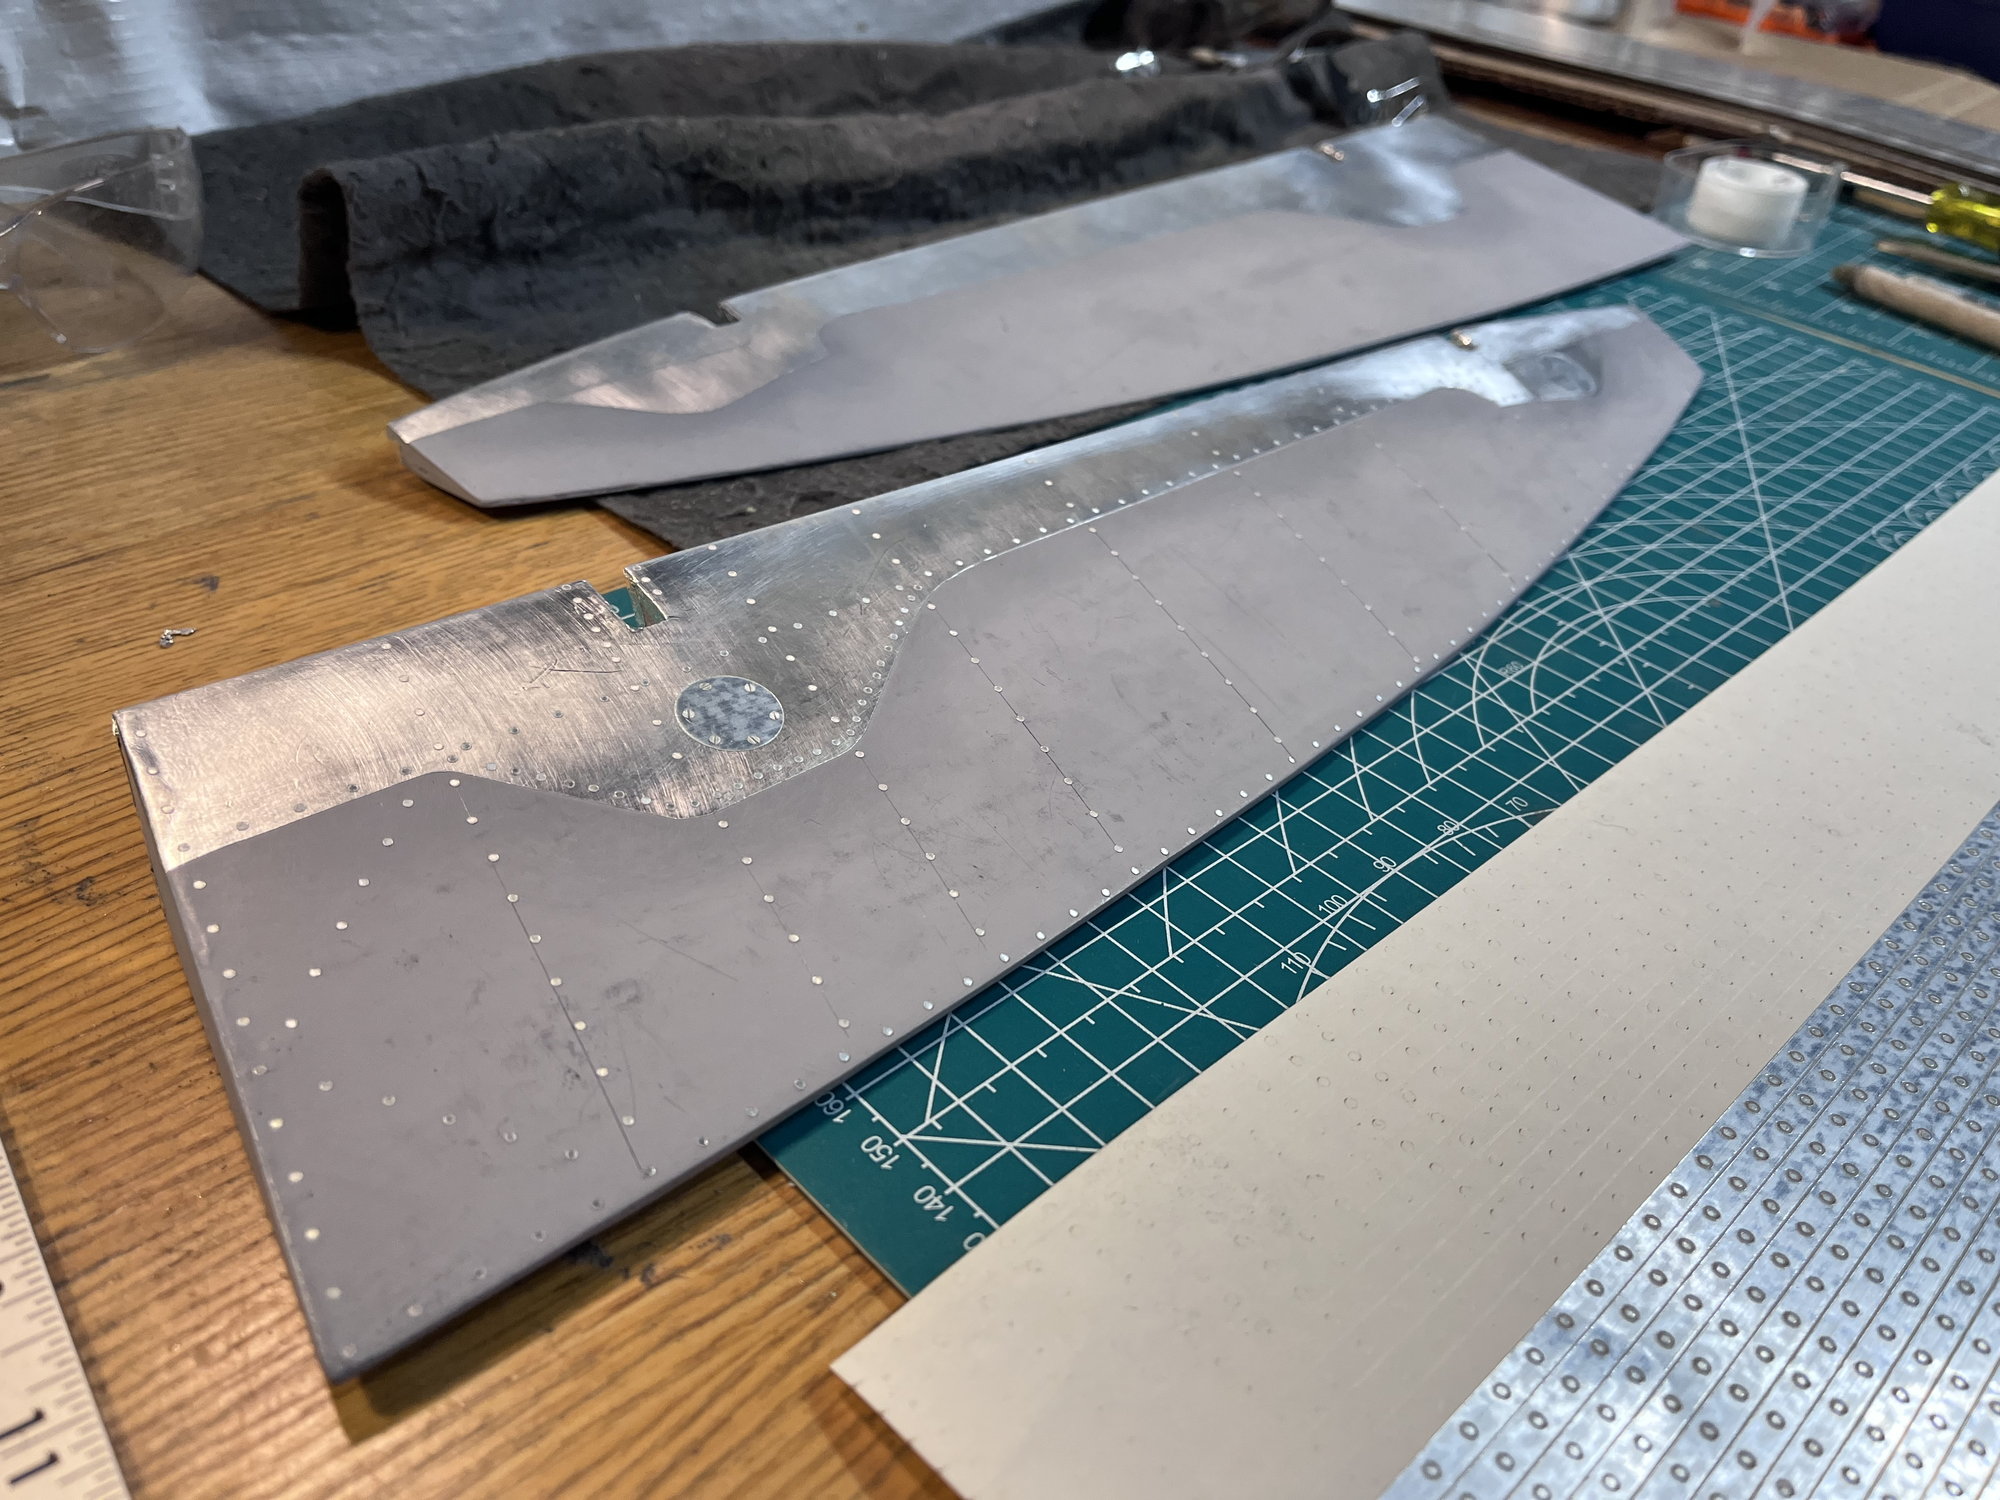
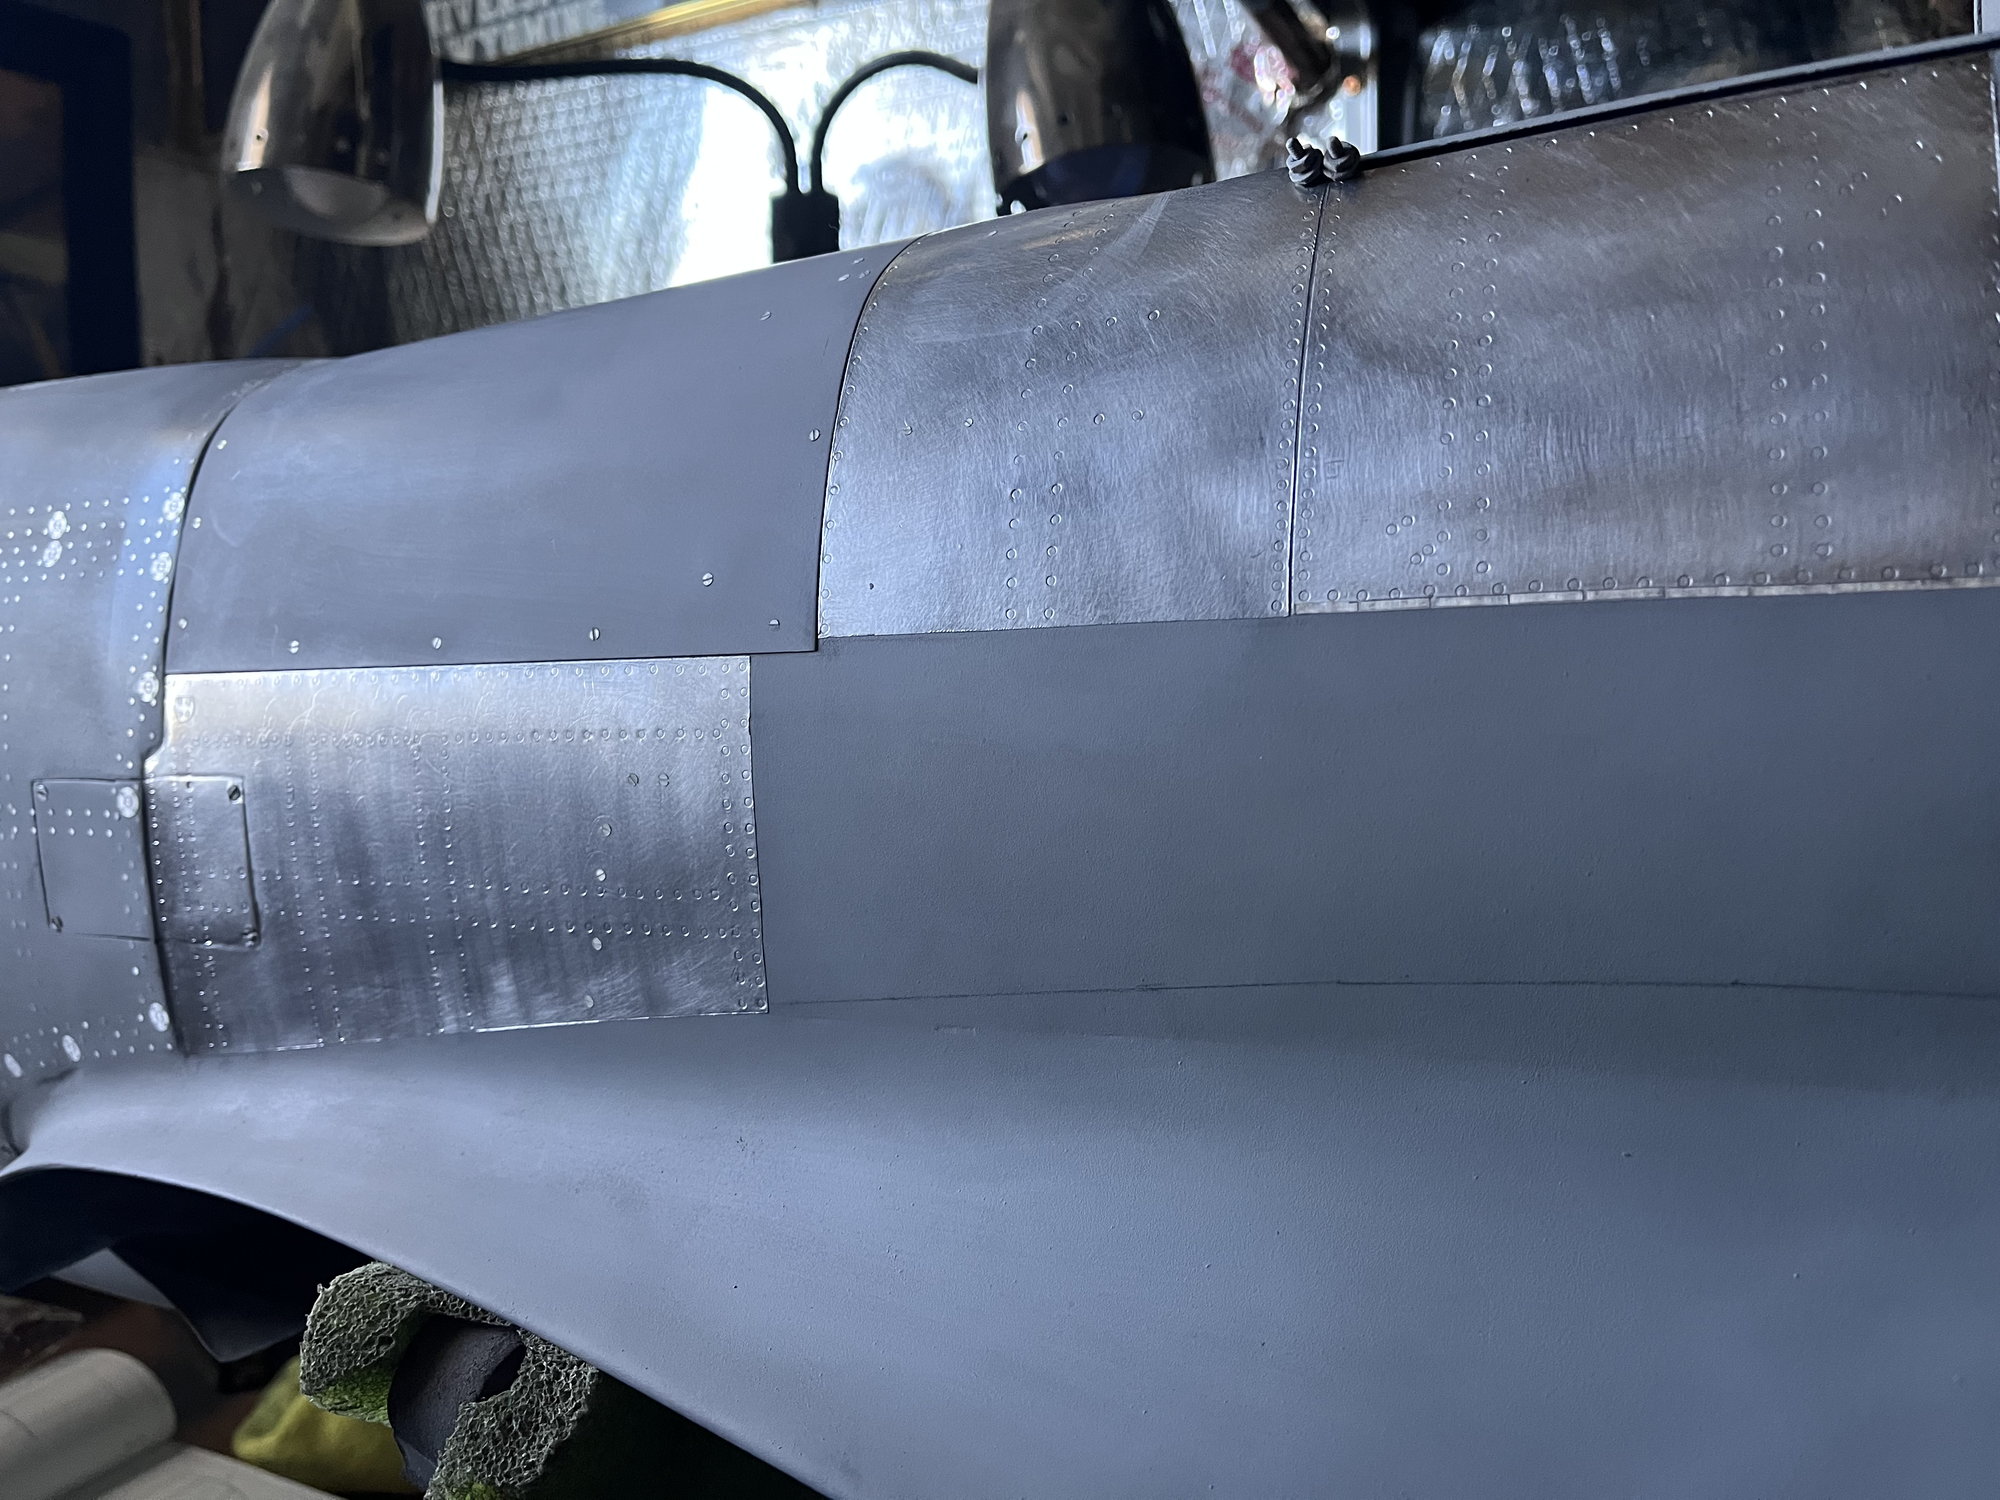
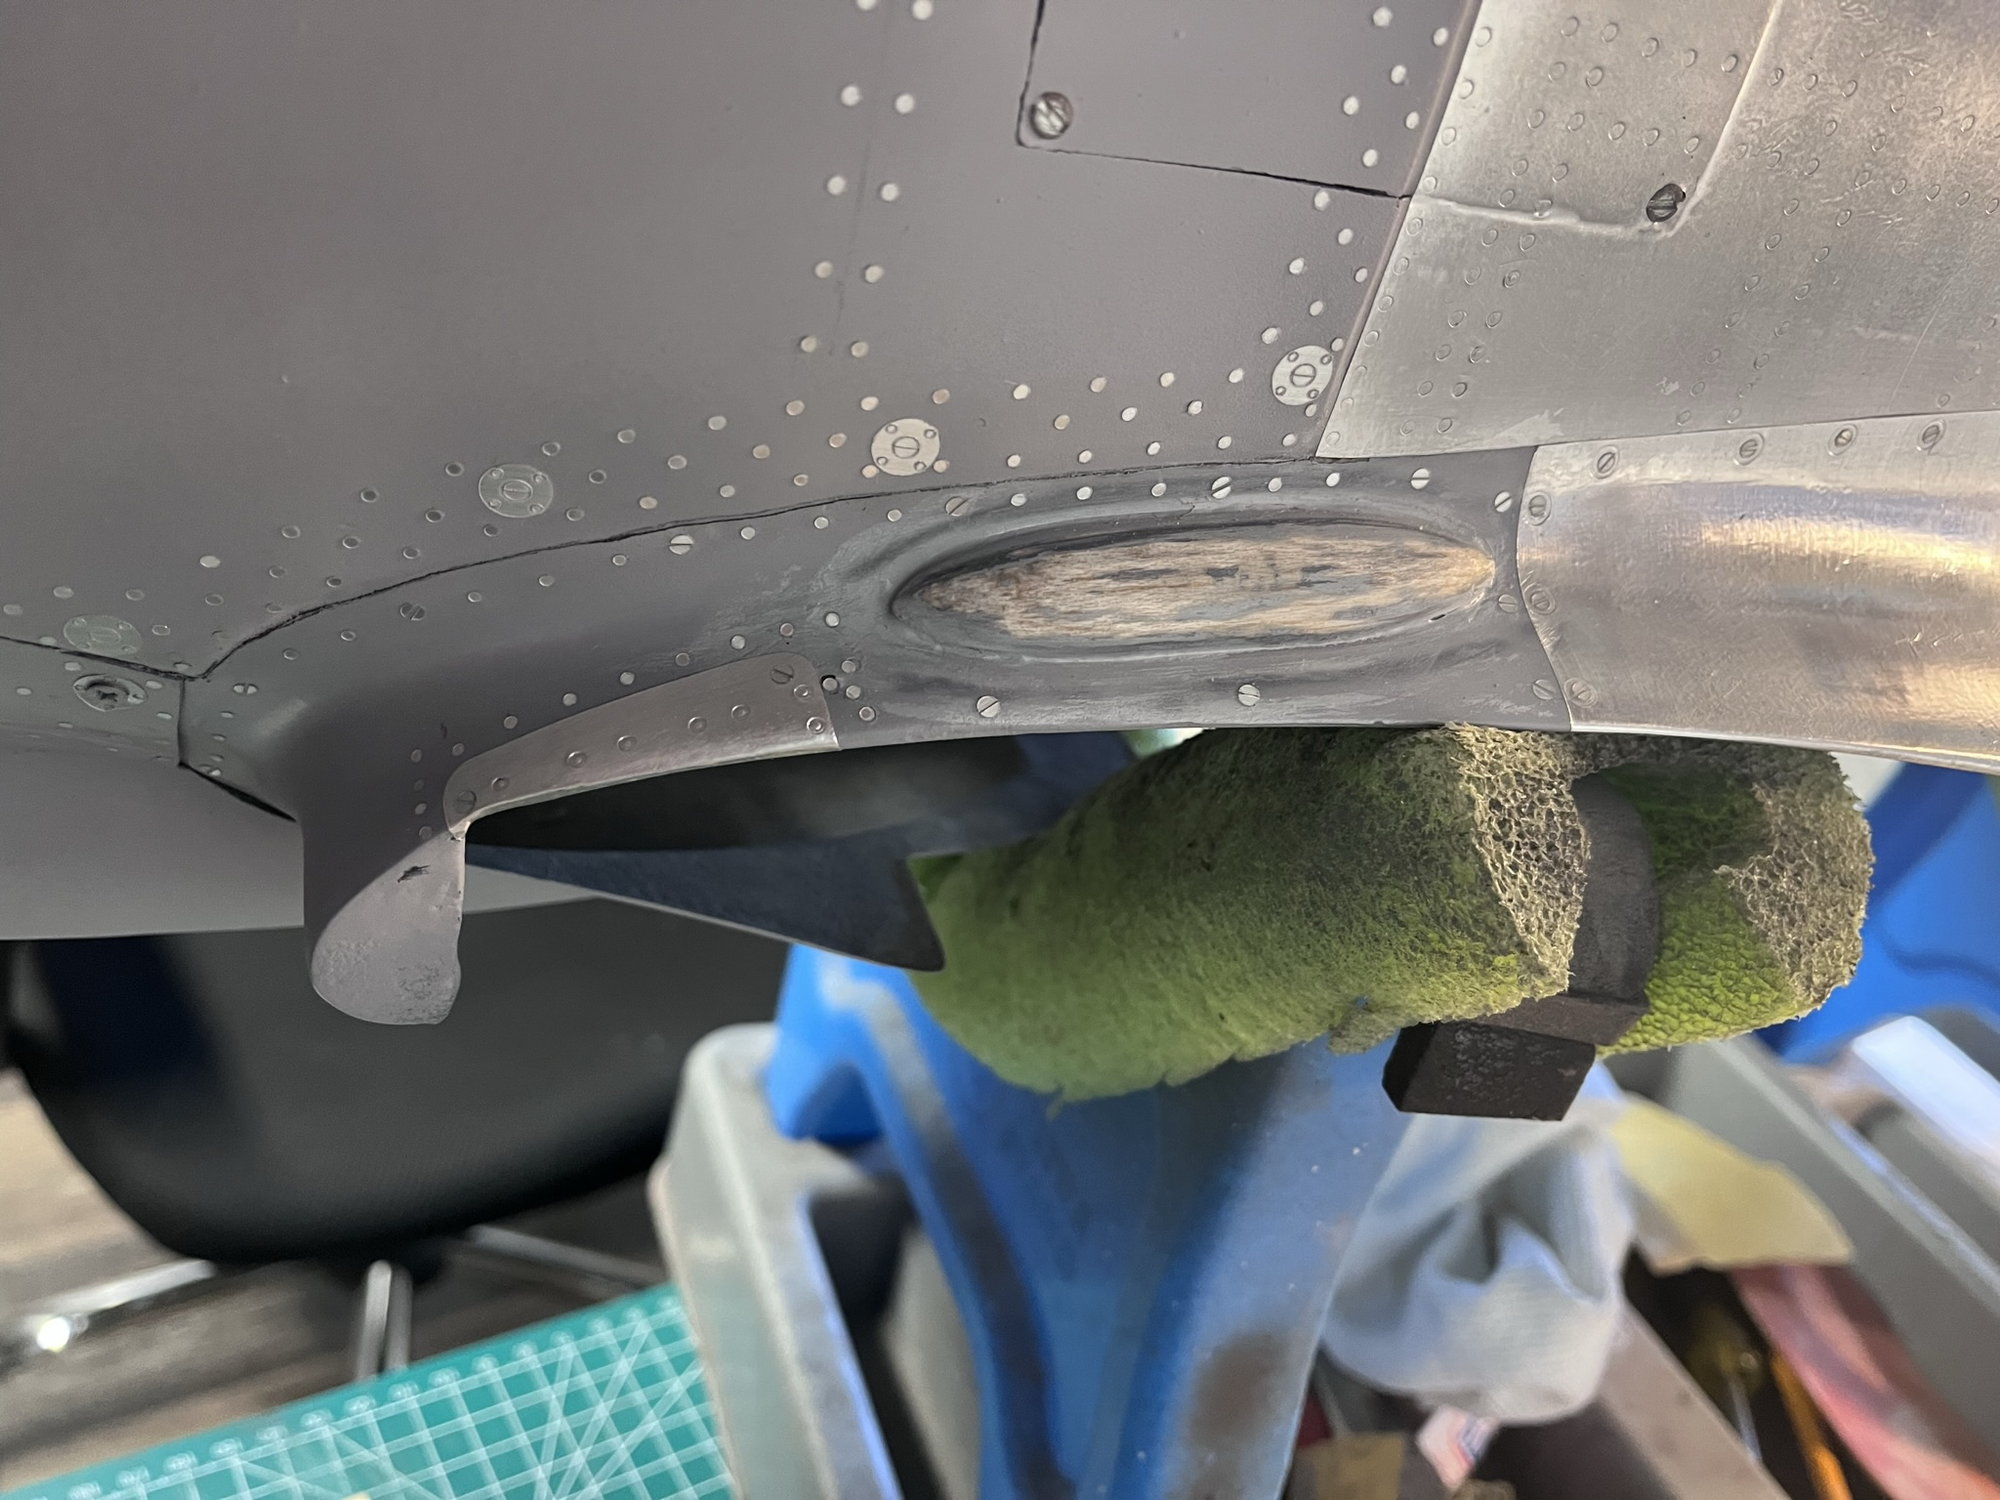
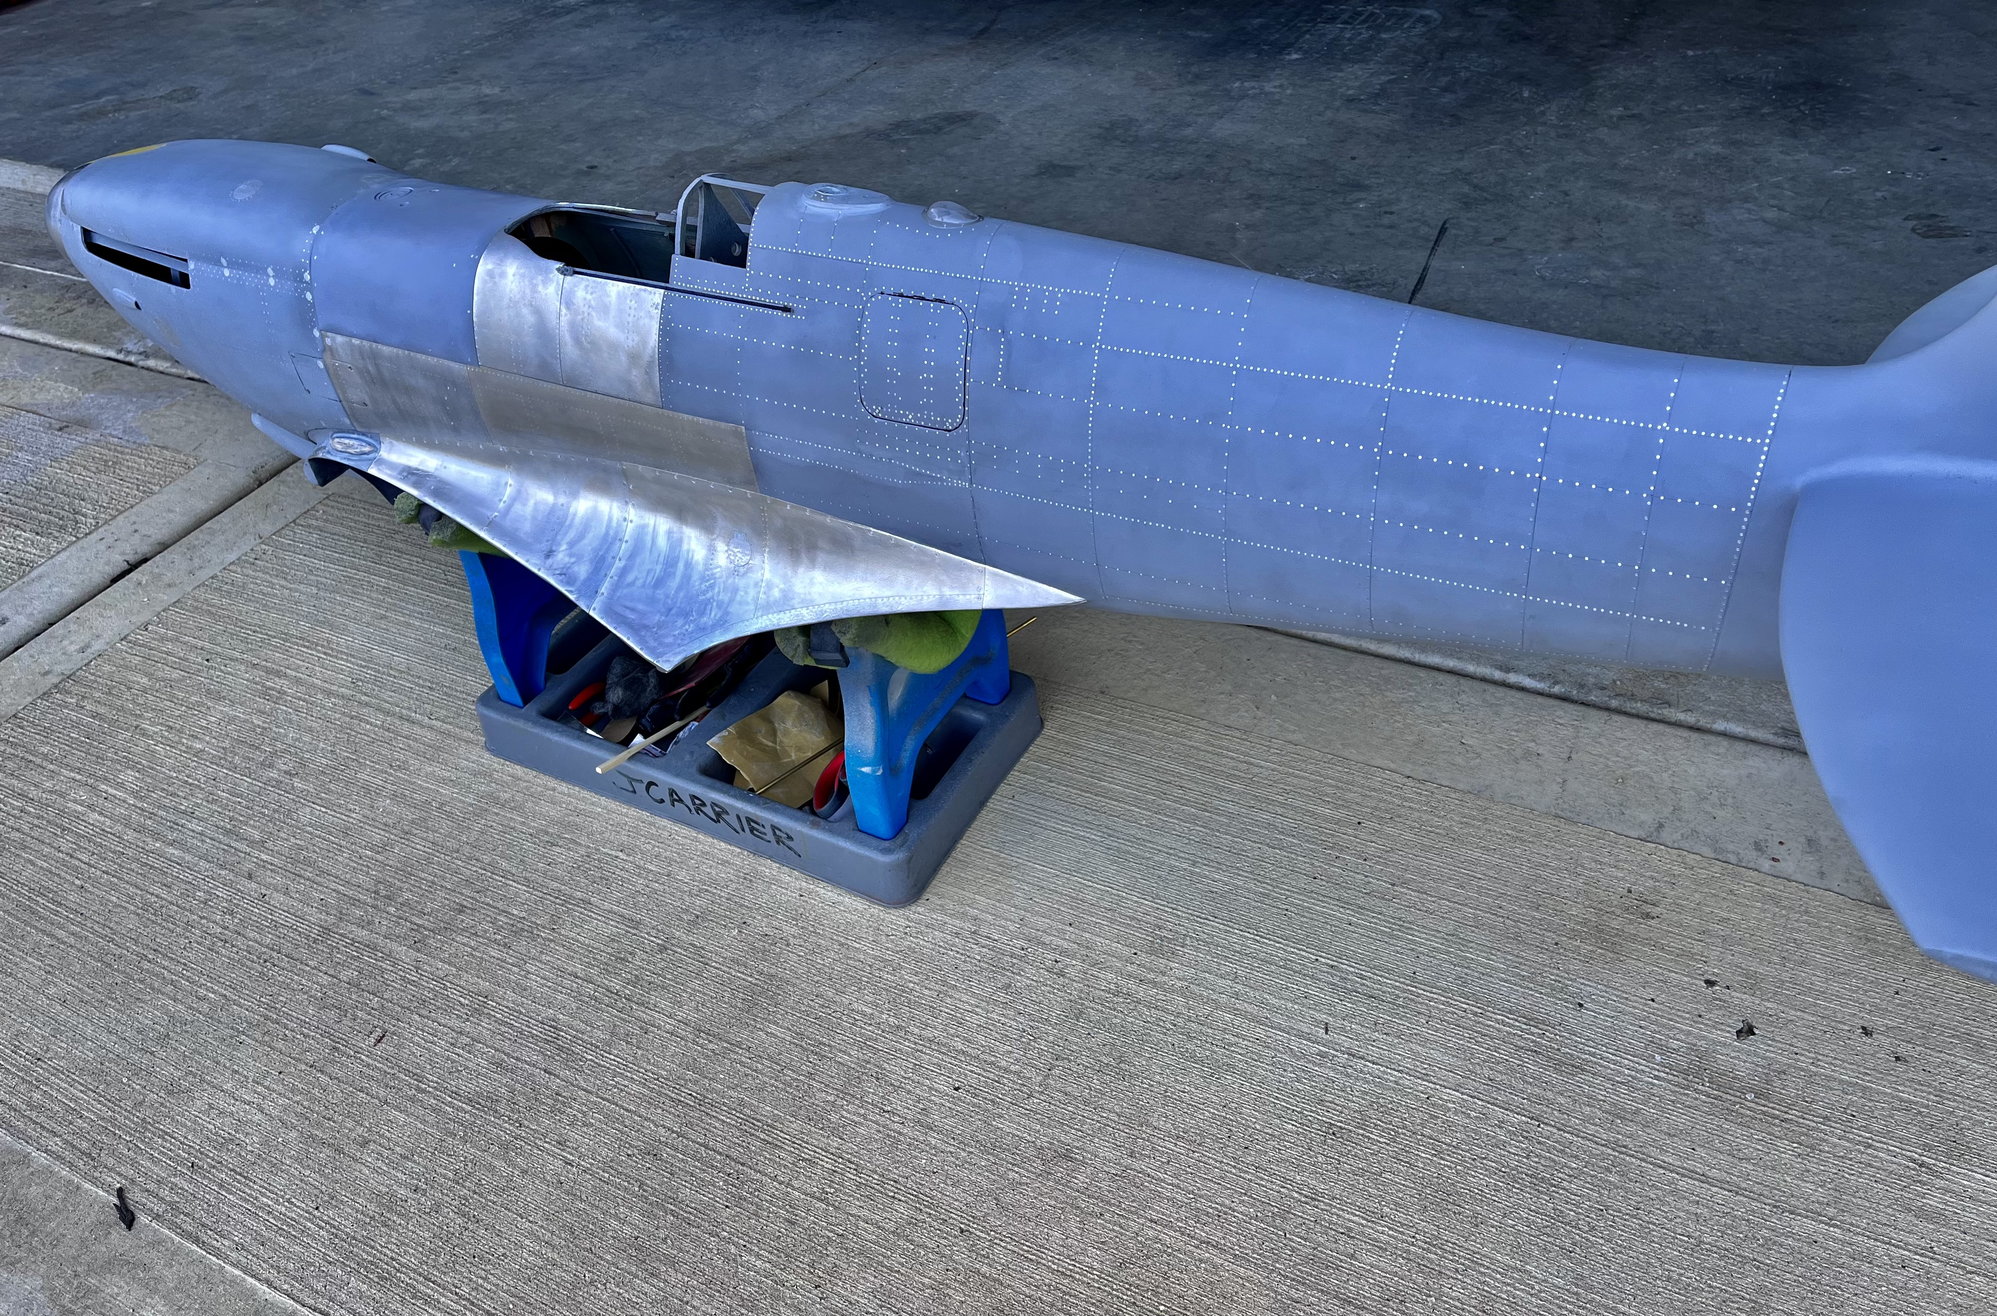
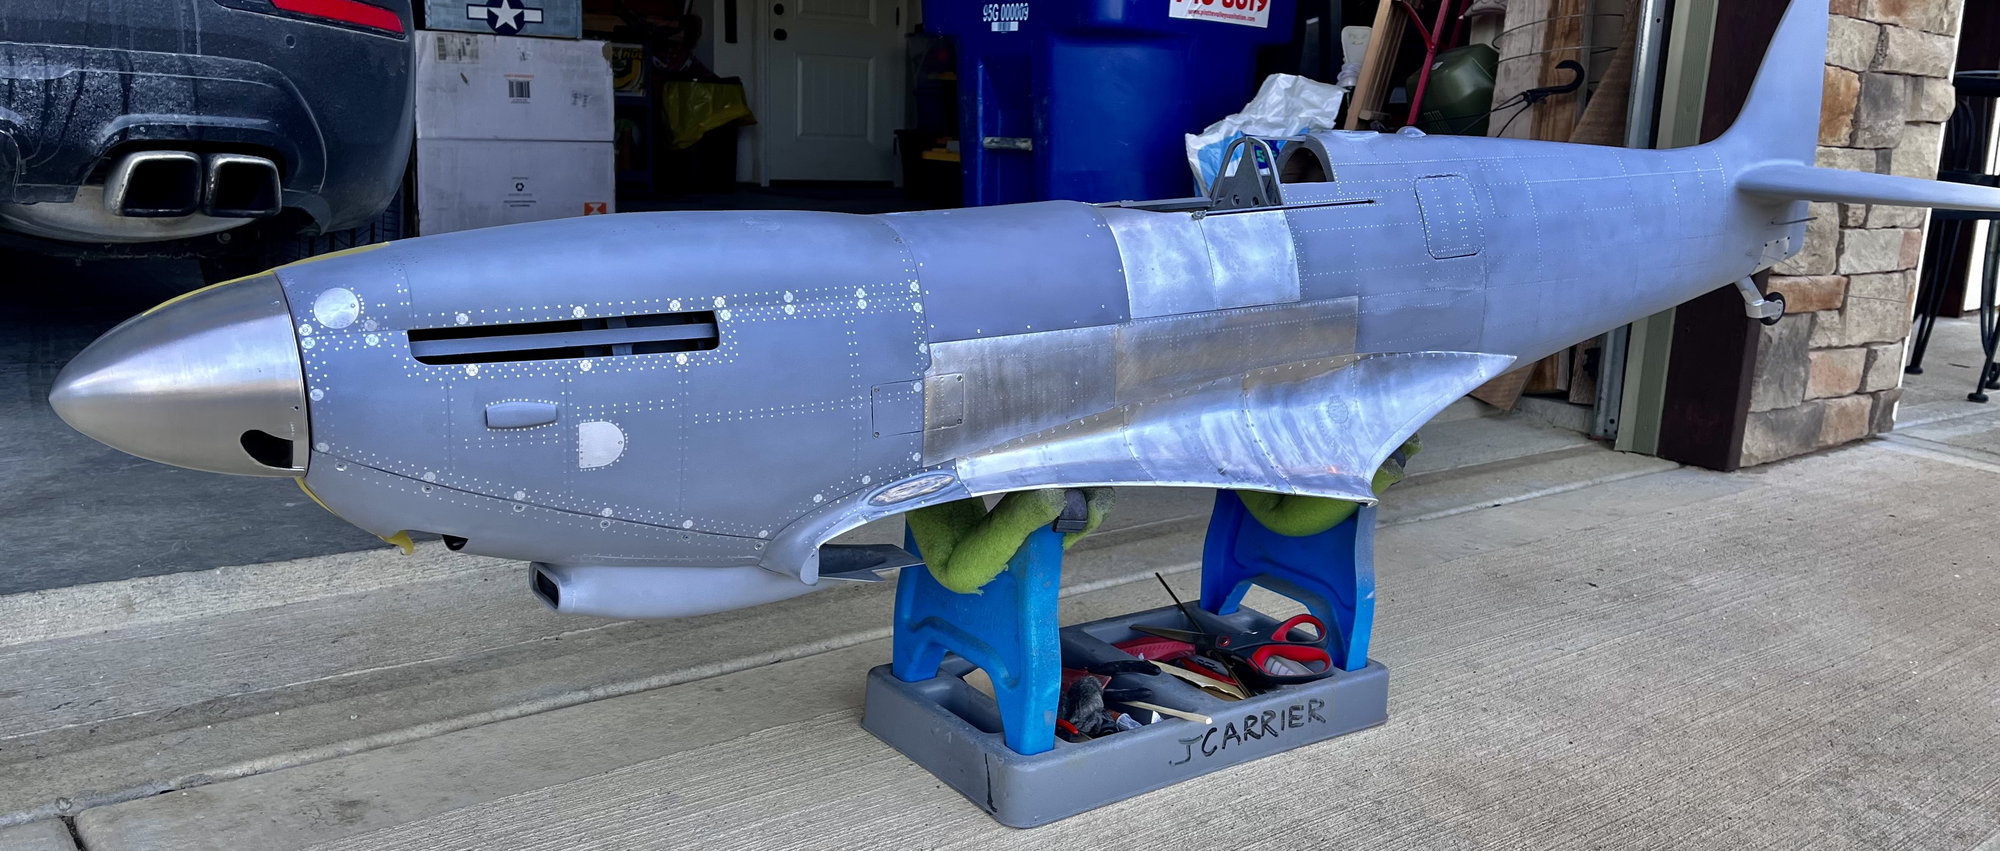
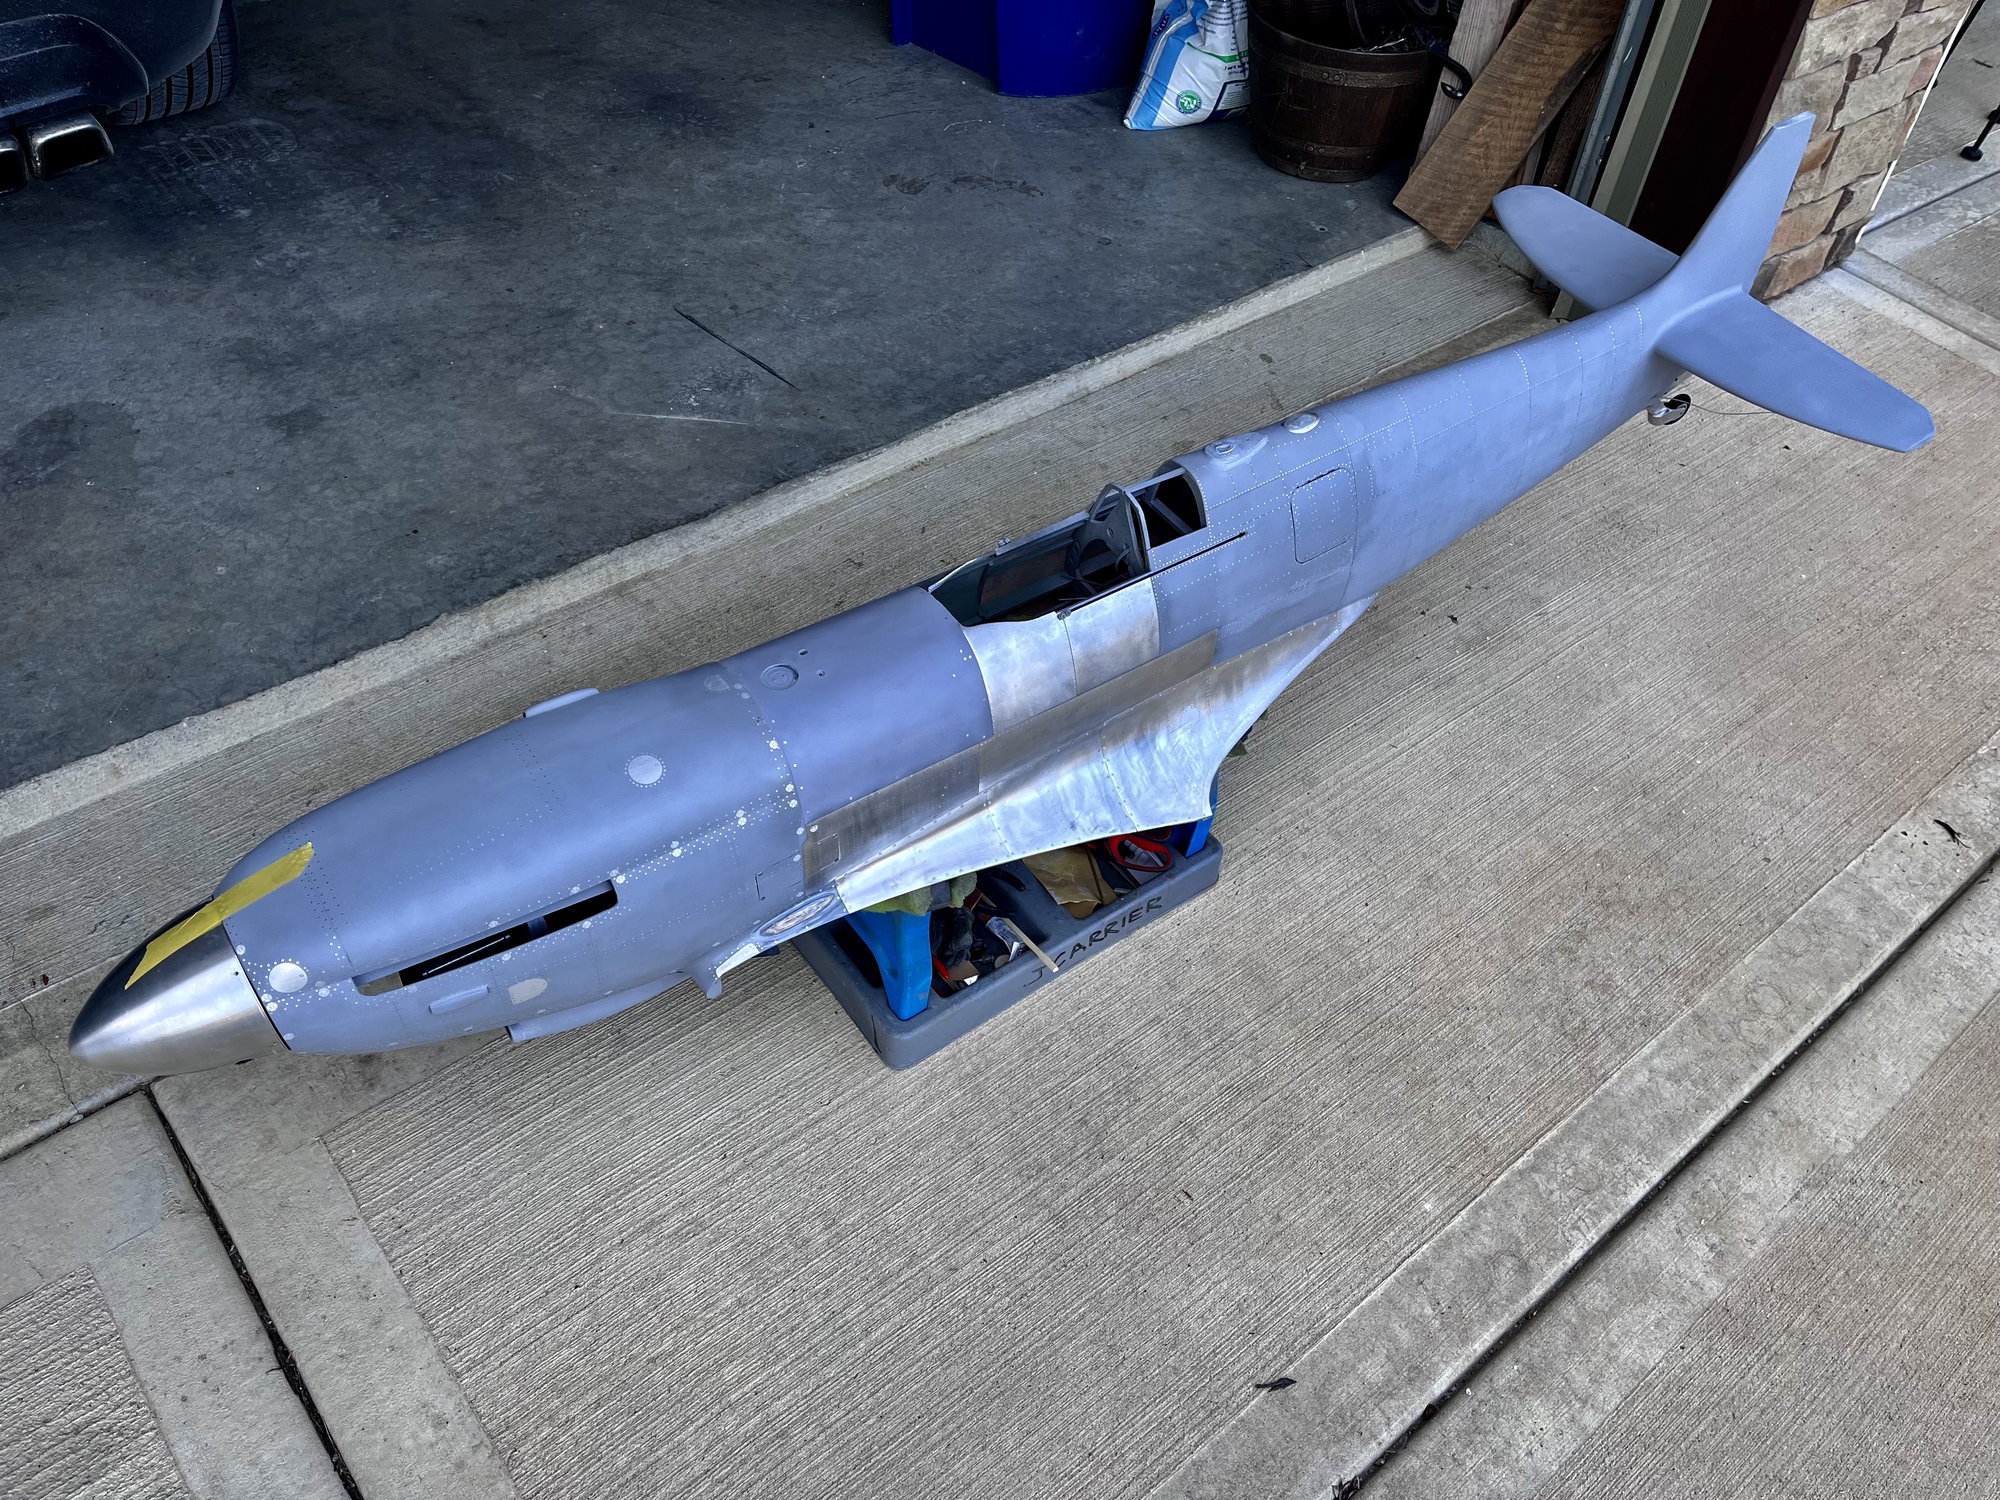
Thread Starter
Left vert stab and saddle finished, I chose to run metal on the upper saddle but I decided to build up the forward saddle panels as the curves were too abrupt to get foil to burnish down without tearing or wrinkling. Under paint it’ll give same panel effect and it’s nice and smooth.